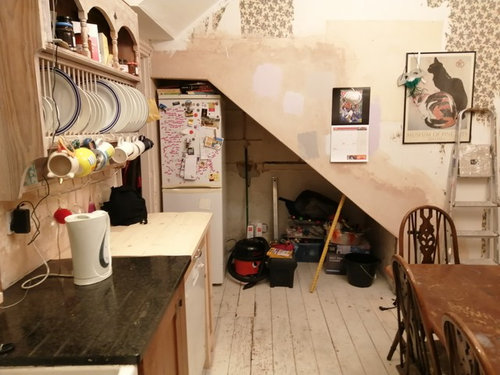
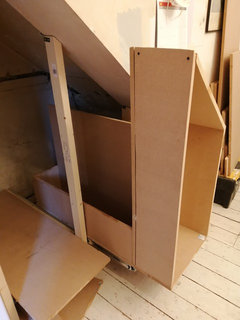
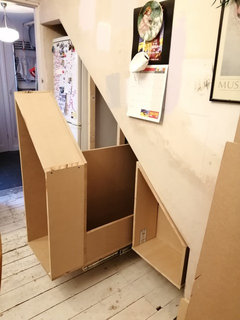
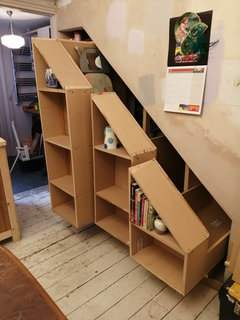
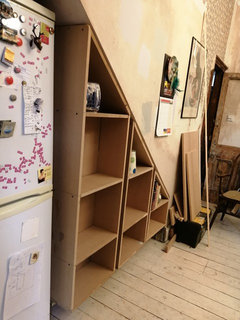
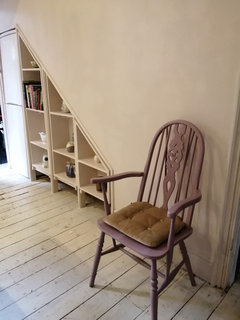
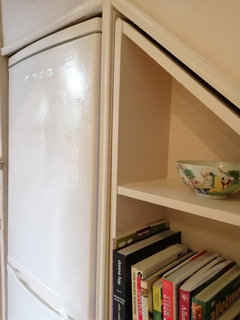
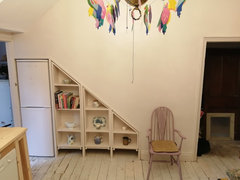
Under stairs drawer/shelves
Sam Potter
4 years ago


Featured Answer
Sort by:Oldest
Comments (61)

Sam Potter
4 years ago
Patrina
4 years agoRelated Discussions
What shall I put on this wall?
Comments (4)You could do a bench with a top that opened for storage. This way family & guests have a place to sit and take off their shoes or boots when entering. You could also put hooks on the wall above the bench for a place to hang coats or keys. A second option could be a sideboard or dresser. This would also provide storage and you could put decorative accessories on the top of it and hang a nice picture on the wall....See Moreunder stair space
Comments (4)If it's done smartly, shelves and doors won't necessarily make the space feel closed in. You could have a built-in seating/platform with a couple of shelves above, or all shelves for different functions, maybe a small home office...? Or you could have a slim mirror (in the space between the door and top of stairs, and then just hooks for the little one(s) coats, rucksacks, etc. Or if you want storage, you could have cupboards recessed so they don't close off the front. Or, why not a small fancy bar? :))...See MoreHelp with a boring bedroom
Comments (23)Adding width BEHIND THE BED - with a headboard (which doesn't have to be a "headboard"; it could be fabric, collection of mirrors, collection of pictures, a farm gate!, small chairs or stools) across the entire width. Matching bedside tables/bookcases/chests/ with LAMPS - useful storage for extra books, extra bedding, etc. CURTAINS always warm up a room. People will always feel colder away from home - provide an extra blanket or duvet to add to the bed. I notice there is no WARDROBE. Not really necessary for overnight guests (provide hooks on the back of the door) but useful for storing your out-of-season coats, etc. There is plenty of room behind the door. Buy one on eBay and paint it to suit your colour scheme....See MoreNeed help on decorating wall in entrance
Comments (1)Sorry ! Here are some pictures to give you an idea of the entrance...See More
Carolina
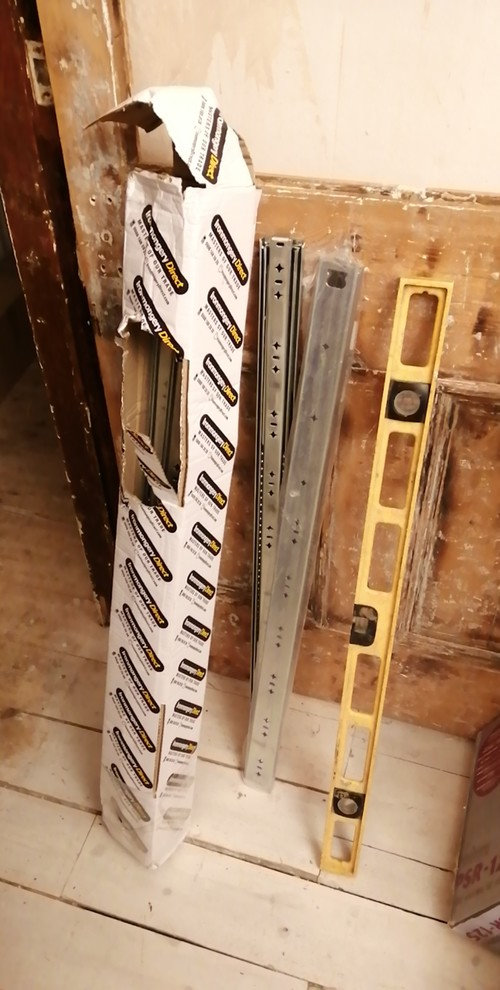
4 years agoSam Potter
4 years agoSam Potter
4 years ago PRO
PROBrandler London
4 years agoCarolina
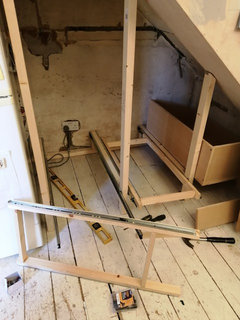
4 years agoSam Potter
4 years agoSam Potter
4 years ago- PRO
Brandler London
4 years agolast modified: 4 years ago - PRO
Brandler London
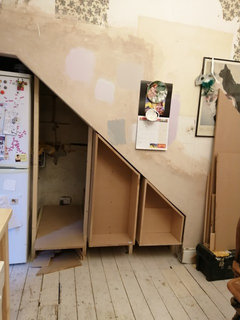
4 years ago Sam Potter
4 years ago- PRO
Brandler London
4 years ago Sam Potter
4 years ago- PRO
Brandler London
4 years ago Sam Potter
4 years ago
pmasmith3
4 years ago
Gabby Wong
4 years ago PRO
PROOnePlan
4 years agoSam Potter
4 years agoAMB
4 years agoPatrina
4 years agoMilly Moo
4 years ago
Victoria
4 years ago
kazzh
4 years ago- PRO
Brandler London
4 years ago 
Jules Mc
4 years agoCarolina
4 years agoSam Potter
4 years ago
E D
4 years agoSam Potter
4 years agoJonathan
4 years agoSam Potter
4 years agoJonathan
4 years ago
Surjit Johal
4 years agoSurjit Johal
4 years agoSam Potter
4 years agoE D
4 years agoSam Potter
4 years agoAMB
4 years ago
rachelmidlands
4 years agoPatrina
4 years agoSam Potter
4 years agoPatrina
4 years agoSam Potter
4 years agoJonathan
4 years agoSam Potter
4 years agoAMB
4 years ago
Alix W
4 years ago


Sponsored
Reload the page to not see this specific ad anymore


Sam PotterOriginal Author