How to Track Time with the Stopwatch
The Stopwatch on Houzz Pro allows you to track the time you work accurately and easily, whether behind a desk or on the go, so you get paid what you deserve.
Once you start the stopwatch you can let it run in the background while you work. You can pause and resume the stopwatch at anytime, then easily log the exact time in your records once your task is complete. Your logged time will appear in the Time & Expenses section and will be viewable in your Time Billing Reports. See this article to learn more about managing time and expenses for your team.
Using the Stopwatch on the Mobile App
Using the stopwatch on the Houzz Pro mobile app is a great way to track your time while you're away from the computer, whether it's an on-site meeting or in-store product sourcing.
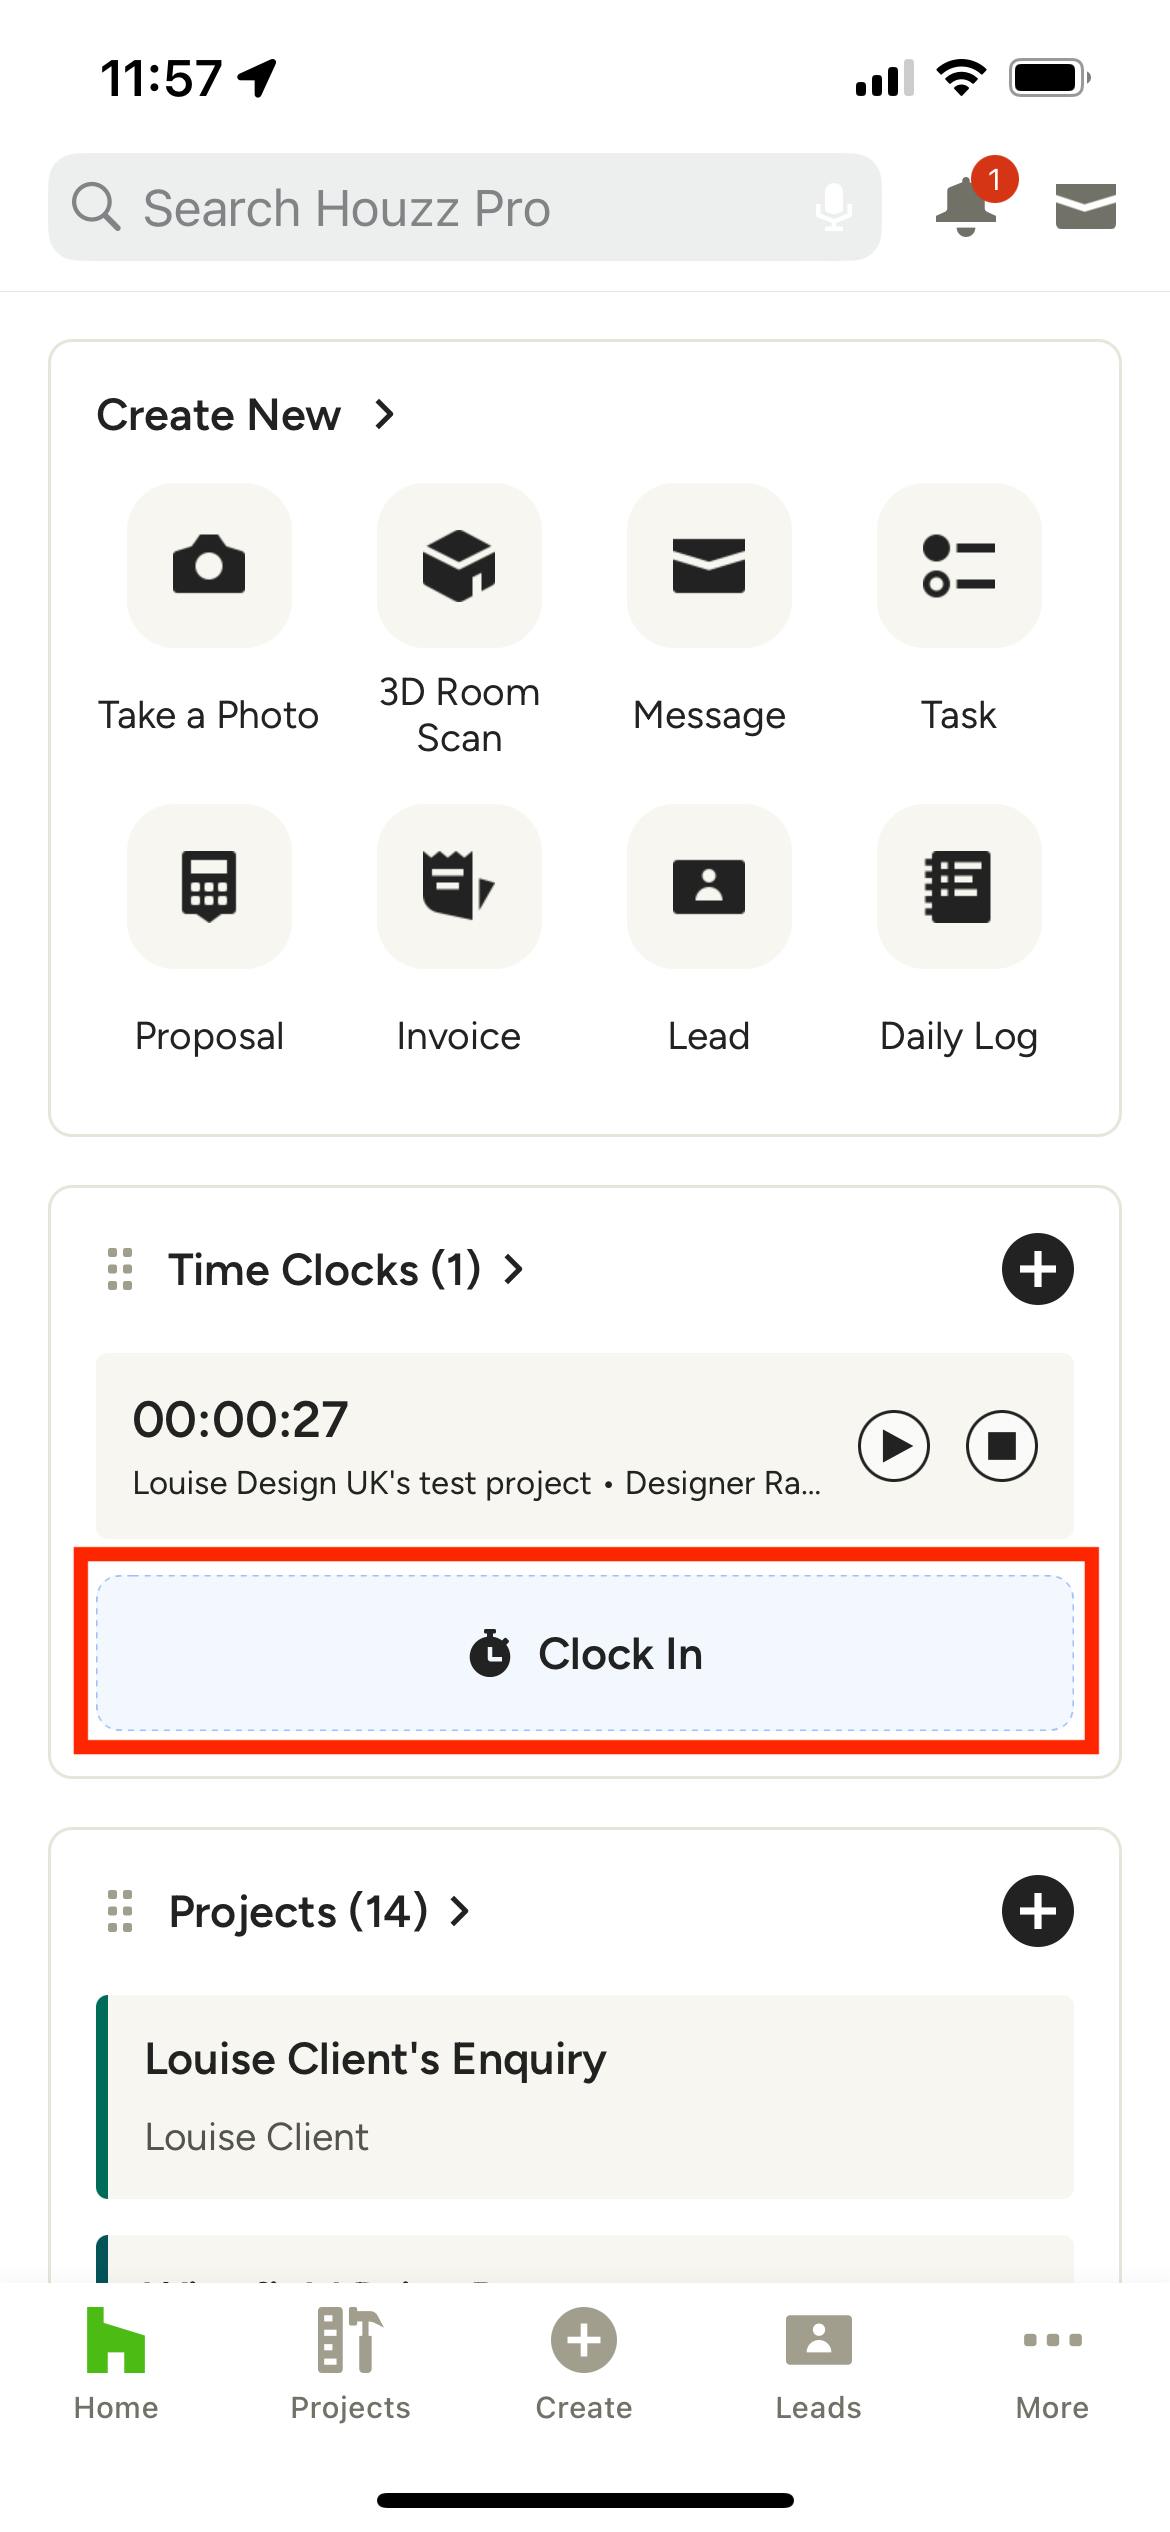
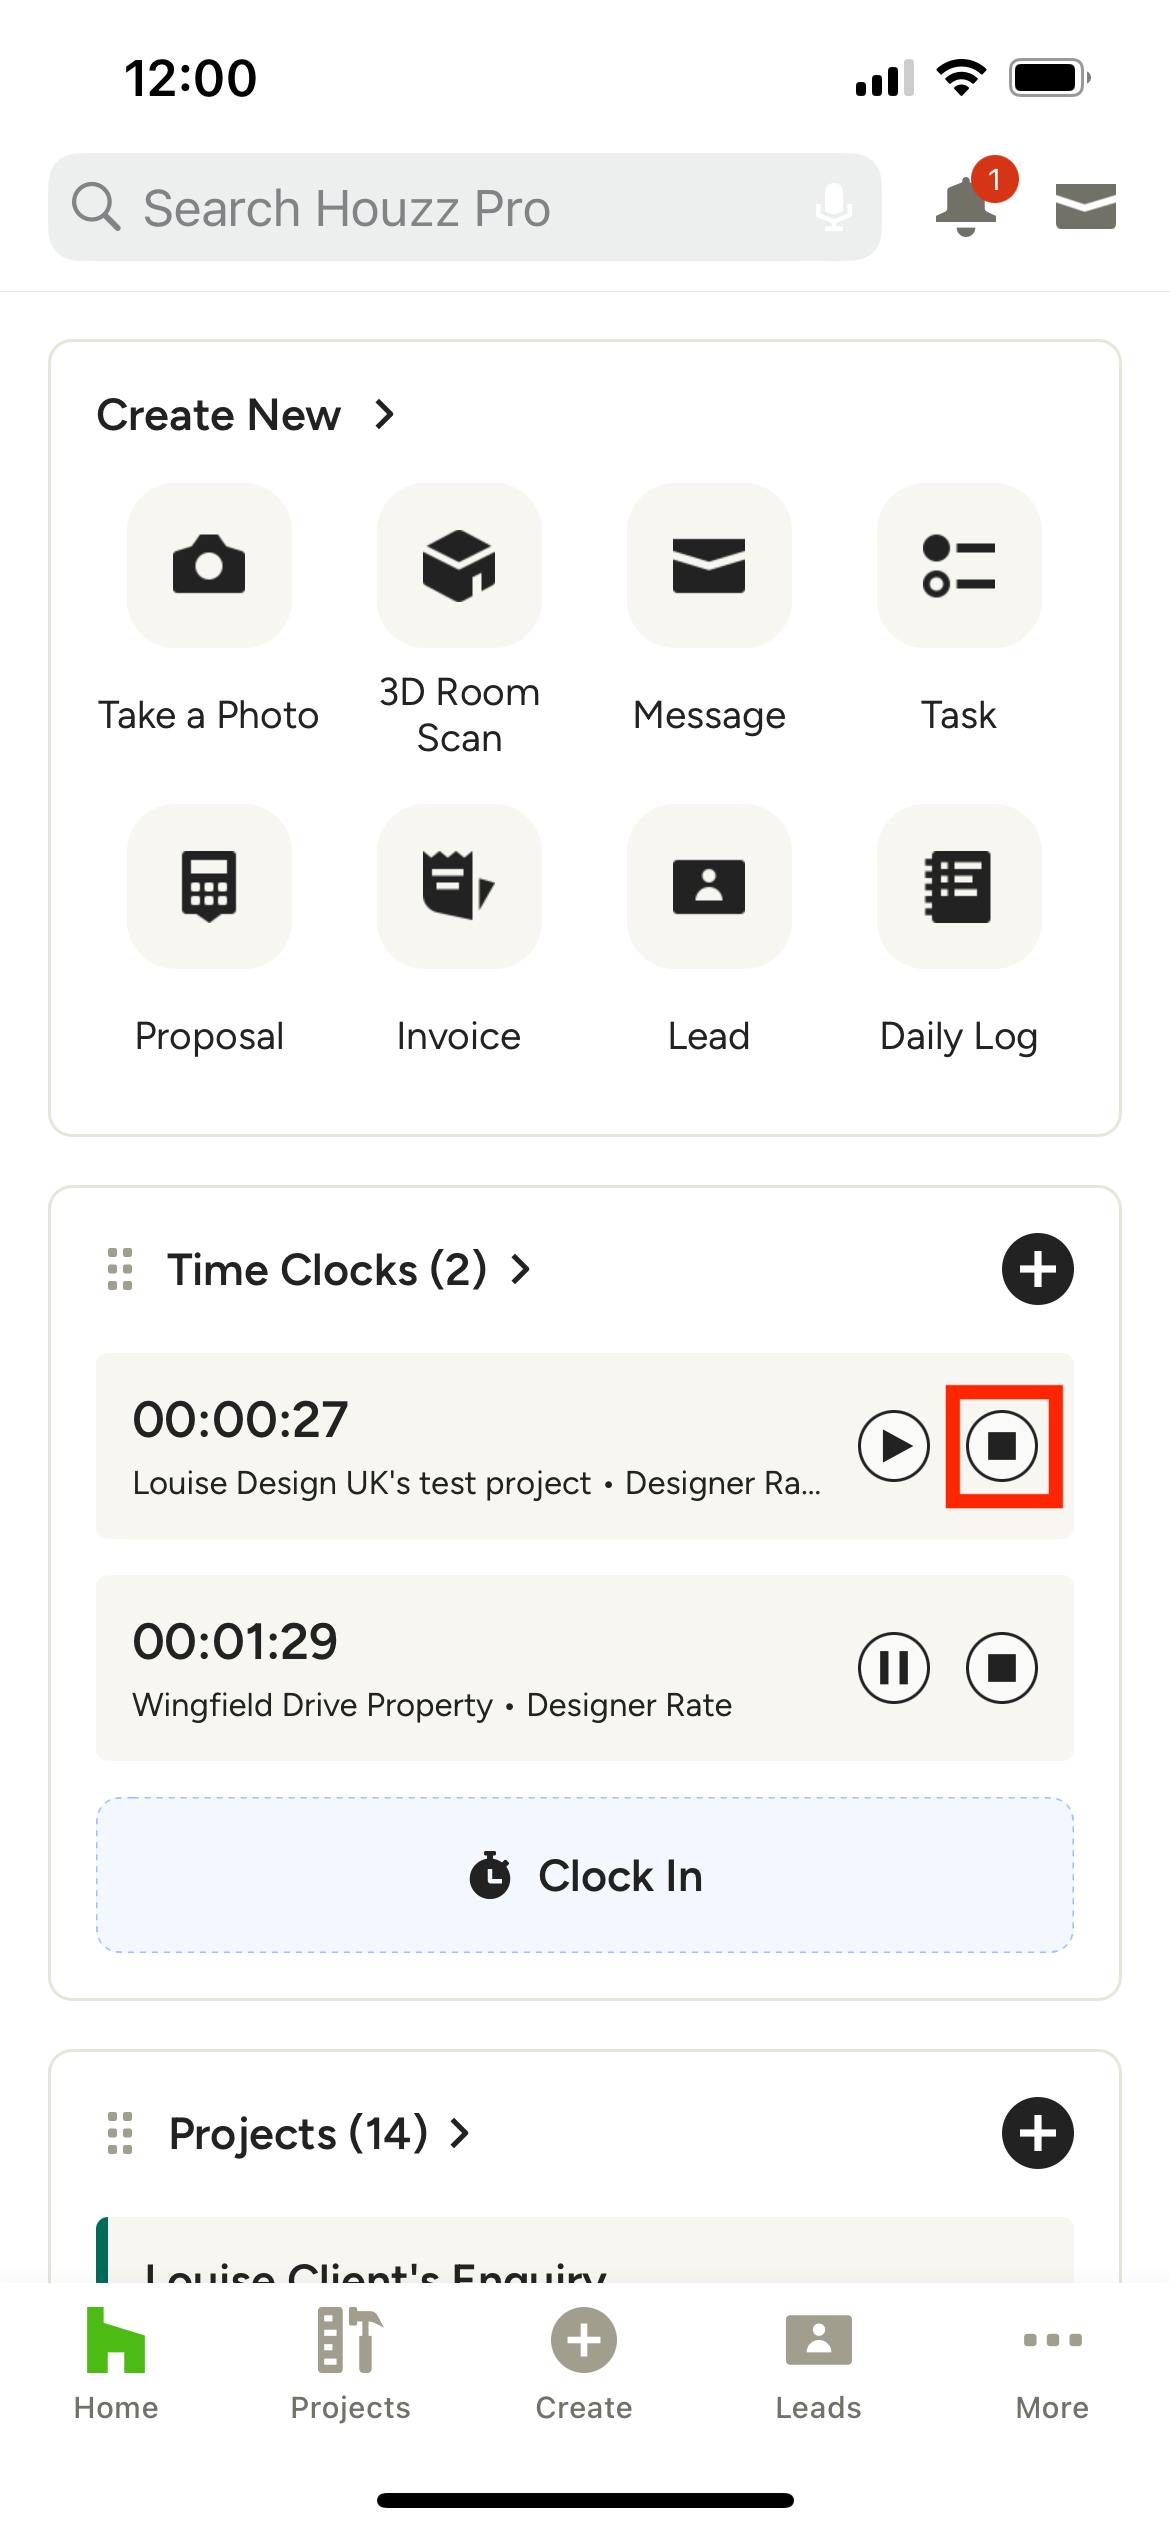
To start a time clock on the app locate the Time Clocks section on your homepage and tap the Clock In button or the + icon .
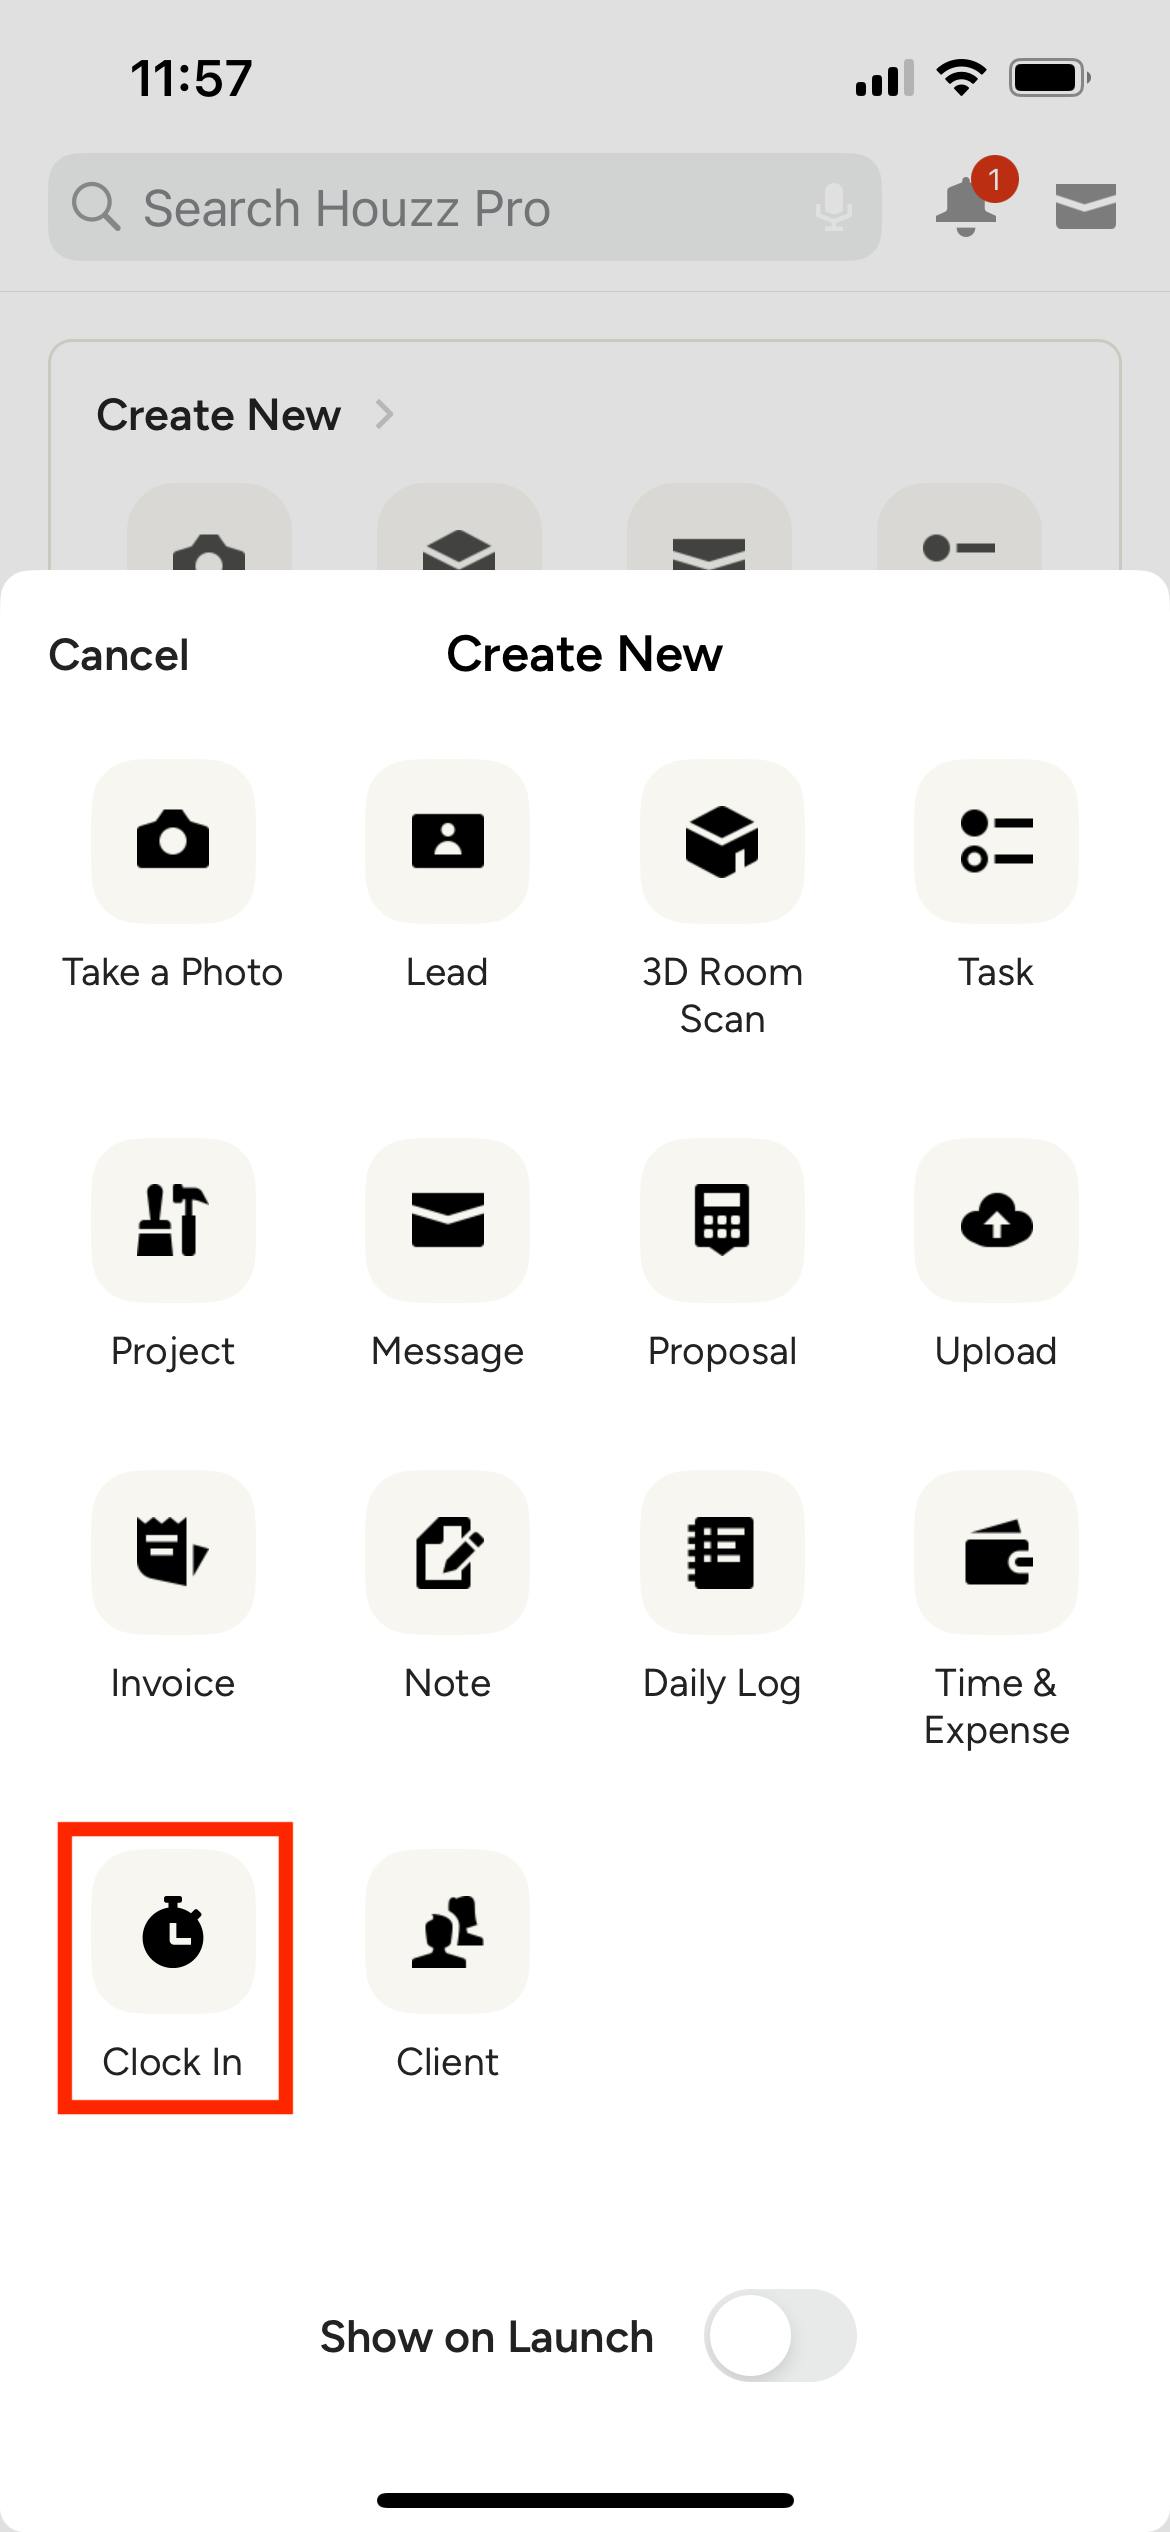
You can also access the stopwatch from any other section of the app by tapping the Create icon on the bottom navigation, then tapping Clock In.
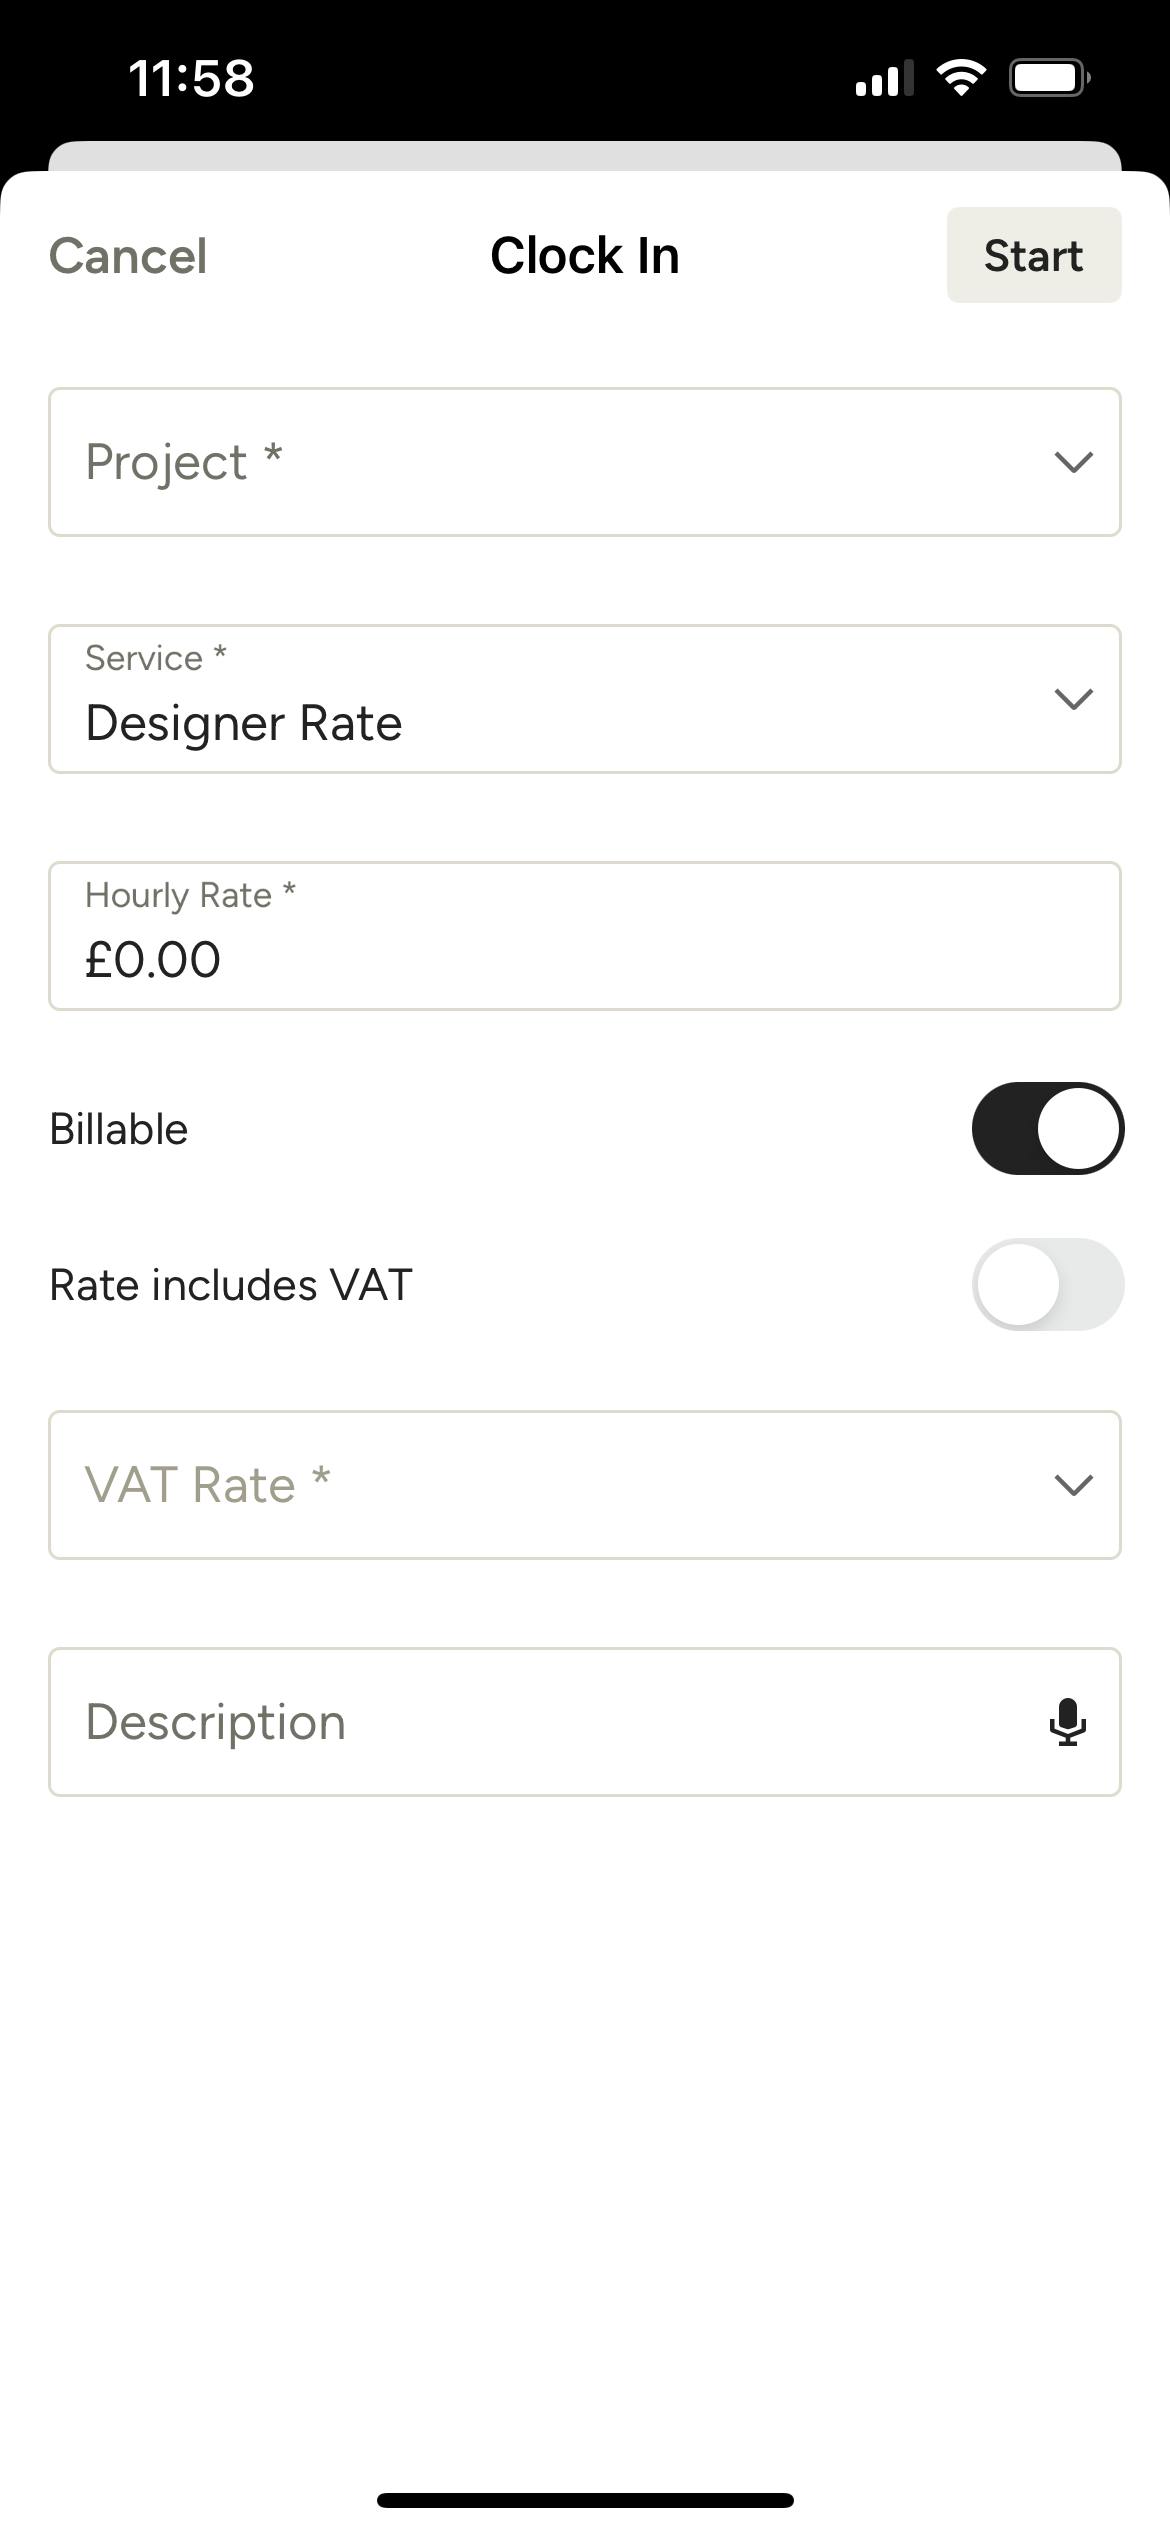
From here, fill in the project, service, hourly rate, whether it's billable or VAT applicable, and add a description if necessary. Tap Start in the top right to begin the stopwatch.
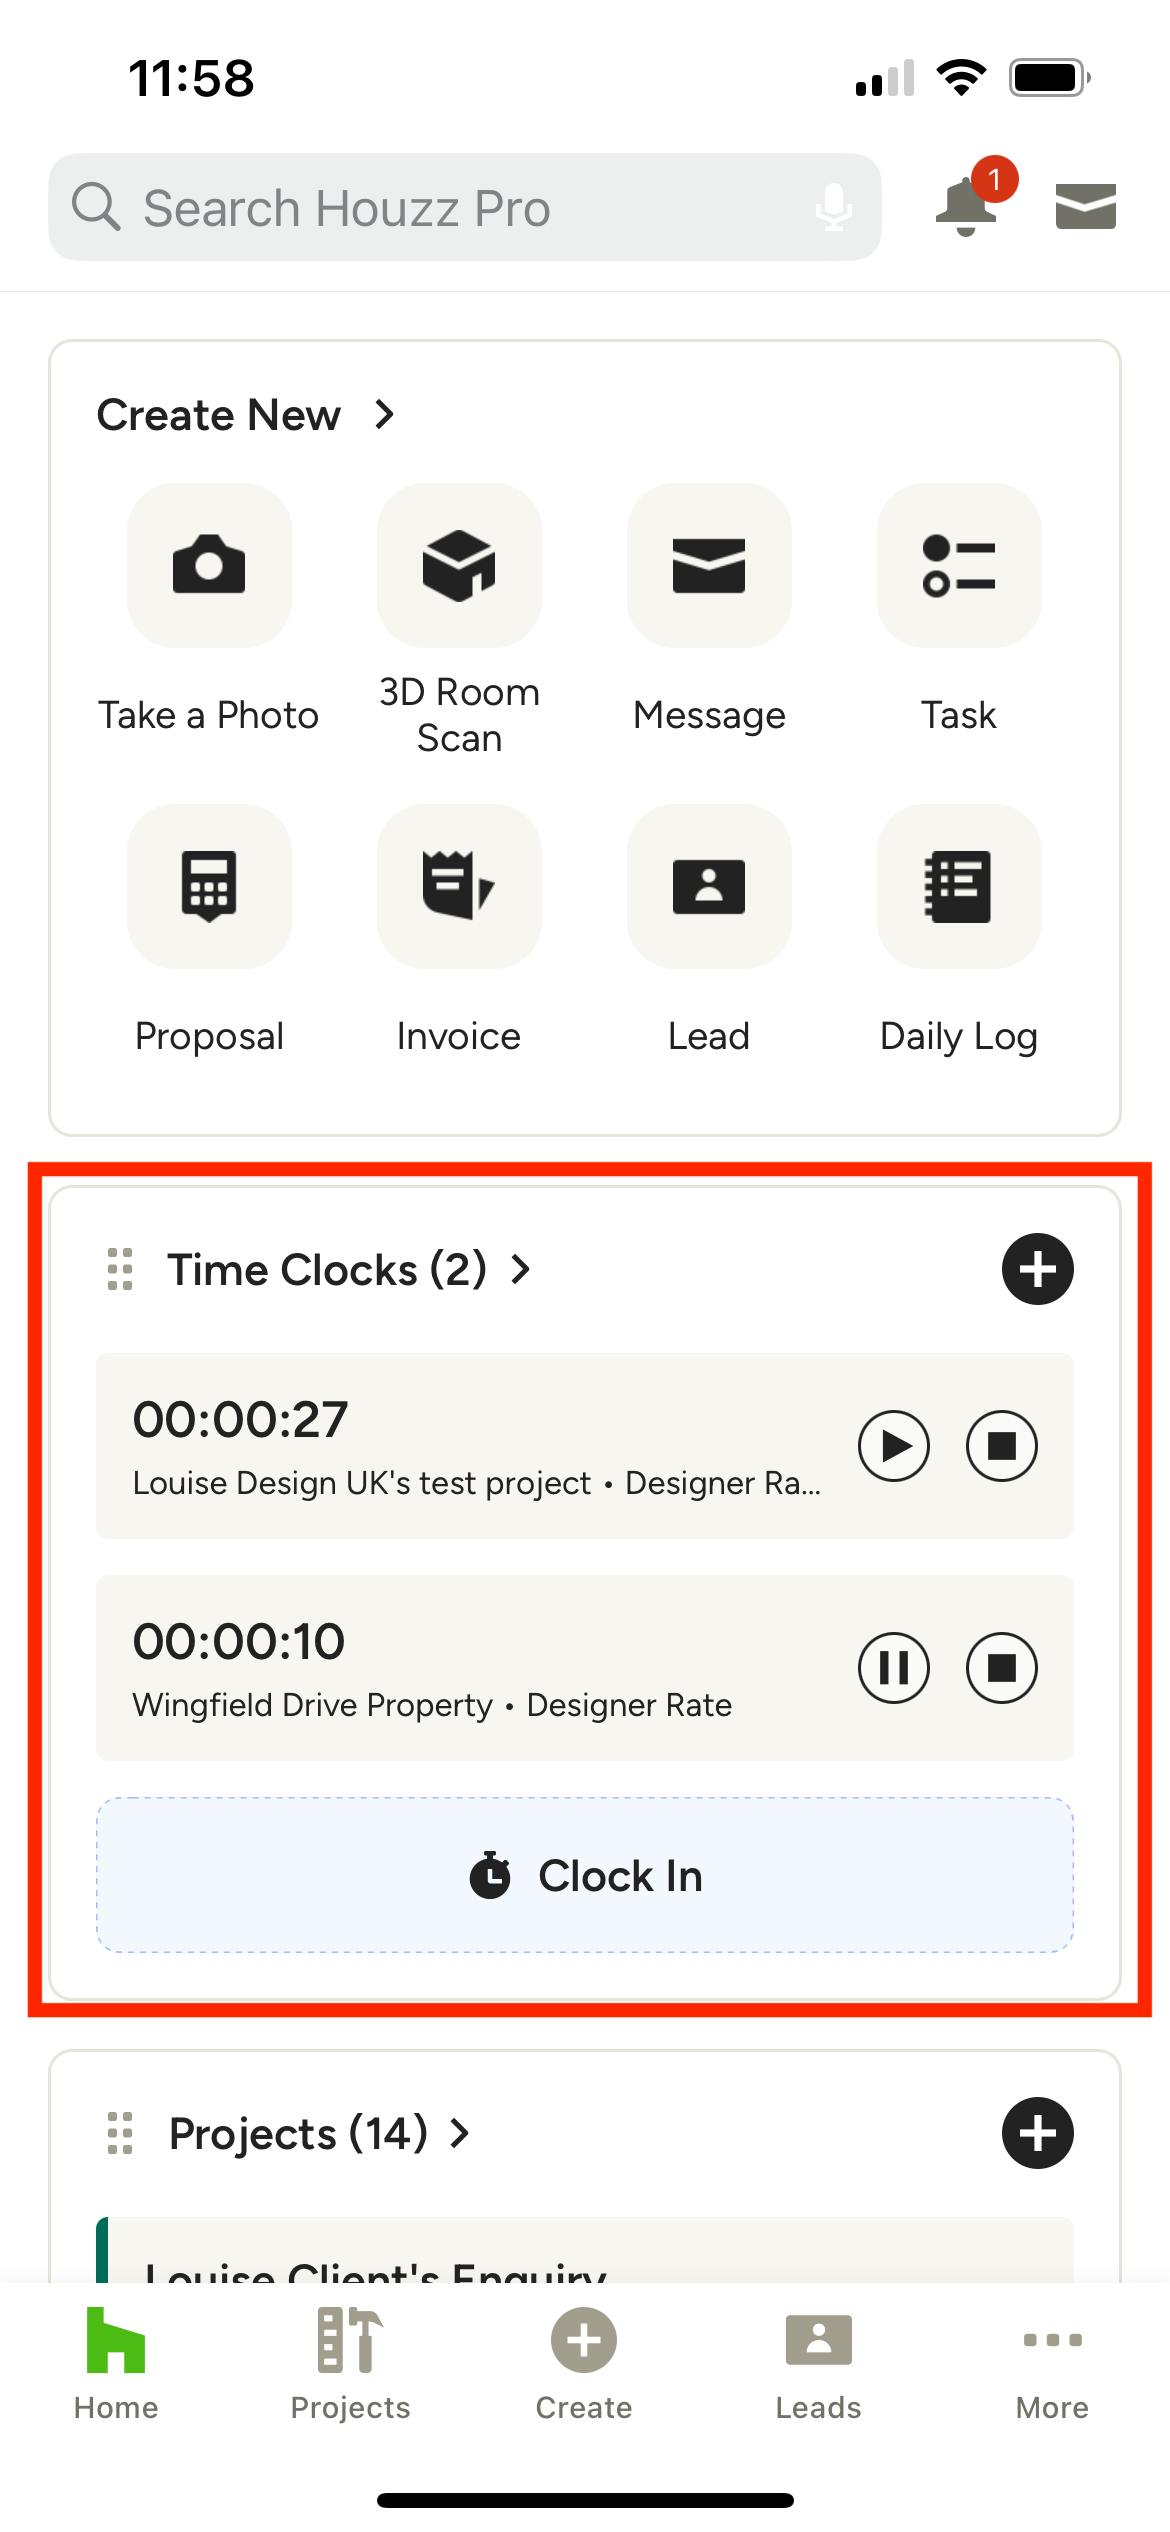
Once a stopwatch has started, you can access it from your homepage in the Time Clocks section to pause, resume or stop and log the time entry. You can have multiple stopwatches running at the same time, as seen here.
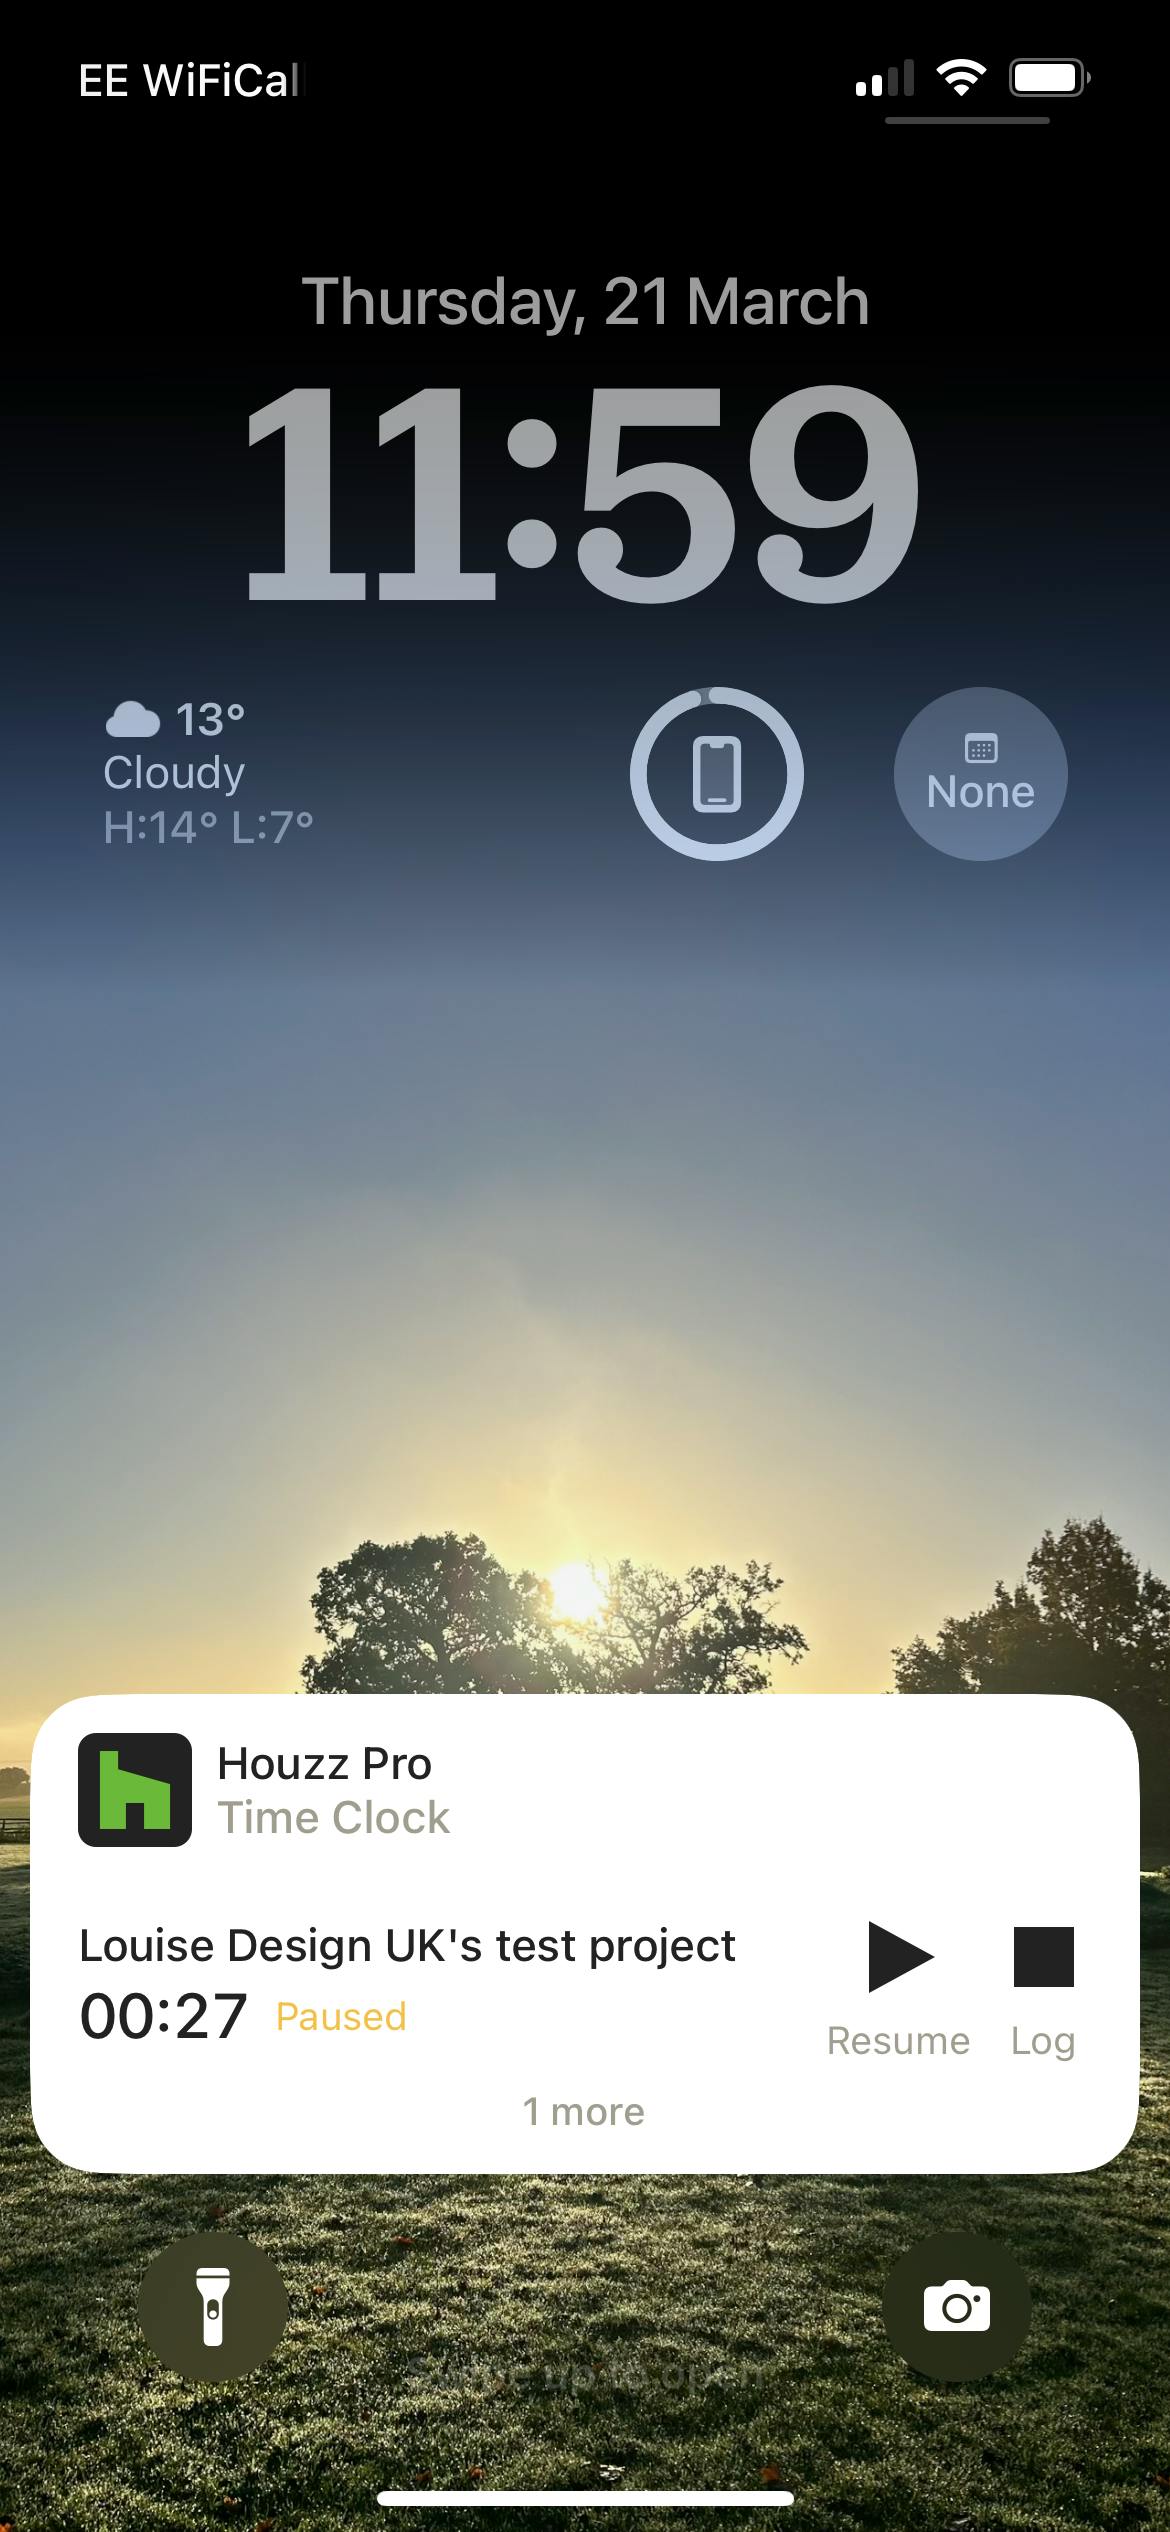
iOS users, your stopwatch(es) will also appear on your devices lock screen for quick access to pausing, resuming and logging the entry(s).
Note: Any time clocks you started on the app will appear on the desktop and vice versa.
Logging a Stopwatch Entry on the Mobile App
Once you're done tracking your time with the stopwatch you can easily log it into your Time and Expenses section from the app or on a desktop. To log a stopwatch entry on the app, press the square Log icon on the far right of the time clock, either from the homepage or your phone's lock screen (iOS only).
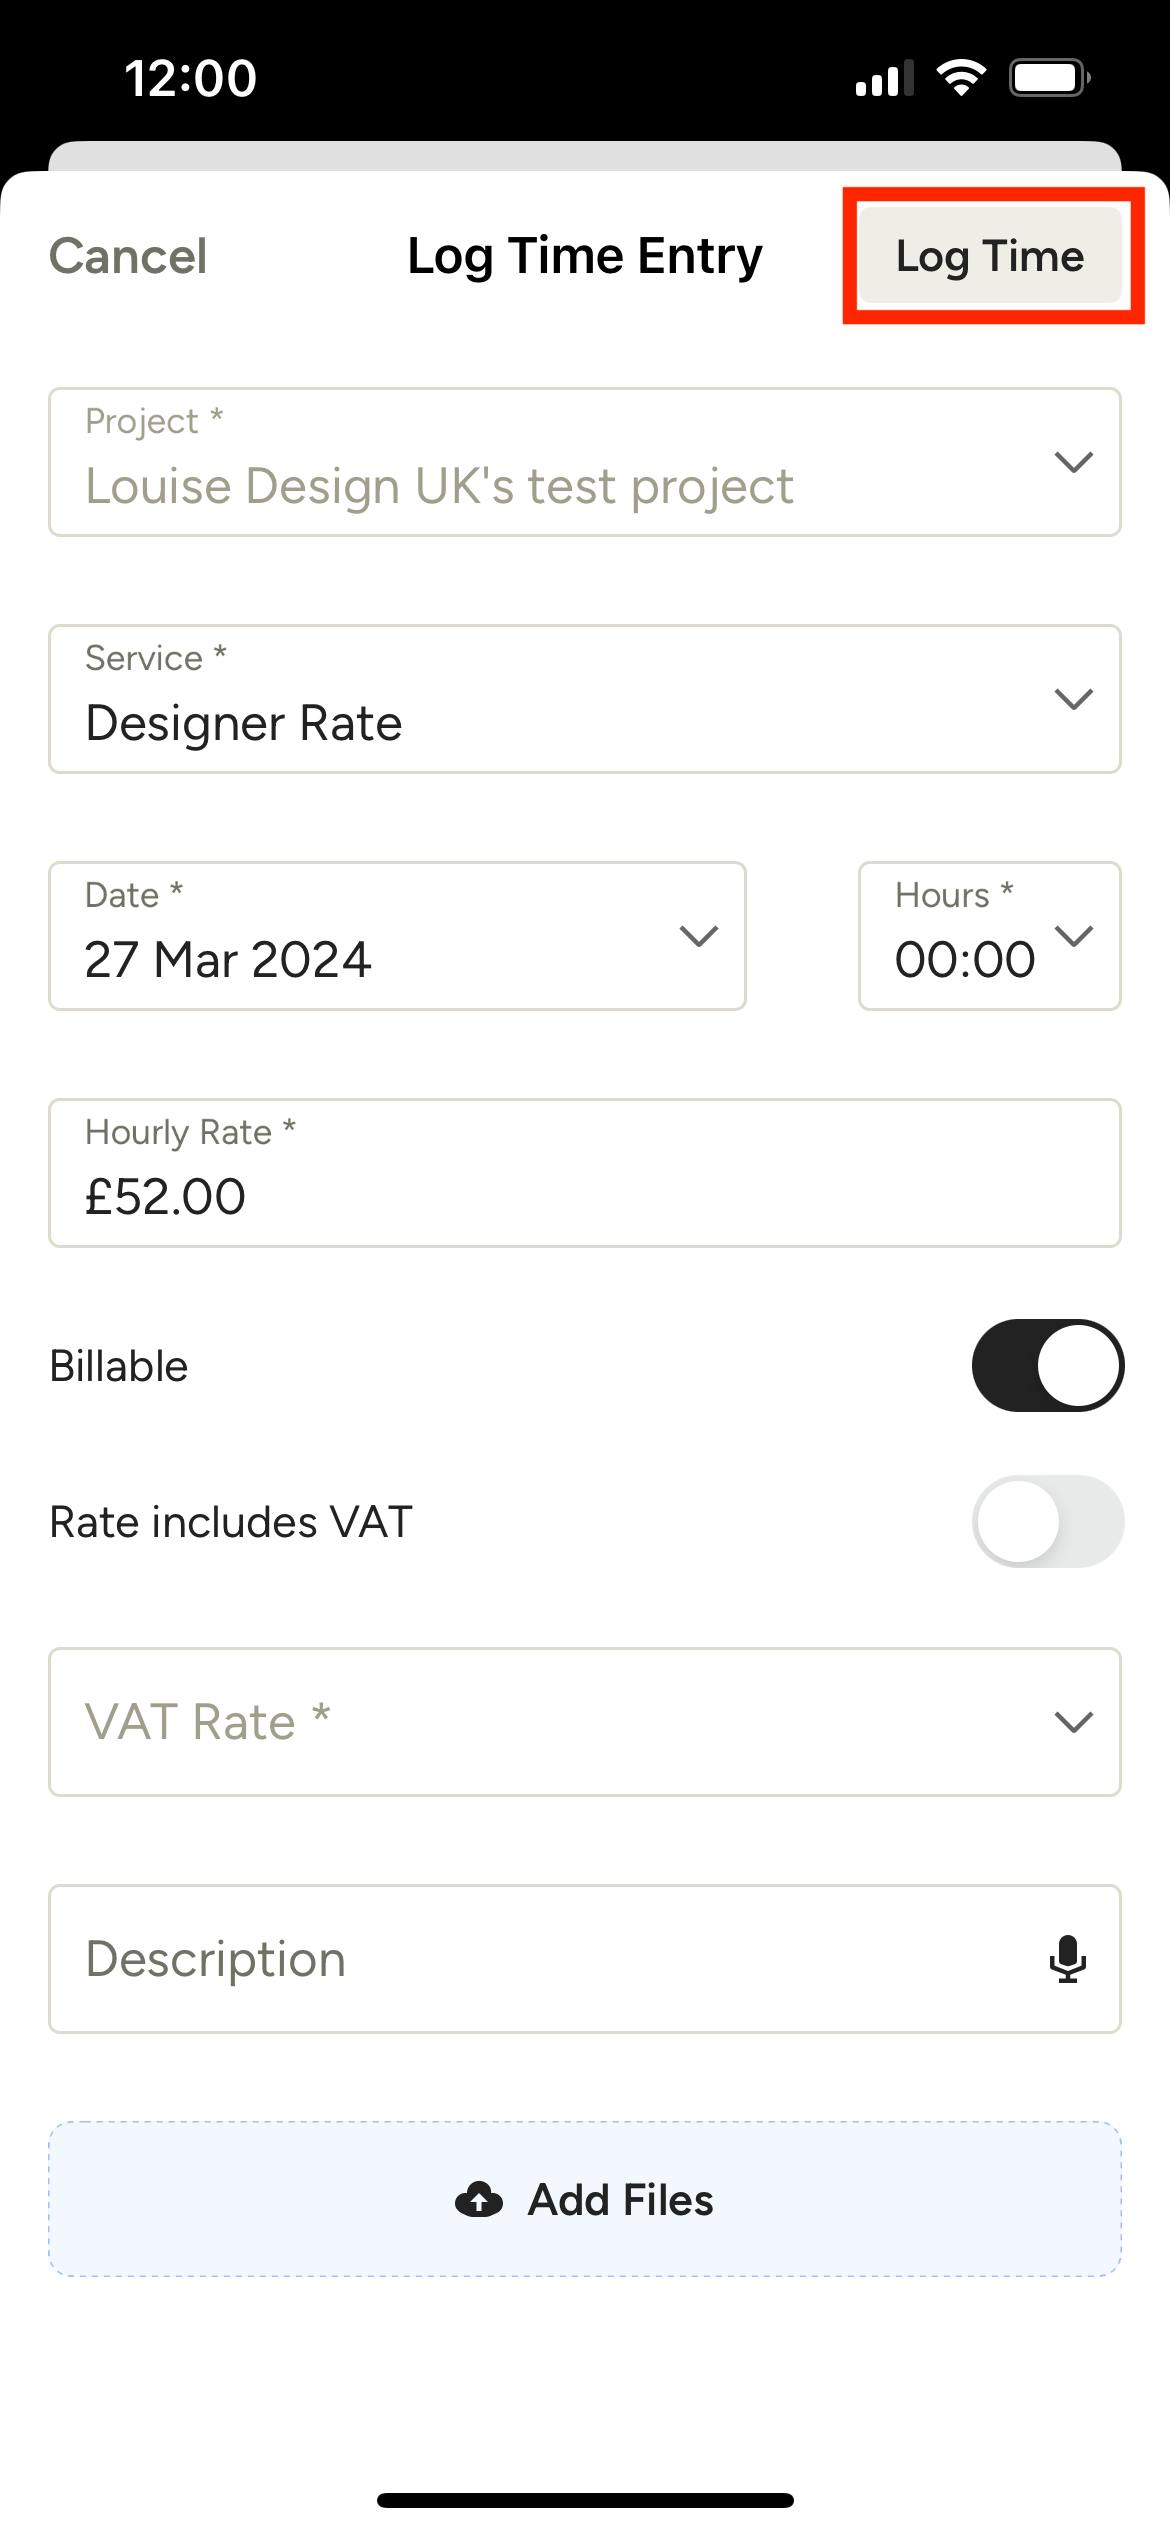
Confirm the details of the time entry are correct on the next screen. You can adjust the time if needed by tapping the Hours field. Add any necessary files, like receipts or photos, and tap Log Time in the top right. You can find any new time entries under your Time & Expenses section.
You can easily convert the time you logged with the stopwatch into an invoice to bill your clients, but this must be done on the desktop version of Houzz Pro. See this article for more information.
Using the Stopwatch on Desktop
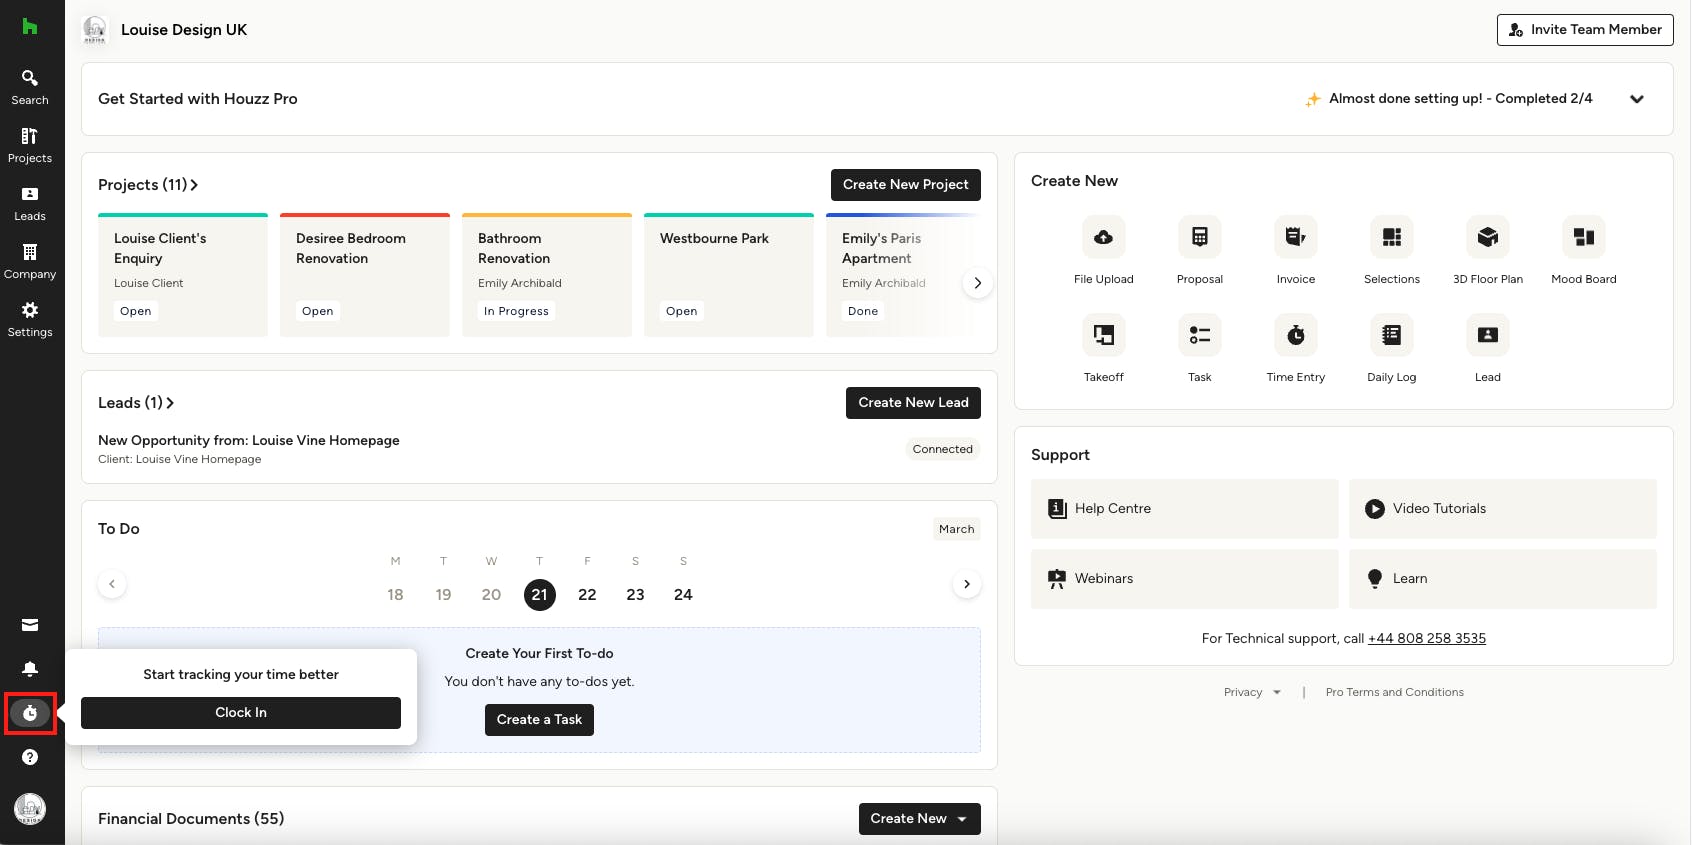
To start a time clock on the desktop version of Houzz Pro, locate the stopwatch icon in the left navigation, below your notifications, and click Clock In.
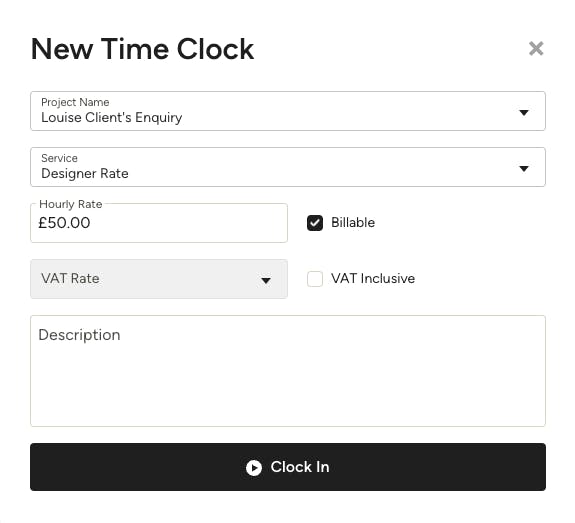
In the modal that pops up, fill in the project, service, hourly rate, whether it's billable or taxable, and add a description if necessary. Click Clock In at the bottom to begin the stopwatch.
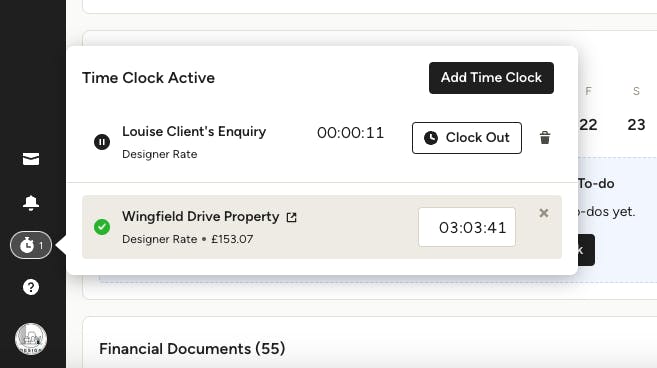
Once a stopwatch has started, you can access it from the icon in the left navigation to pause, resume or stop and log the time entry. You can have multiple stopwatches running at the same time, too.
Note: Any time clocks you started on the app will appear on the desktop and vice versa.
Logging a Stopwatch Entry on Desktop
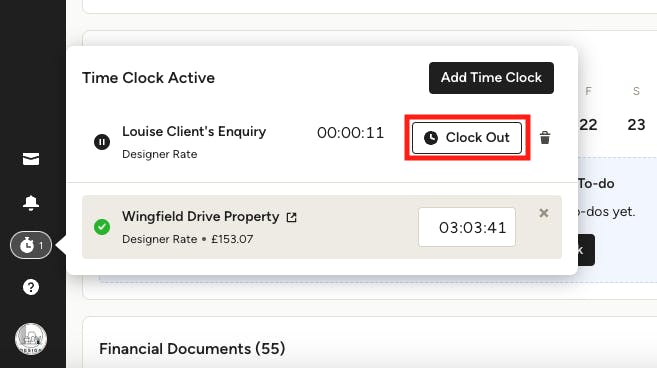
To log a stopwatch entry on your desktop, click Clock Out on the far right of the time clock.
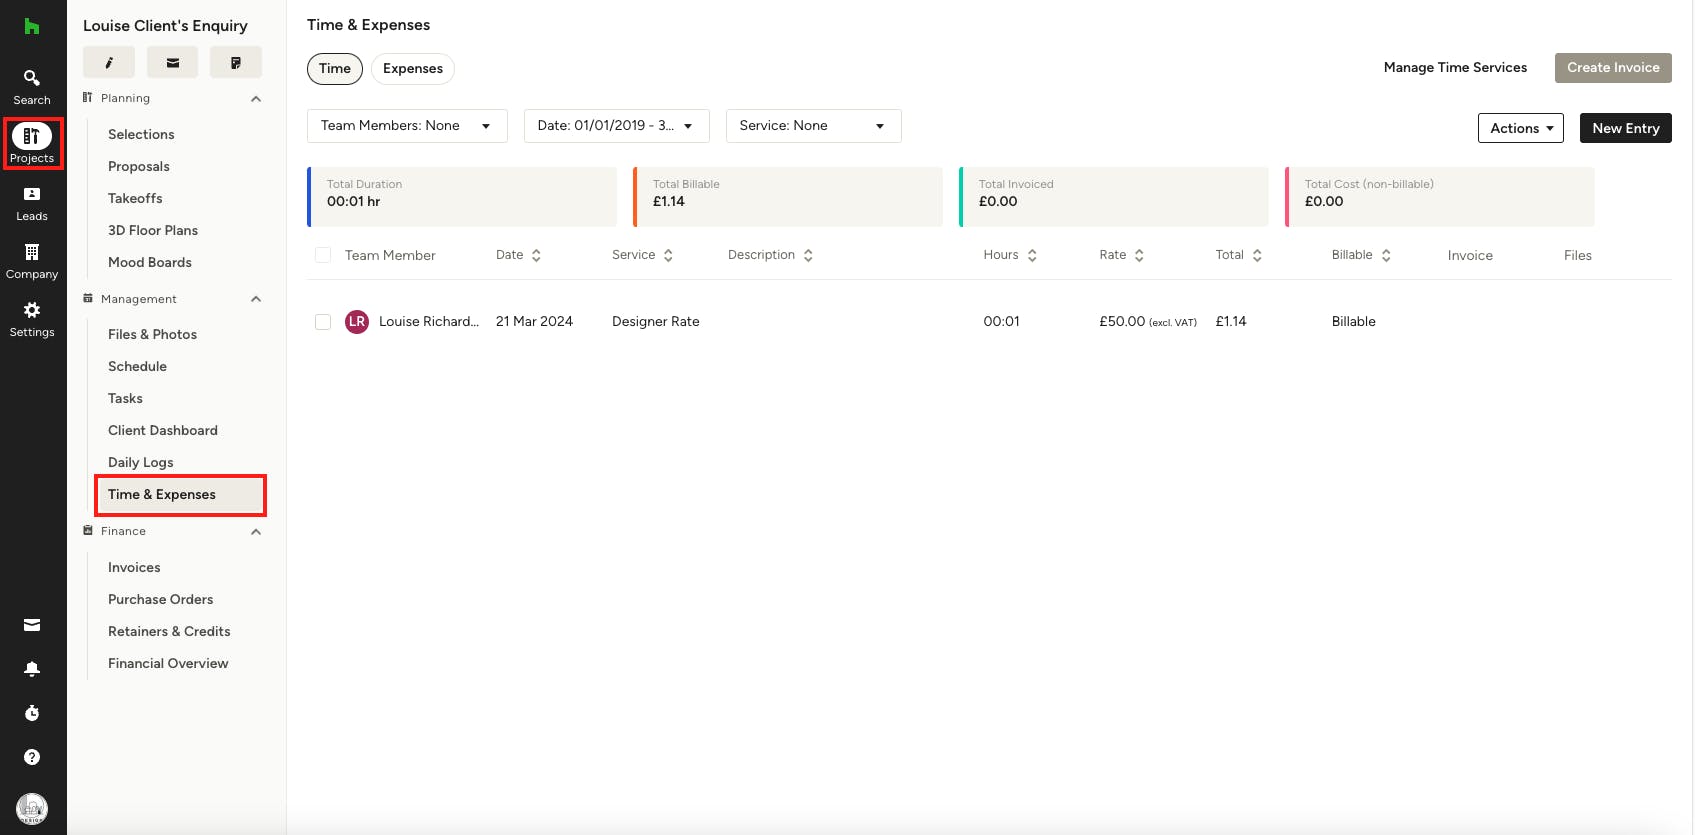
This will create a new time entry with all the information you originally input, which you can access and edit in your Time & Expenses section.
You can easily convert the time you logged with the stopwatch into an invoice to bill your clients on the desktop version of Houzz Pro. See this article for more information.
To learn more about managing time and expenses for your team, check out this article.