How to Void an Issued Invoice
Sometimes changes happen, and even though you can't edit an issued invoice, you are able to void the invoice and start again.
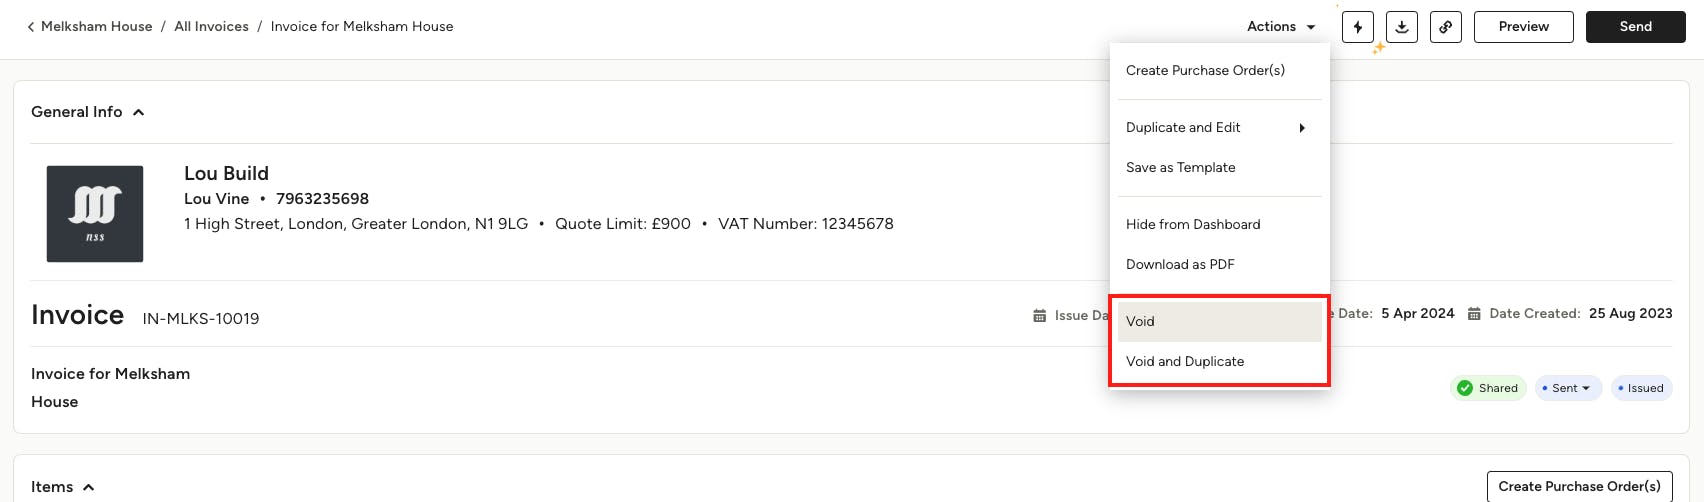
If you want to void an issued invoice, select Void in the Actions dropdown.
You also have the option to Void and Duplicate; this is useful when you want to keep your existing invoice format but made some slight edits before issuing again.
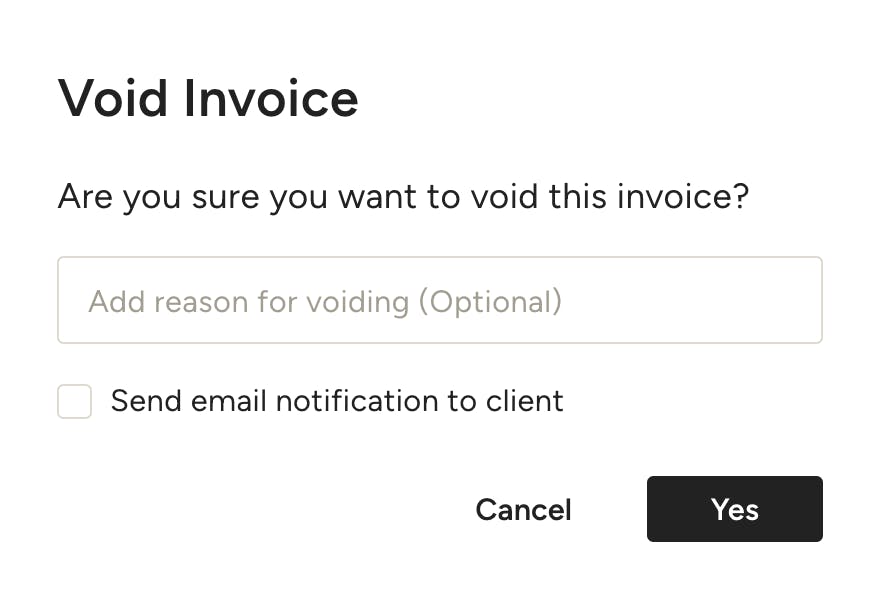
When you select Void, a screen will appear confirming that you want to void your invoice. You can input a reason, and you can decide whether or not to notify your client about the void. If you choose to notify them, Houzz Pro will send them an email explaining that the invoice was voided, which includes the reasoning, if included.
Select Yes once complete.
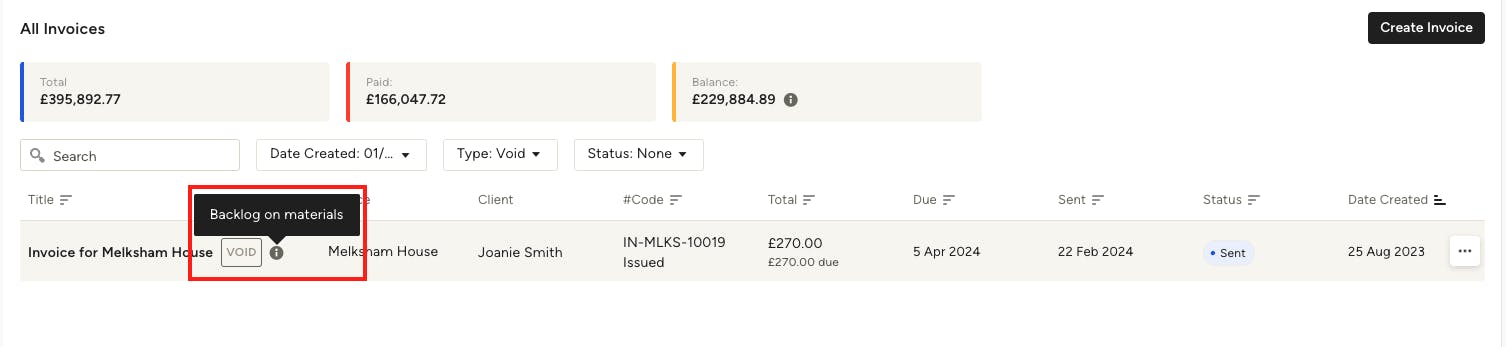
You will now see a Void tag on the voided invoice document. If you selected Void and Duplicate, your duplicate invoice will automatically open up.
When you view the list of all your invoices, you'll see a Void tag next to the voided invoice. You can hover over the i icon to see the reason for the void, if you added one.
If you would like to see a list of all voided invoices, you can filter by Void in the Type dropdown.
Once an invoice has been voided, you can’t edit it, and your client will no longer be able to make payments on it. Any paid logged payments will be credited to your client, and any unpaid payments will be cancelled. The invoice will also be removed from the client dashboard.
Voided invoices won’t be calculated into the project invoices financial totals or factored into your financial reports.
To learn more about invoices, read these helpful articles: