Creating and Sending Change Orders
Changes to a project happen — the scope gets bigger or smaller, materials change, decisions change. When this happens, Houzz Pro enables you to create change orders directly from your approved estimates and send them to your client for approval.
A change order only charges the client for the difference between the planned cost and the updated cost. This allows you to send a payment request for the planned amount and still collect money separately in the change order for the updated costs.

How to Create Change Orders
There are two ways you can create a change order: You can create one from scratch or from an approved estimate.
To create a change order from scratch, select the relevant project from the left-hand navigation. Select Change Orders in the left menu, and click on the New Change Order button at the top right of your screen.
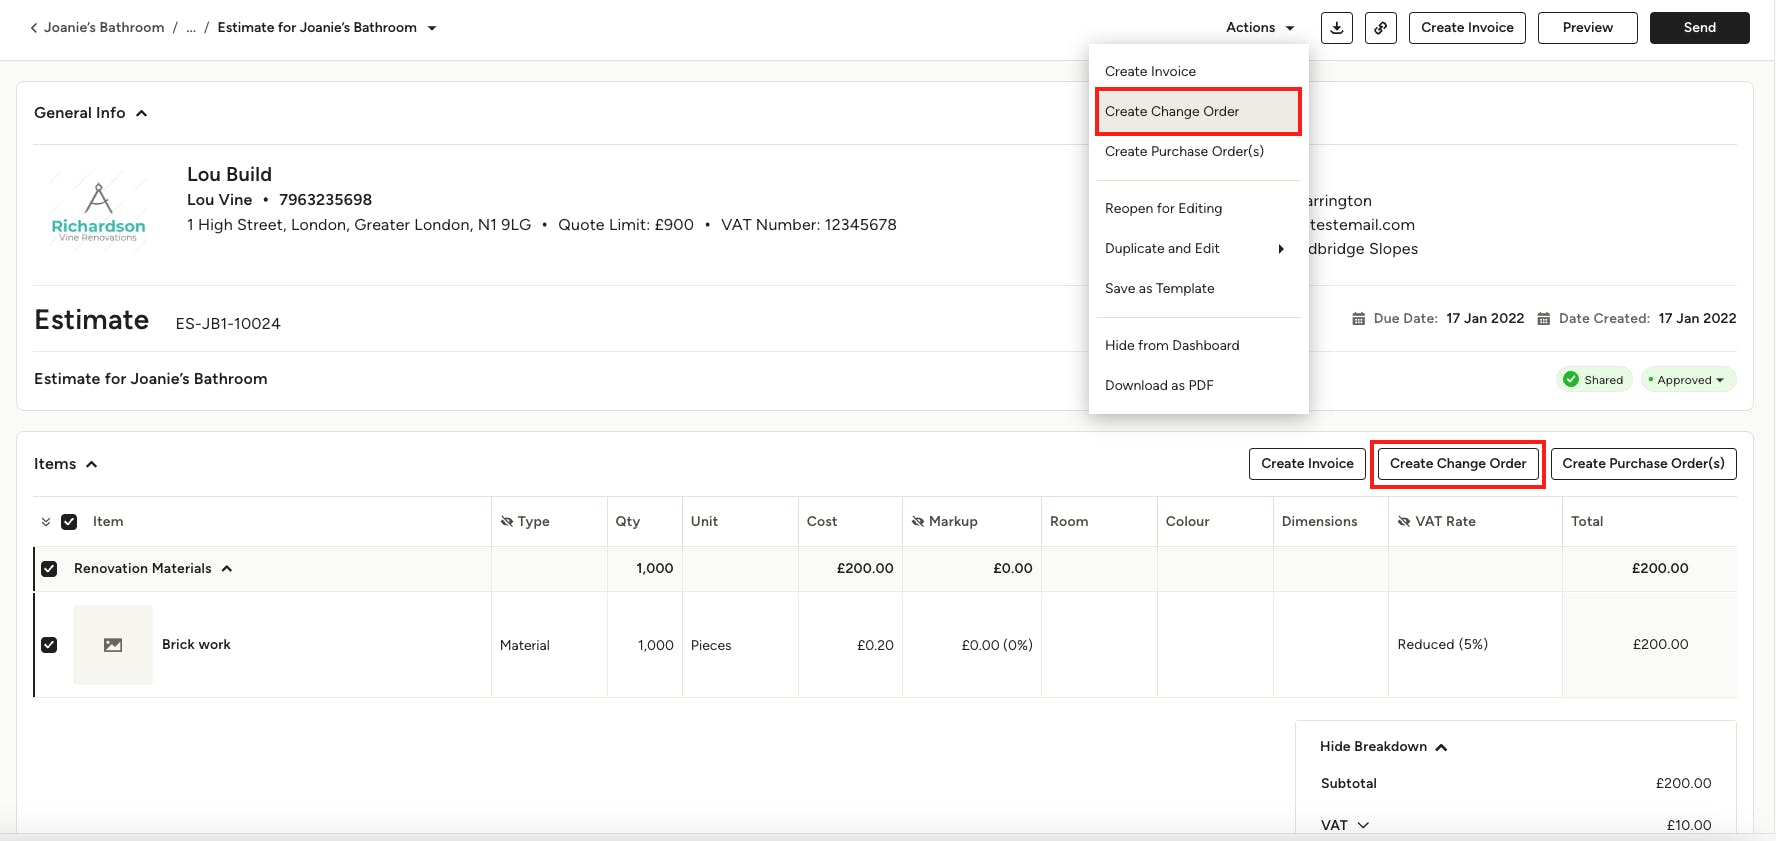
To create a change order from an approved estimate, open the approved estimate. Select the checkboxes next to the line items that require a change in either cost or quantity. Then you can either select Create Change Order right above your line items, or select Create Change Order from the Actions dropdown at the top of your estimate.
Update Change Order
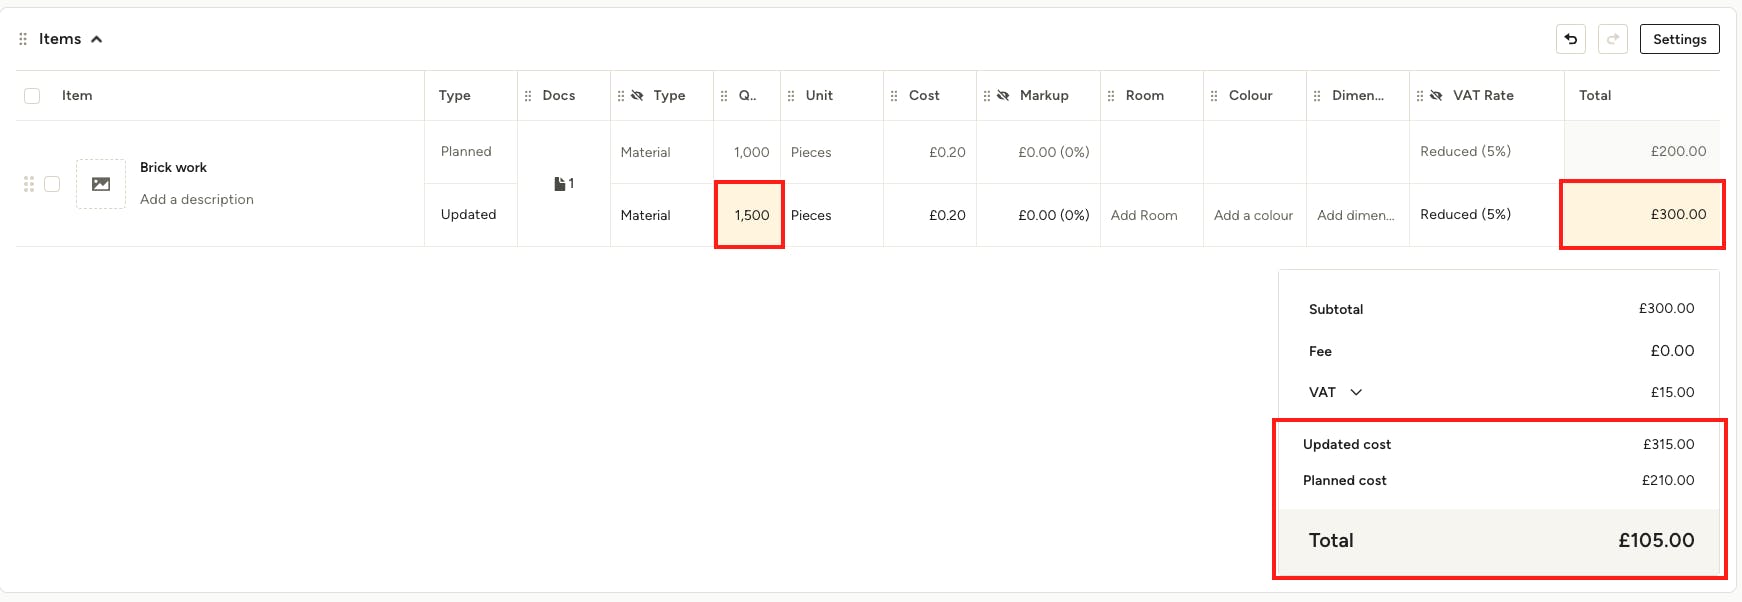
This will open up a change order where you can adjust quantities and cost, add notes for each line item, and then send it to your client for approval.
Your change order will have a row for planned and a row for updated quantities, material, labour, and profits.
The planned values come directly from your approved estimates and cannot be changed. The updated values can be changed as needed by simply clicking the value you'd like to edit. You can also edit the line item name and add notes. As you make changes, you will notice a yellow highlight indicating the changed values. This makes it easy for you to see your updates as you work.
In this example: The quantity of bricks has gone up, affecting the price of the line item. These changes are reflected in the total cost for those line items, as well as in the total cost at the bottom of the change order.
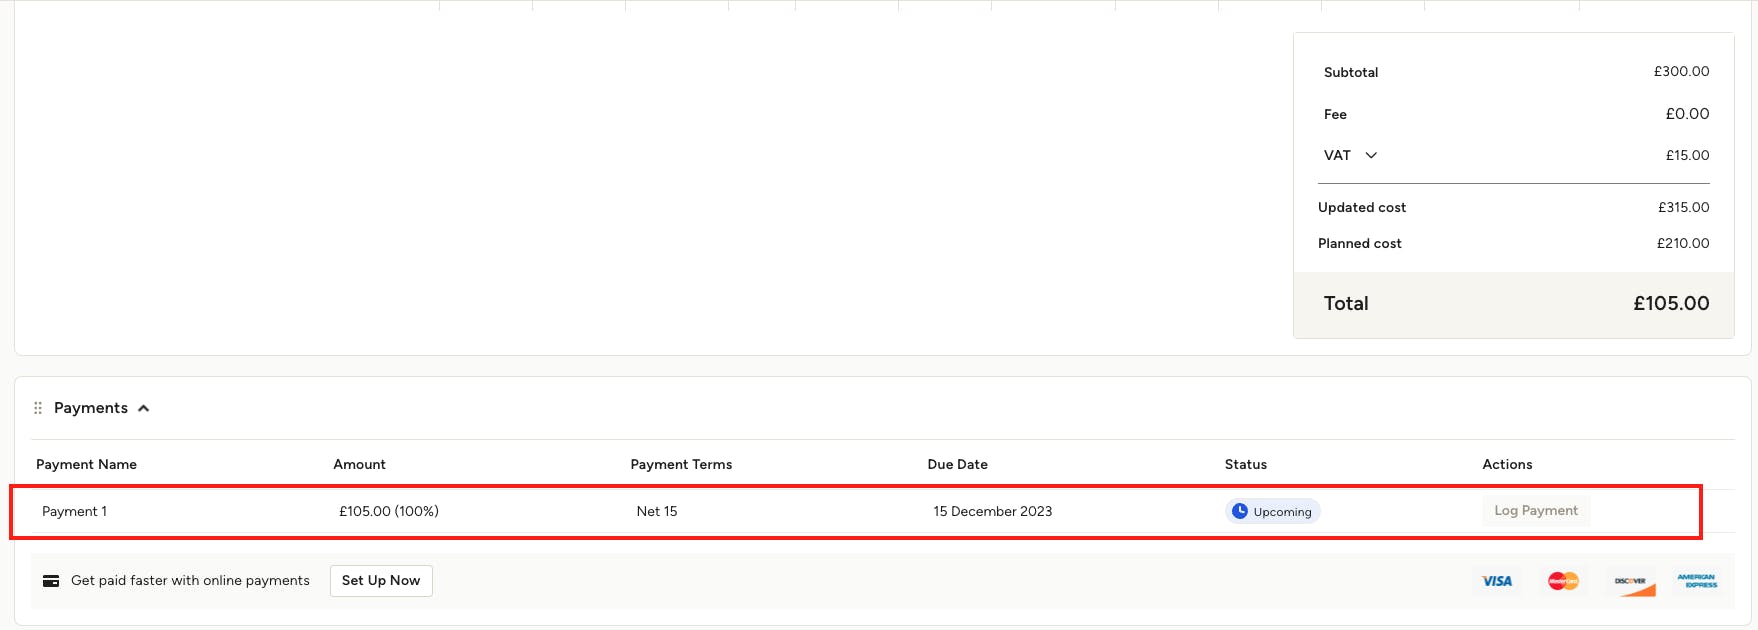
Adjust Payment Schedule
Once you've made all the necessary changes, be sure to set the due date for approval and your payment terms underneath the cost change total.
Share With Your Client
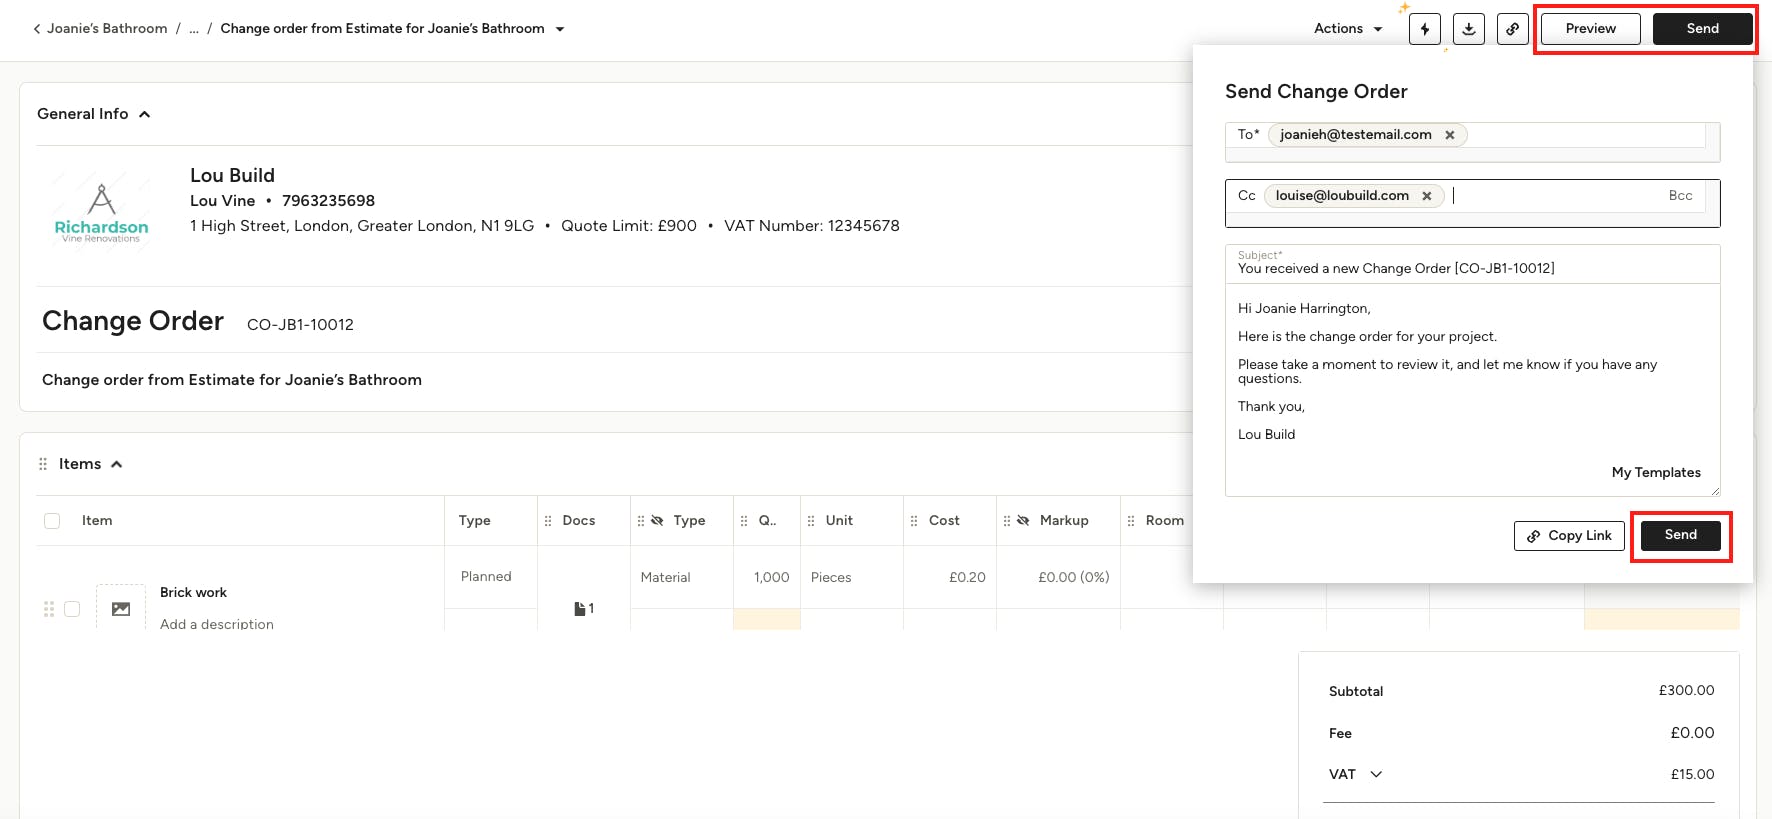
Before you share the change order with your client, be sure to select Preview to ensure all the document information is correct.
Once you're ready to share with your client and get approval, select Send. You will now be able to customise the email your client will receive, including the email subject line and email text. If you have an email template you would like to use, you can select this in the My Templates link at the bottom of the text box. When your email is ready to go, click Send.
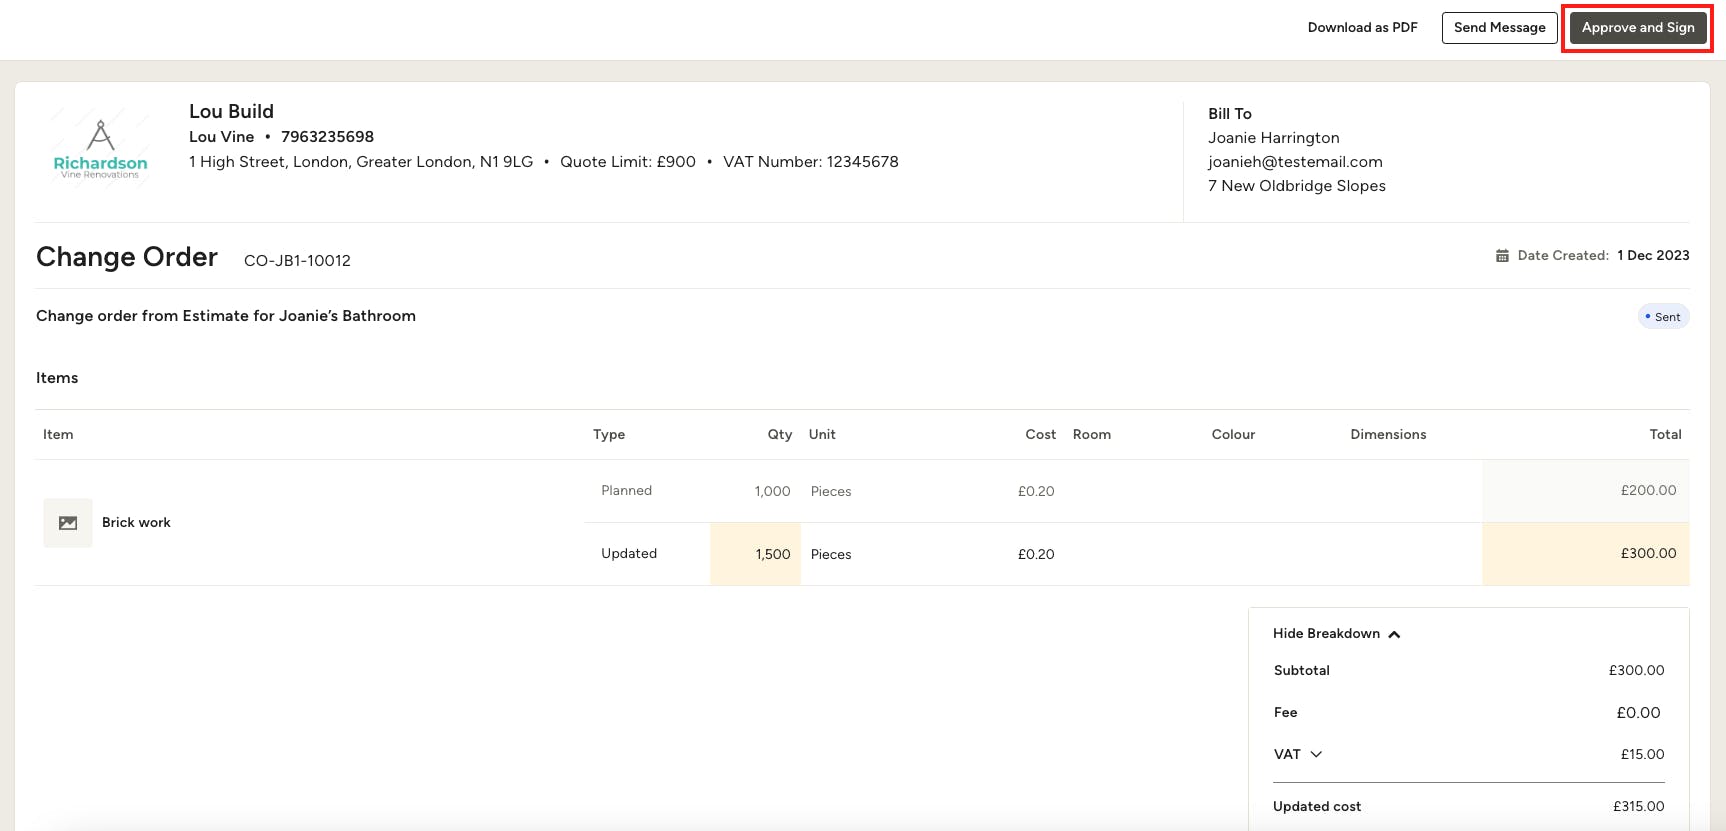
Your client will receive an email with the ability to approve the change order. In order to approve it, they will need to open up the invoice, review and click on Approve and Sign.
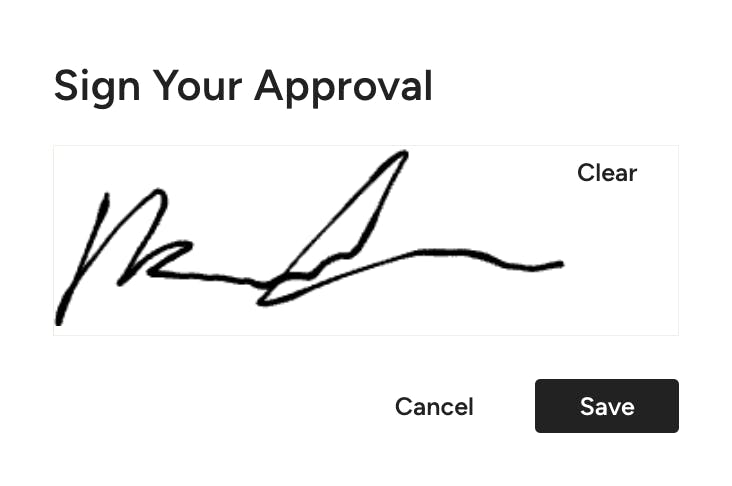
They can add their electronic signature to the change order and select Save. Once completed, the change order will be approved, and you will be notified.