How to Create and Manage Your Tasks
Tasks help you keep your project on track and understand exactly who is in charge of what. You can assign tasks to your team members, subcontractors and clients, and you can send them notifications about new, updated or completed tasks. Once they complete a task, you’ll be notified so you always know the status of your project.
You can access your tasks within the Task Centre, as well as within individual projects, on both Houzz Pro desktop and app.
Task Centre Overview
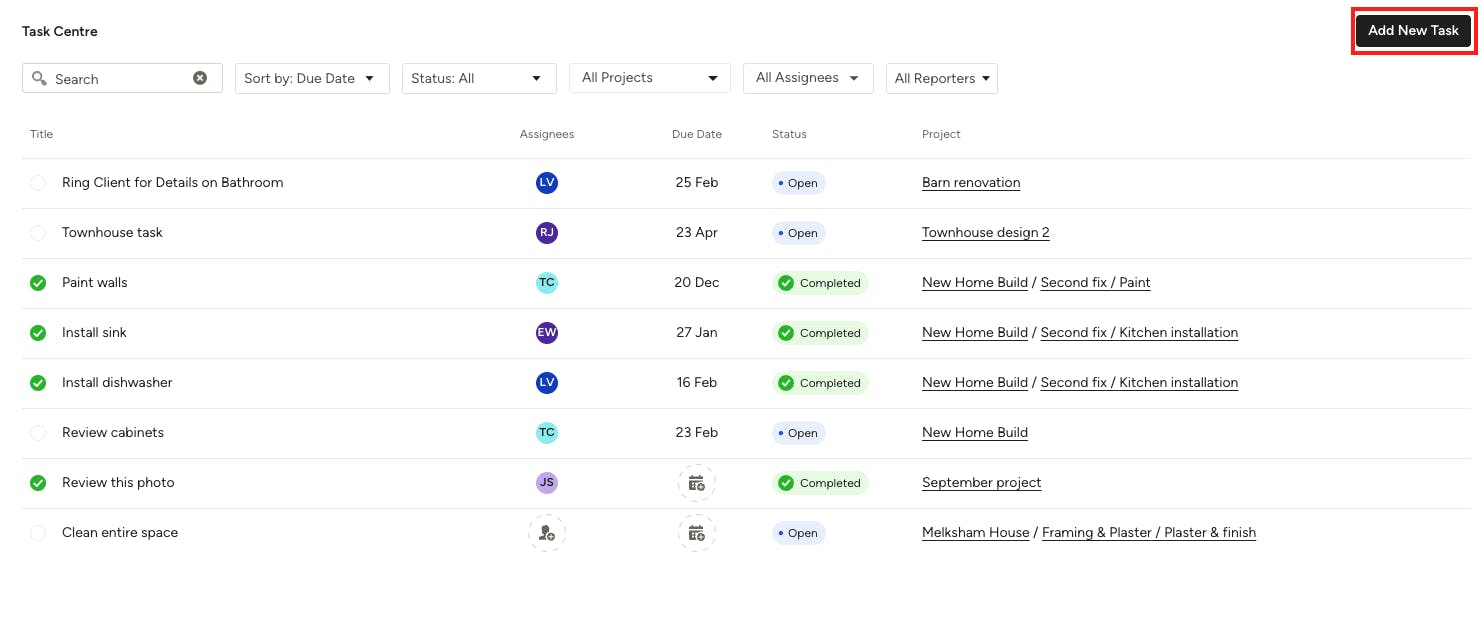
You can view all your tasks across all projects from your Task Centre. This is a great place to get a general overview of all your projects and where they stand.
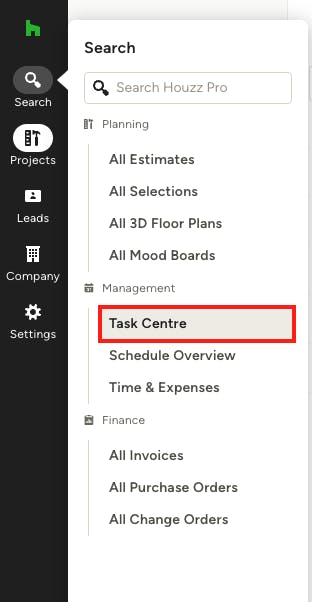
To access the Task Centre, click the Search icon from your left navigation and select Task Centre under Management.
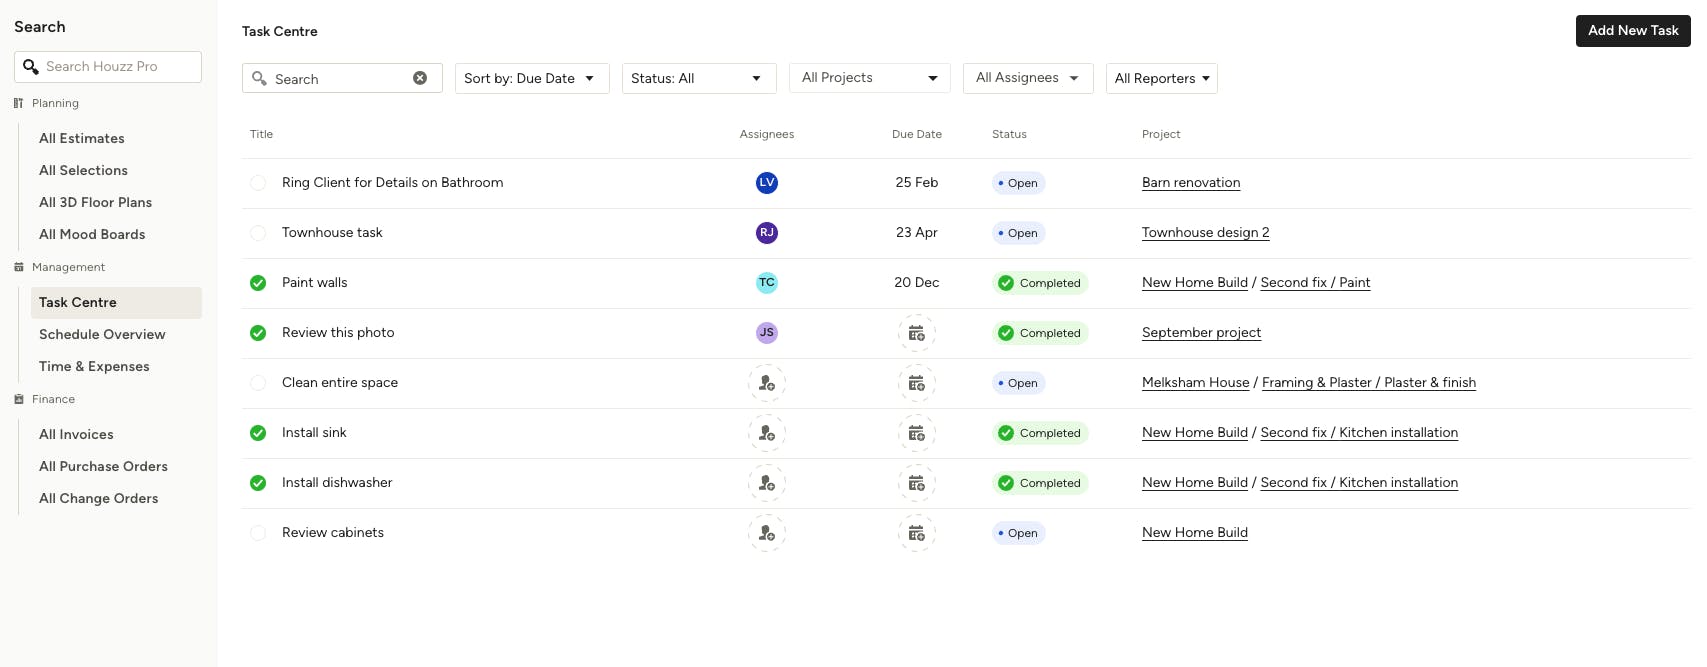
Once in the Task Center, you will be able to view all task details in an organised way, including assignees, due date, status and project name.
You can search all tasks by typing in the search text box, sort tasks in the sort dropdown, or filter by status, assignee, project or reporter.
Project Tasks Overview
If you prefer to focus on a specific project instead, you can easily manage your tasks within the project overview page as well.
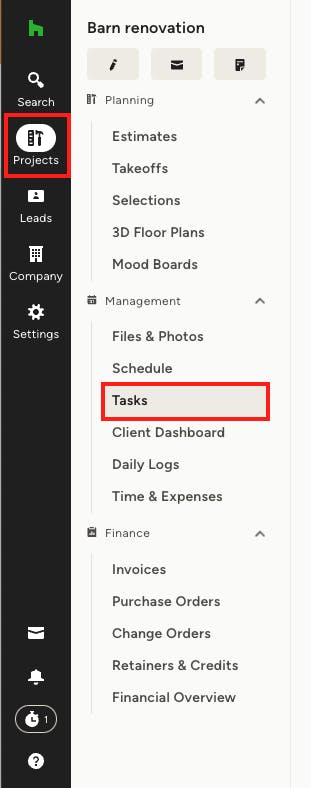
Find the Projects icon in your left navigation, and select the relevant project. Once in the project, select Tasks from the left-hand menu.
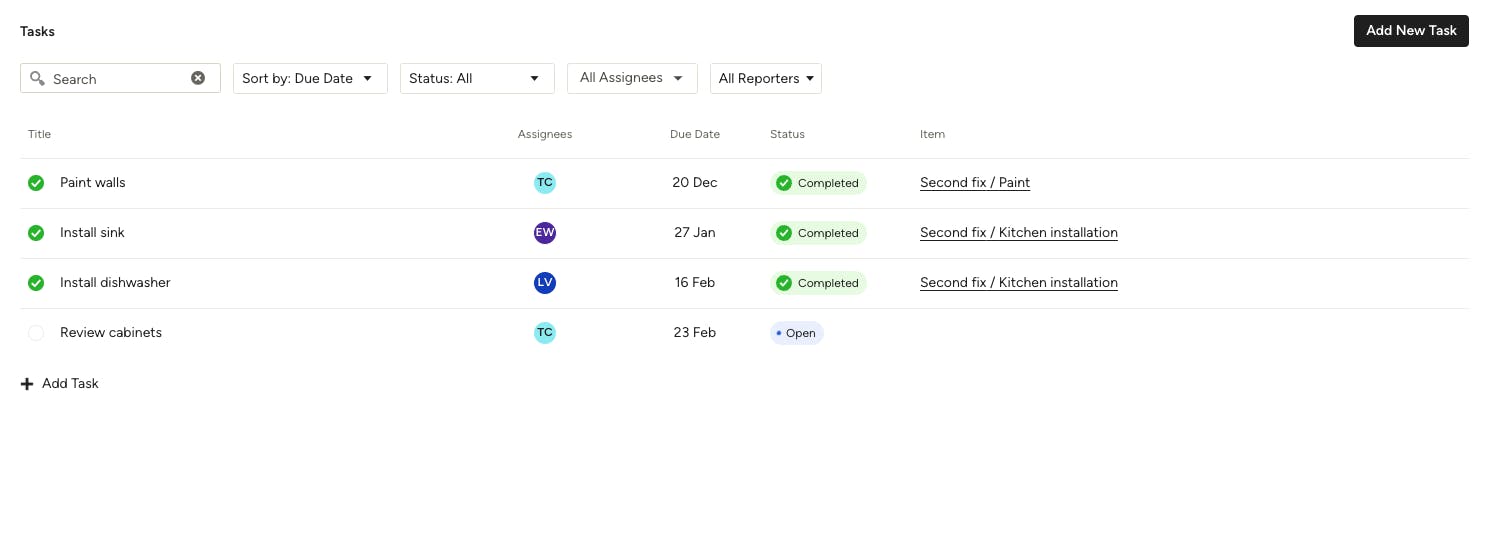
Once in the project task overview, you will be able to view all task details for that project in an organised way, including assignees, due date and status.
You can search all tasks by typing in the search text box, sort tasks in the sort dropdown, or filter by status, assignee or reporter.
Add a New Task
Within Task Centre: To add a new task within the Task Centre, click on the Add New Task button at the top right of your screen.
A new screen will pop up on the right side where you can input all the task details. Add the task name, assign to a specific project, set a due date, assign to a team member or client, provide a description, and add attachments if relevant. You can also set the task as completed in the top left.
Your task will automatically show up in the Task Centre, as well as under tasks for that individual project.
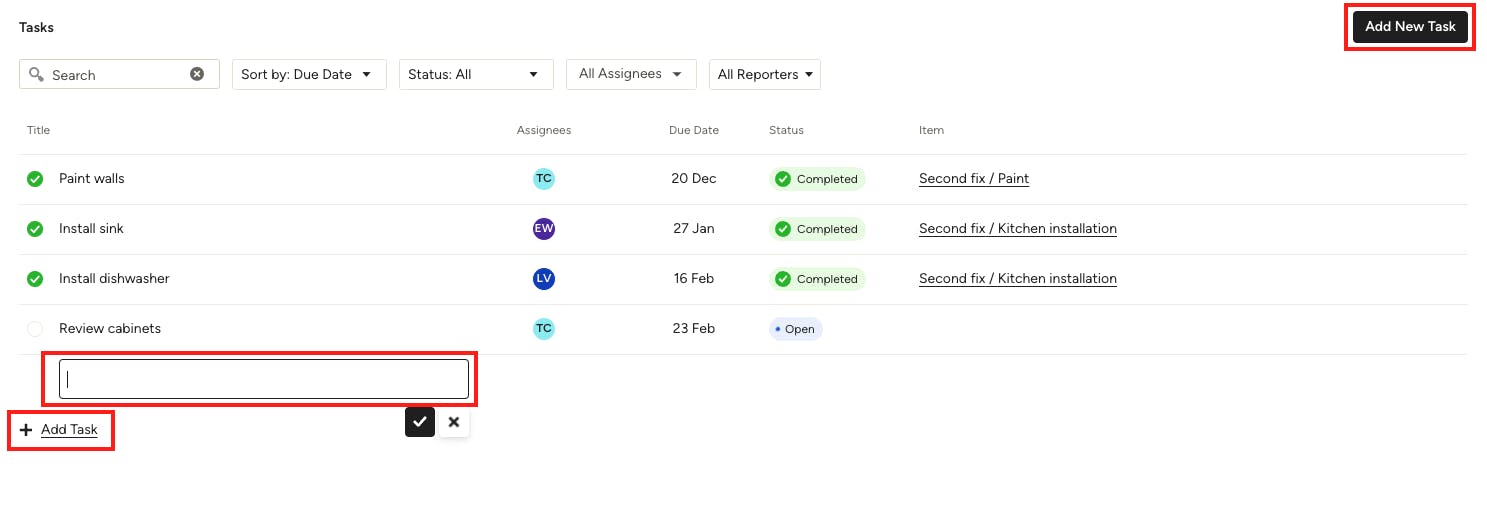
Within a Project: To add a new task within a project, click on Add Task at the bottom of your list or the top of your page.
A new blank line will appear at the bottom of your task list. Type in the task name and select the check mark icon. Once complete, your task will automatically show up in your task list, as well as in the Task Centre. You can then edit the details as needed.
Edit a Task
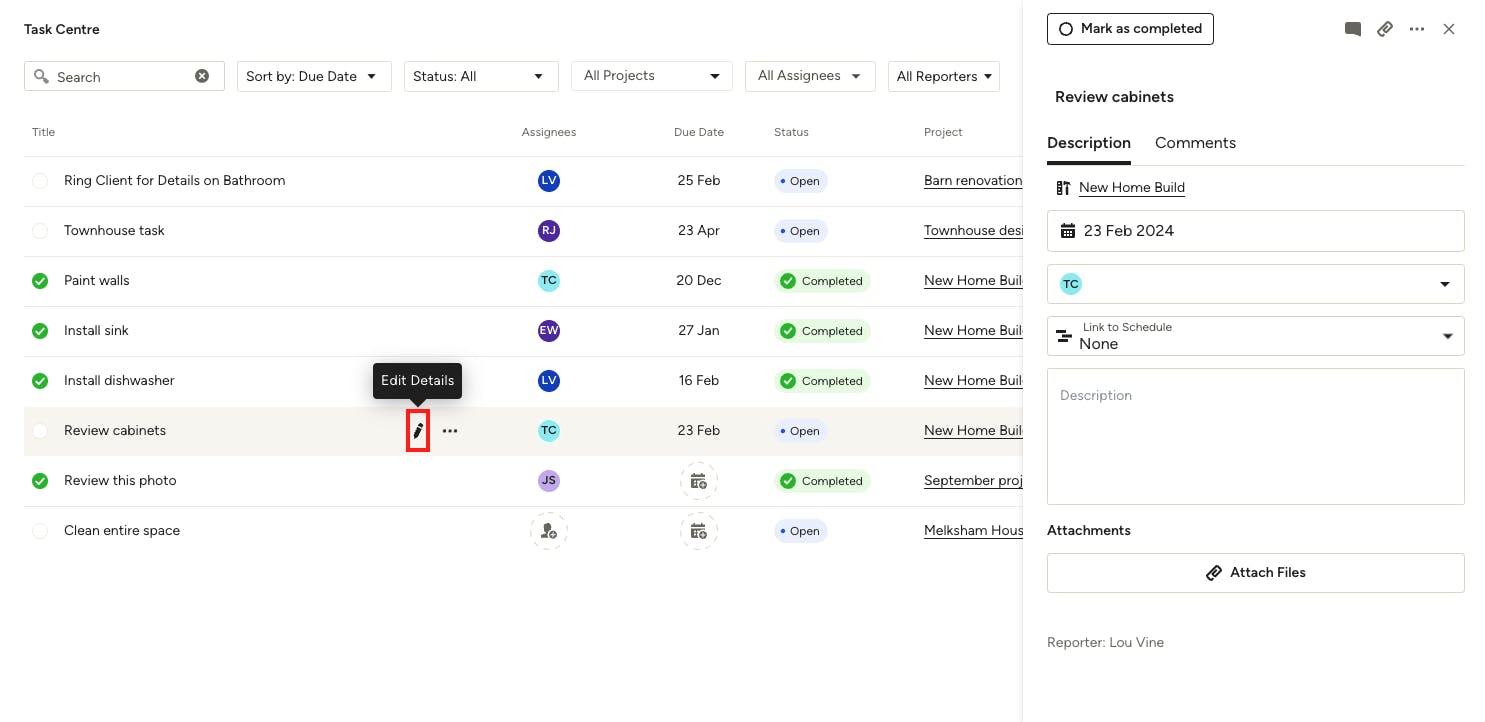
Once you create a task, you can easily edit the details by clicking the pencil icon next to that individual task.
A screen will pop up on the right side that will allow you to edit the task title, due date, description, link to your schedule and add attachments if needed.
Assign a Task
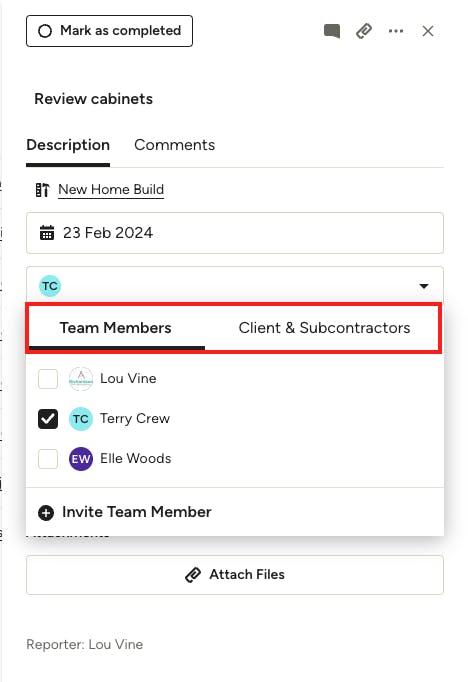
Within Edit mode, you can also assign tasks to a team member, subcontractor or client in the assignee dropdown. Select the relevant tab — Team Members or Clients & Subcontractors — then select from a list of existing people, or invite someone new at the bottom.
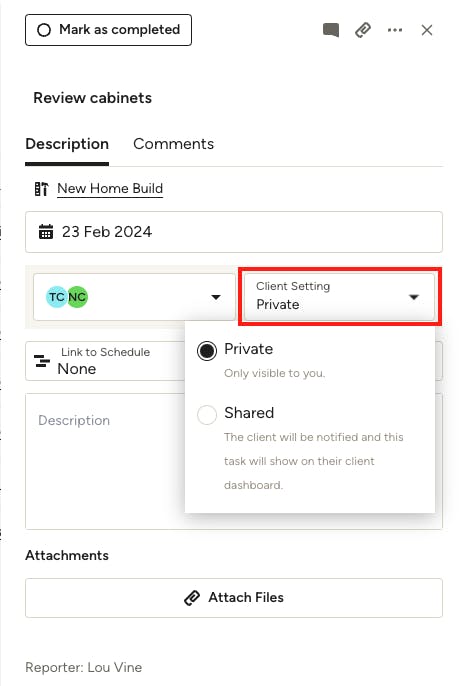
When you assign a task to a client, another dropdown will appear where you can set the task as a Private task or a Shared task. If set as Private, the client will not be able to view the task — it is only for you to see. If set as Shared, the client will be notified about the task and will be able to see it in the client dashboard.
If you create, edit or complete a task, the assignee will be notified through email (unless you decide to not share with the client). If a team member, subcontractor or client edits or completes the task, you will be notified.
If you would like to change task notifications, you can do this in the Notification Centre. Read this article to learn more: How to Manage Your Notifications
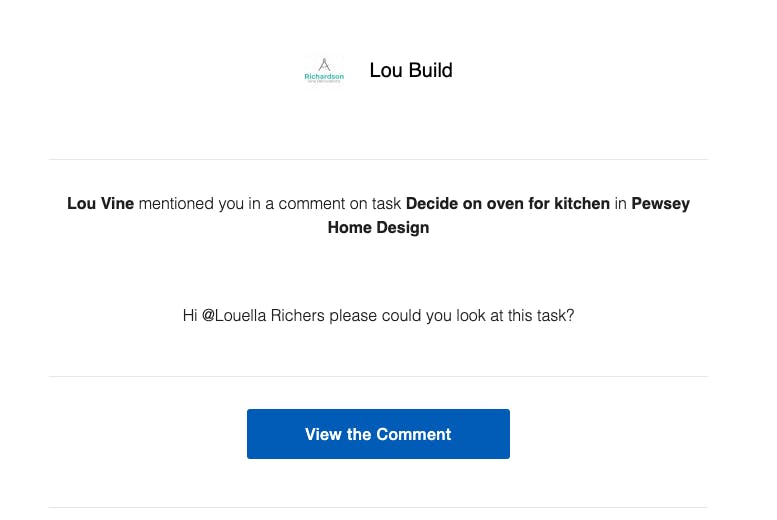
Here is an example email for a task assigned to a client.
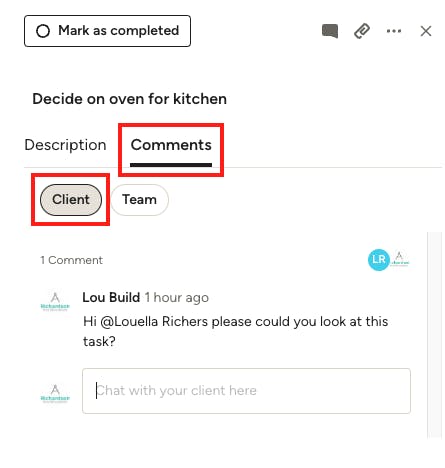
Add Comments to a Task
Within task details, you can also add comments for your client and/or team as needed. To add a comment, click the Comments tab or select the Comment icon. You can select to add a comment for your client or your team.
Type your comment in the text box and click save. Your client or team member will then be notified and can reply directly.
Please Note: For the comment to be visible, you need to assign the task to your client and make sure the task is shared on the client dashboard. For team members or subcontractors, you need to invite them to the project and assign the task to them.
Delete a Task
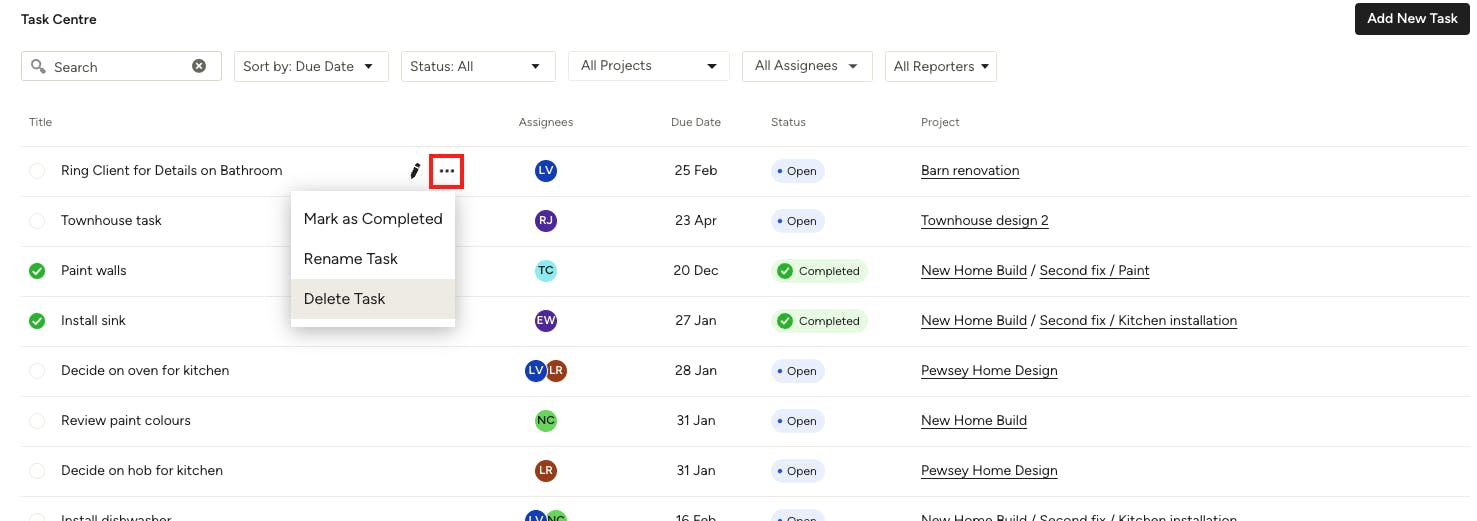
You can delete a task by clicking the three dots icon. Here, you can also rename a task or mark it as complete.
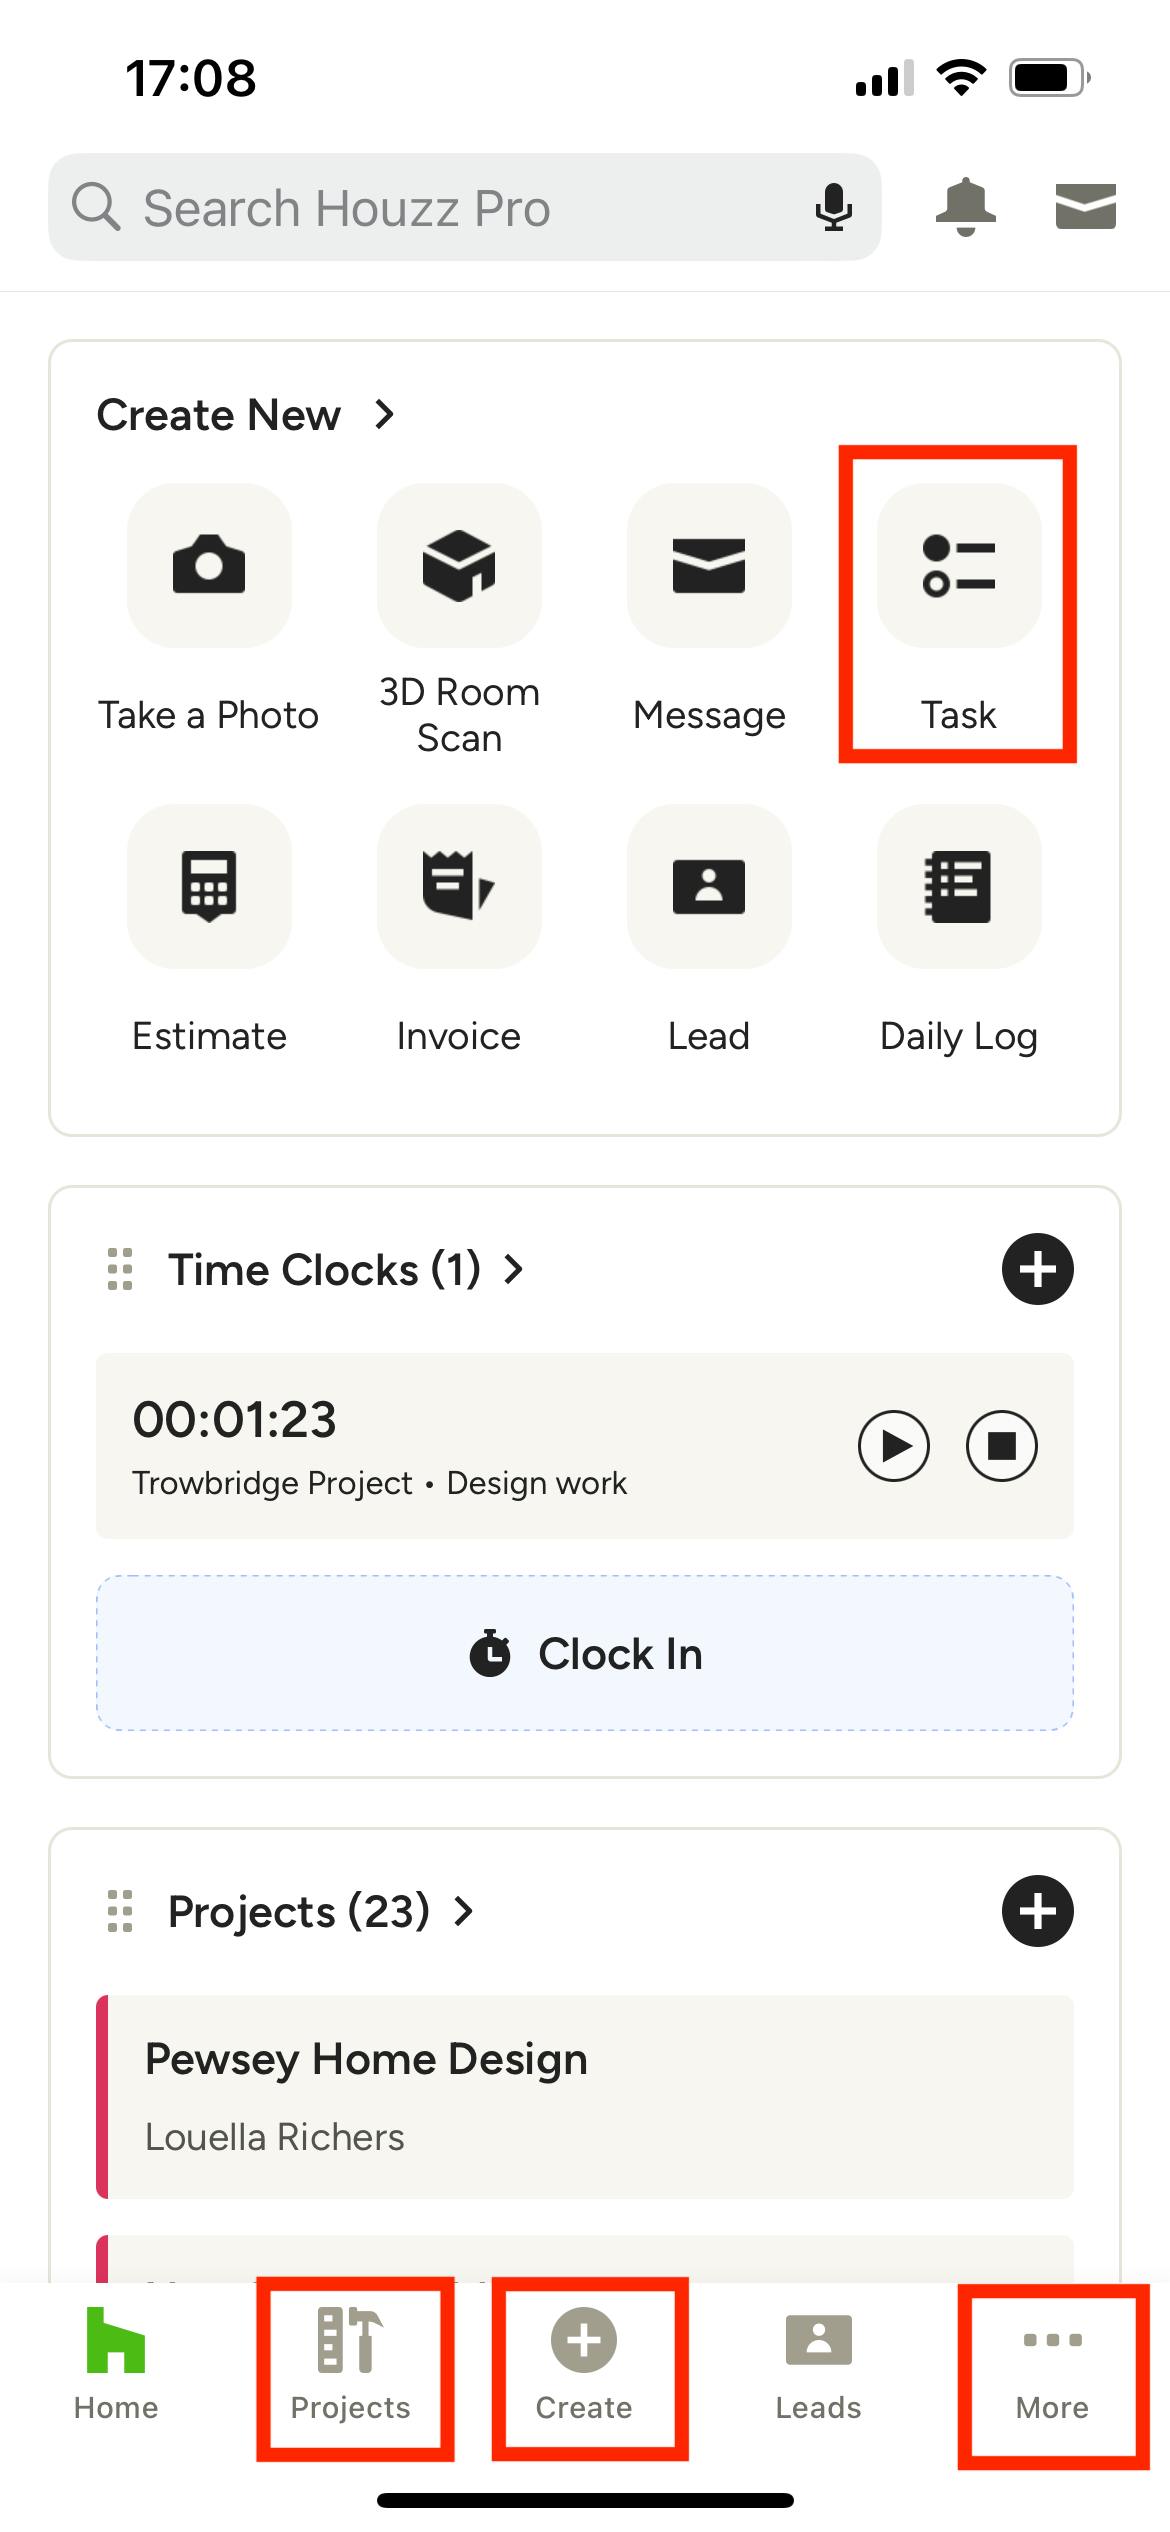
Tasks in the Houzz Pro App
In the Houzz Pro app, which is similar for both iOS and Android, you can access Tasks in multiple places:
1. Select the Task icon from the Create New section of the app homepage.
2. Select the Create icon from the bottom menu, and then find the Task icon from the list.
3. Select the More icon from the bottom menu, and then find Tasks from the list.
4. Select the Projects icon from the bottom menu. Select the relevant project, and scroll down to the Tasks section in the project overview.

Once you open your task, you can input the task details. Add the task name, assign to a specific project, set a due date, assign to a team member, subcontractor or client, link to schedule, provide a description, and add attachments if relevant. You can also mark a task as Done at the top.
The task will automatically save and will then show up in the Task Centre, as well as under tasks for that individual project.