How to Create and Apply Retainers and Credits
Houzz Pro makes it easy to handle your company finances, including the ability to create and apply retainers and credits.
Create a Retainer
Retainers allow you to receive advanced, upfront payment for your services and/or time. These payments can be added to invoices, proposals and estimates.
To create a retainer:
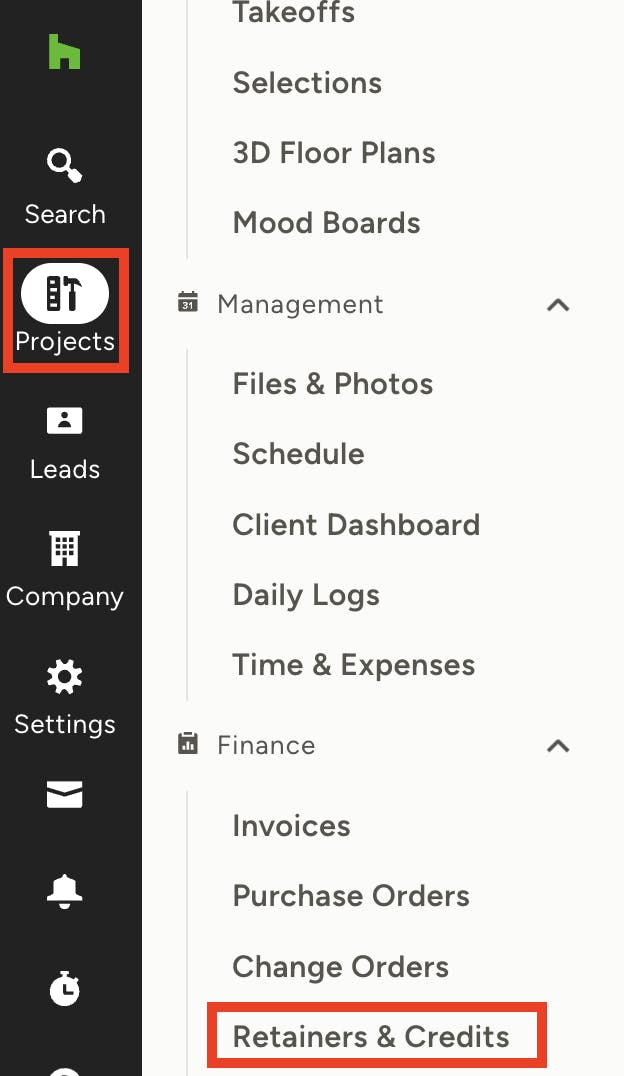
1. Go to the Projects icon in the left menu, and select the relevant project.
2. From the left menu within that project, select Retainers and Credits from the Finance section.
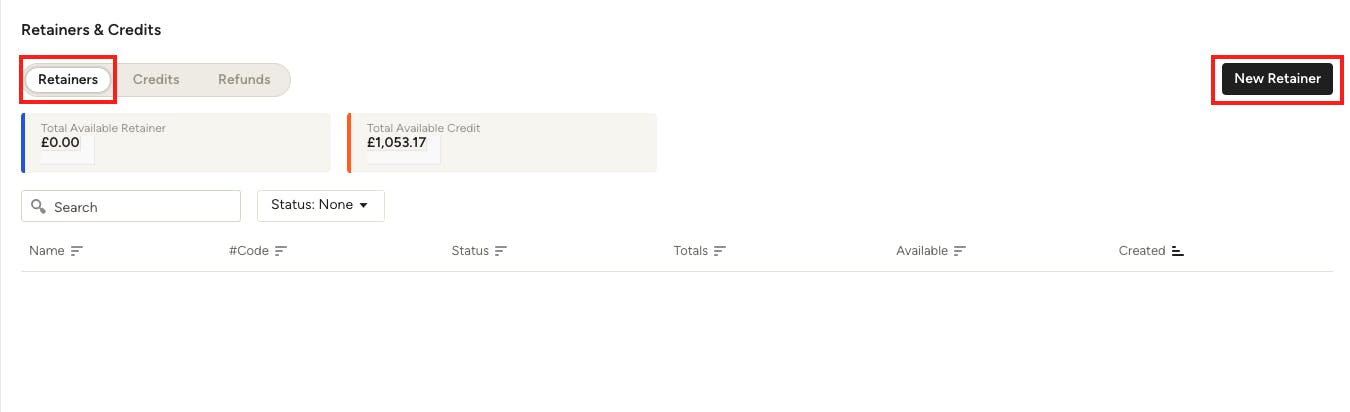
3. Make sure that Retainers is selected in the top menu. To create a new retainer, select New Retainer on the right.
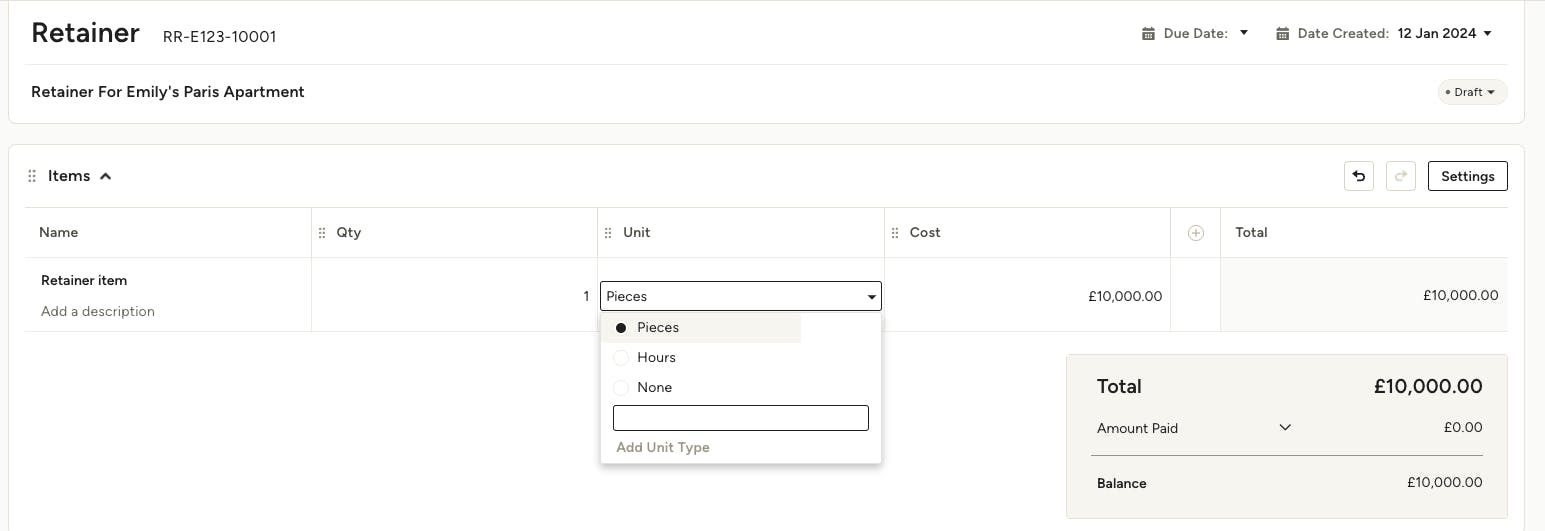
4. You will be able to input all the retainer information, including title, quantity, unit (hours, pieces, none or custom), and cost per quantity. The total will then display once complete.
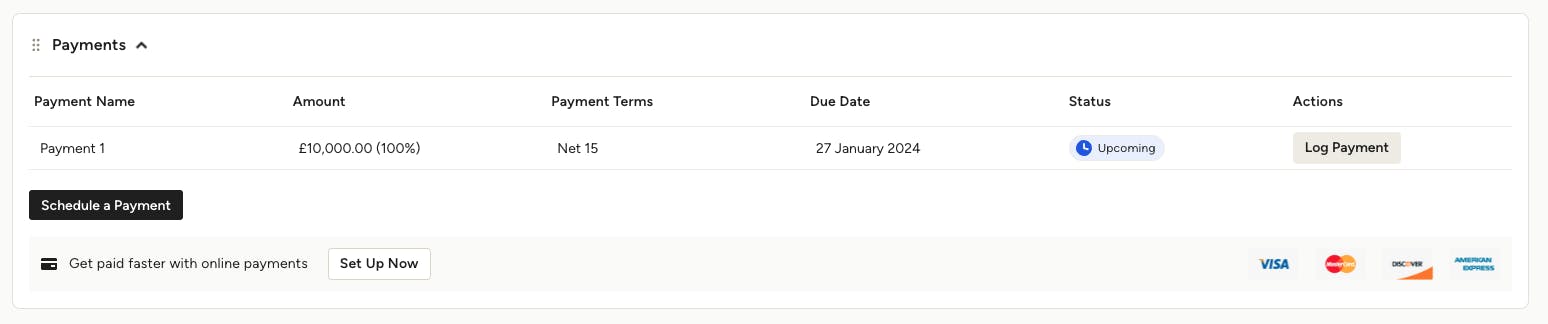
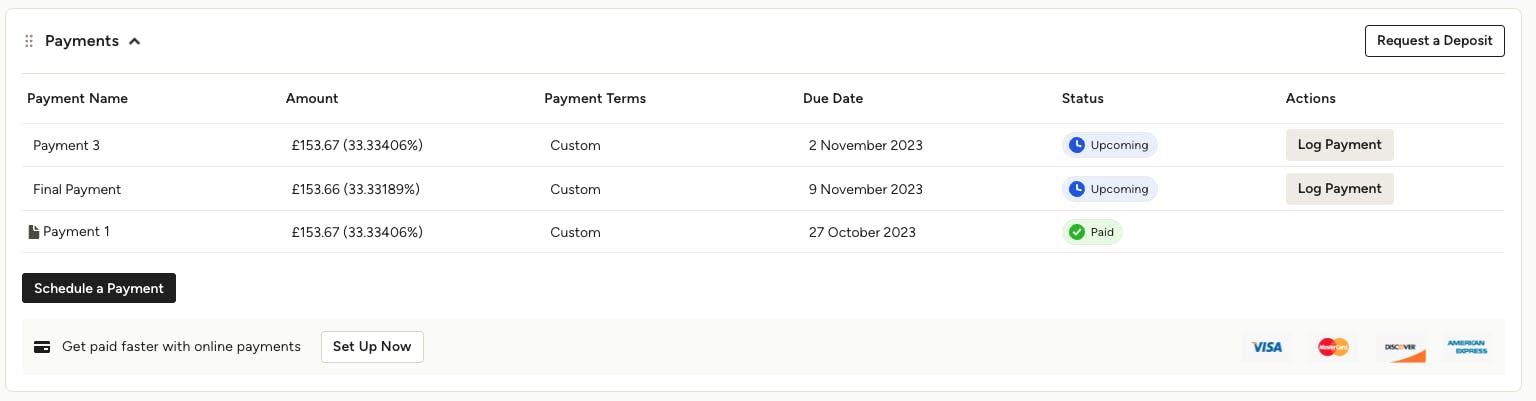
5. Underneath the retainer details, you can customise the payment schedule and log a payment when payment comes through. You can also split the retainer into multiple scheduled payments if needed.
(Online payments are not available in Ireland)
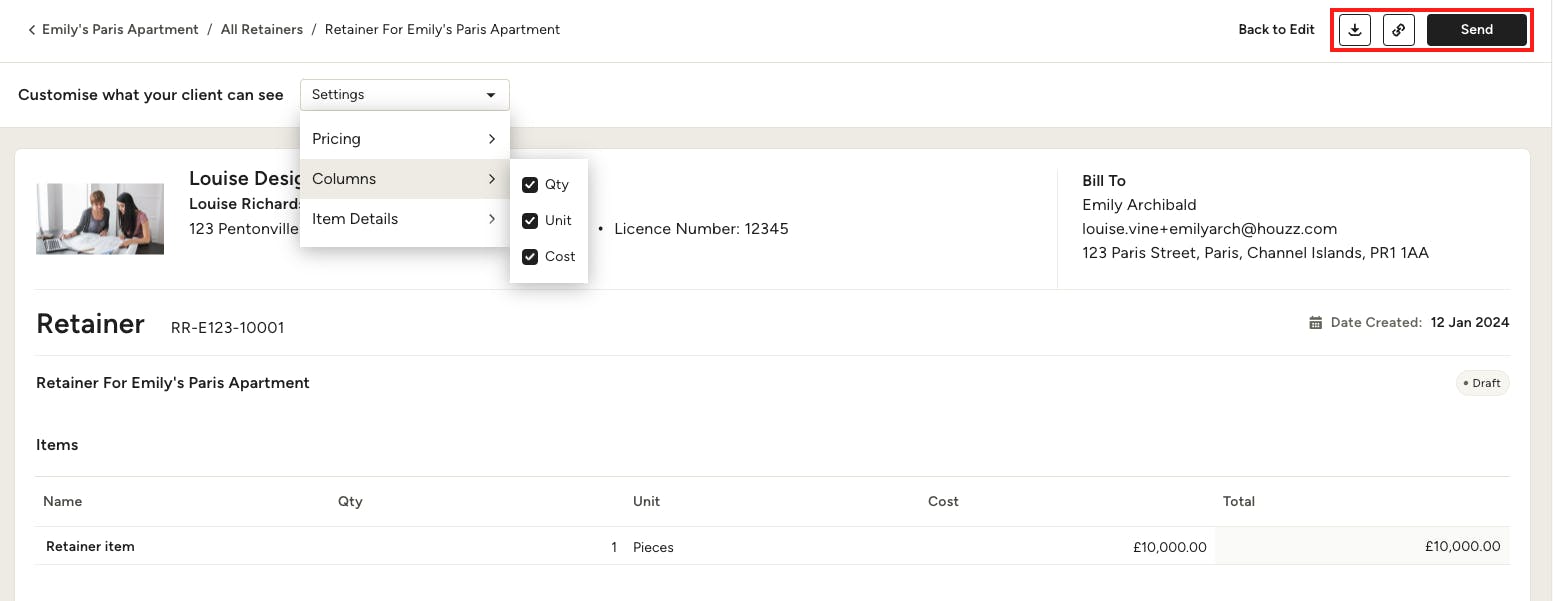
6. Once the retainer is complete, you can easily Preview and Share with your client.
To preview before sending, select the Preview button at the top of your document edit screen. From here, you can make any adjustments to what your client sees — you can remove item pricing, columns or item description details.
7. Once you are ready to share, you can Download as PDF, copy the link, or click Send on either Preview mode or Edit mode of your document.
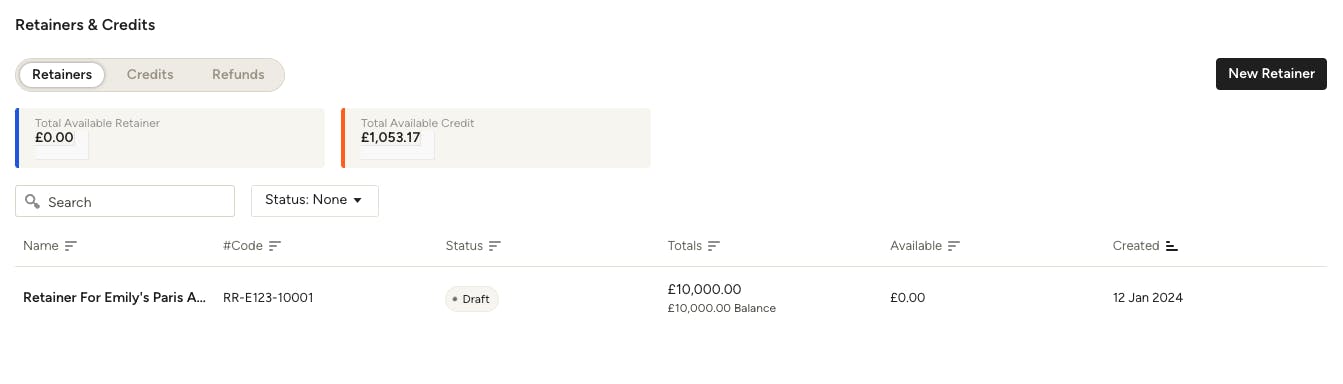
8. Your new retainer will now show on the Retainers and Credits page for your project. You will be able to search and sort all previous retainers and credits.
From this list, you can also edit an existing retainer, but keep in mind — once a retainer is paid or partially paid, it cannot be edited.
Apply a Retainer
Once you have created a retainer and received payment, you can apply it to a scheduled payment on your invoice, estimate or proposal for that project.
To start:
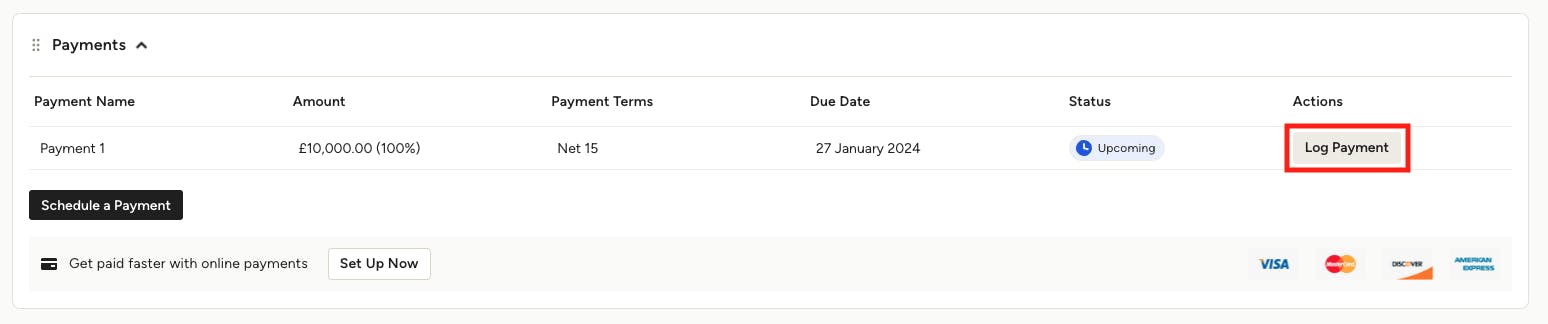
1. Your retainer needs to be paid before you apply it to a document. You will need to manually log the payment on the retainer page.
To do this, click the Log Payment button next to the scheduled payment and input the payment details. Here, you can select whether you want to send your client a receipt. Once you submit, the retainer will show as paid.
(Online payments are not available in Ireland)
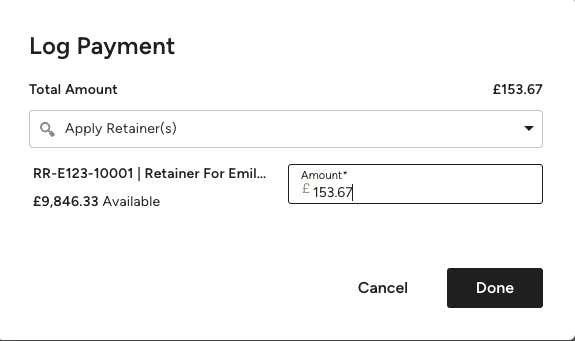
2. Once the retainer is logged as paid, you will be able to apply it to a payment listed on your invoice, estimate or proposal for that project only.
Open up the relevant document, and go to the scheduled payment section. Click Log Payment. You will then be able to select Apply Retainer from the dropdown. You will be able to use the full amount, or a partial amount and save the rest for another scheduled payment.
Be sure to click Done once complete.
3. You will then see a new payment listed that shows the amount you specified from the retainer. The initial payment amount will also update with the new amount due.
Create a Credit
Sometimes project costs are less than estimated, items get returned or clients change their mind. If project costs have decreased and you have excess money from a client, you can create a credit. Creating a credit means your client will have remaining money available to use on the project.
You can create a credit on an invoice, proposal or estimate that has already been marked as paid.
Please Note: You can't create a credit on an issued invoice; to do this, you will need to void the invoice and duplicate to create a new version for editing.
To create a credit:
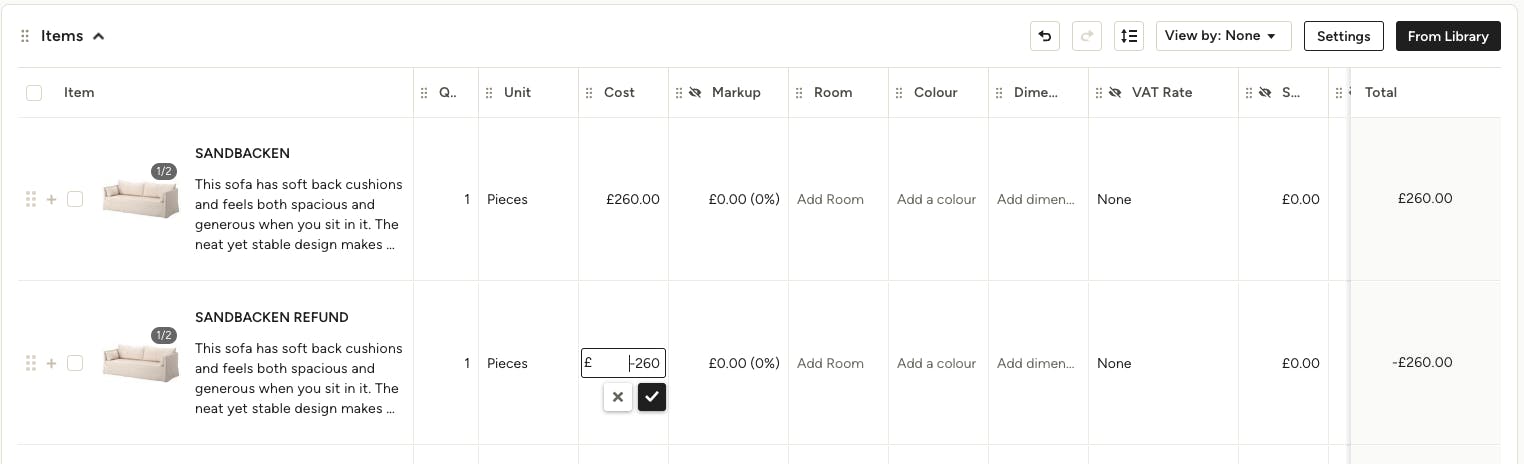
1. Open up the relevant document. Add a new line item under the product or service you need to credit. In the new line item, input the same product or service information — you can also change the wording in the item description to Credit or Refund for clarity.
2. Add a negative cost amount for this new line item. In a proposal, you will add the negative amount in the cost column. In an estimate, you will add the negative amount to the materials and/or labour column(s). This will create a negative balance on the document.
Please ensure you adjust your VAT or shipping costs accordingly as well.
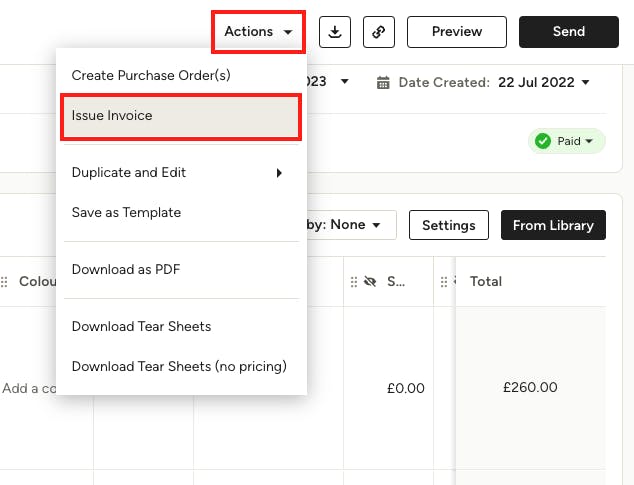
3. Once complete, click on Actions in the top right and click Issue Invoice.
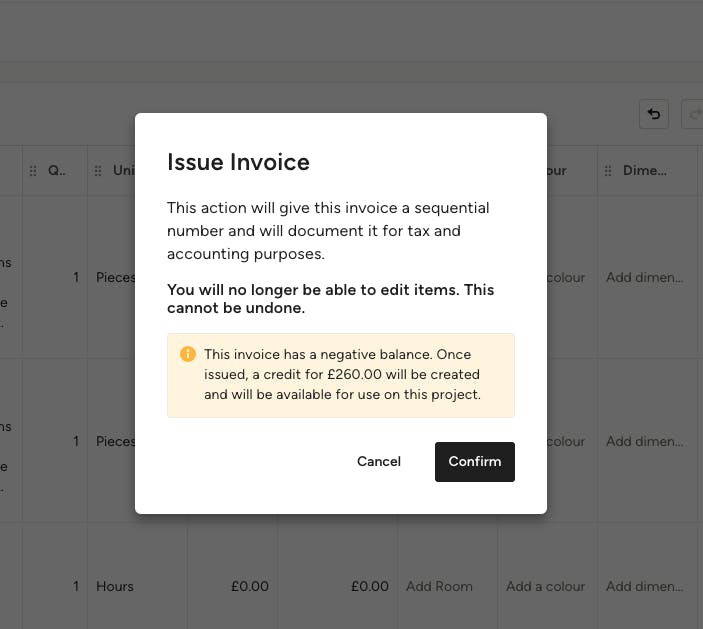
4. This action will give this invoice a sequential number and will document it for tax and accounting purposes. Once issued, a credit for the negative balance will be created and will be available for use on the project.
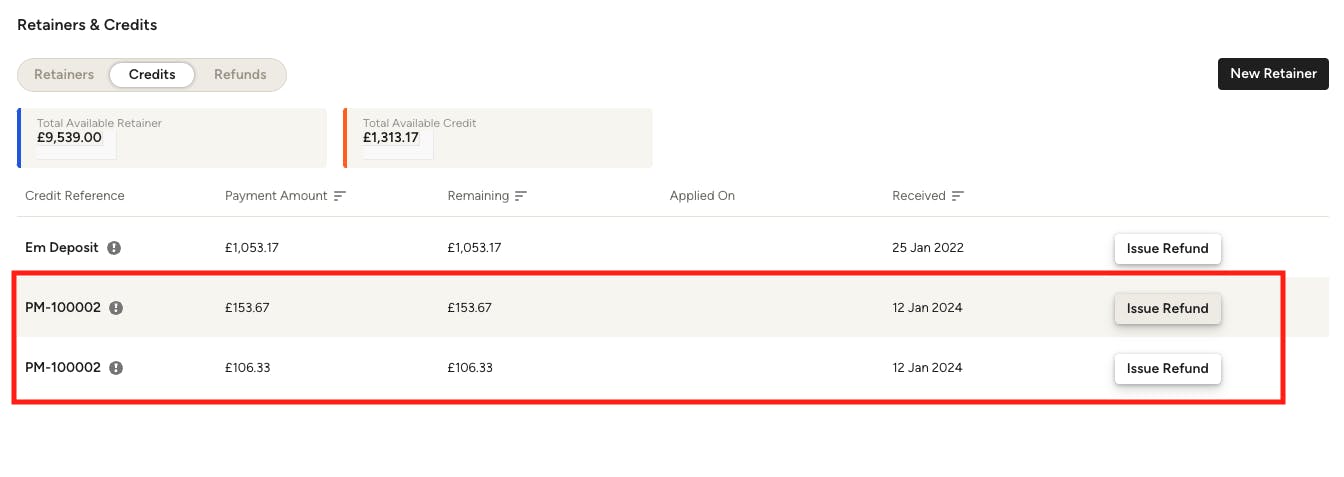
5. To see the credit, go back to the home page of the project and click Retainers and Credits in the left-hand menu. Click on the Credits tab at the top, and you’ll be able to see the total available credit balance and what document it was created from. If there were initially multiple payments for the document and the credit is more than one single payment, the credit will appear split out into those payments.