How to Create a Mood Board

Use Mood Boards to showcase your concept and plans for a project, and easily share them with your client. You can add your Mood Boards to Selections Boards to present your vision all in one place.
Create a New Mood Board
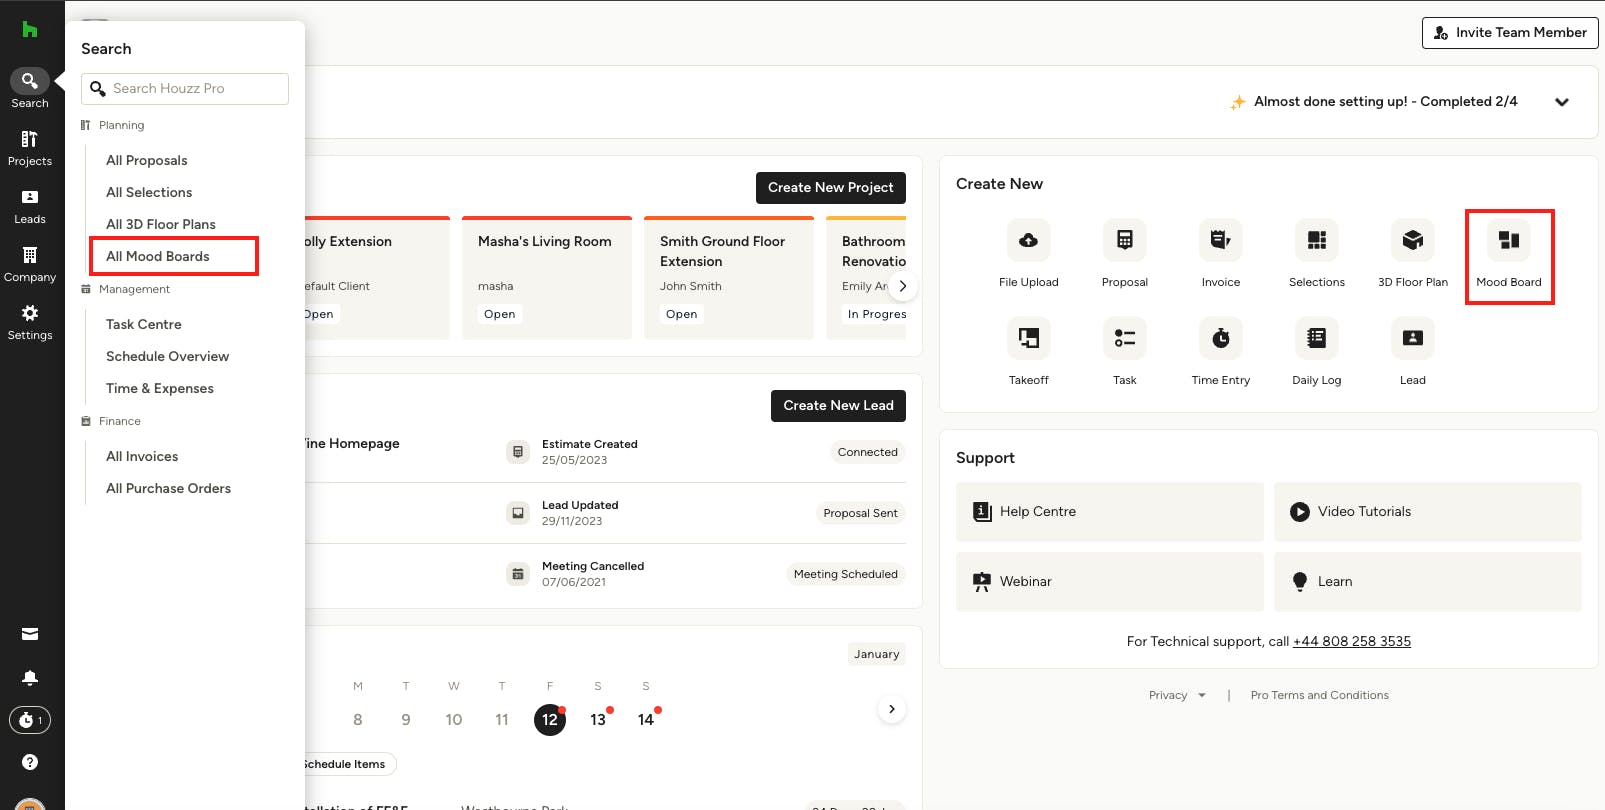
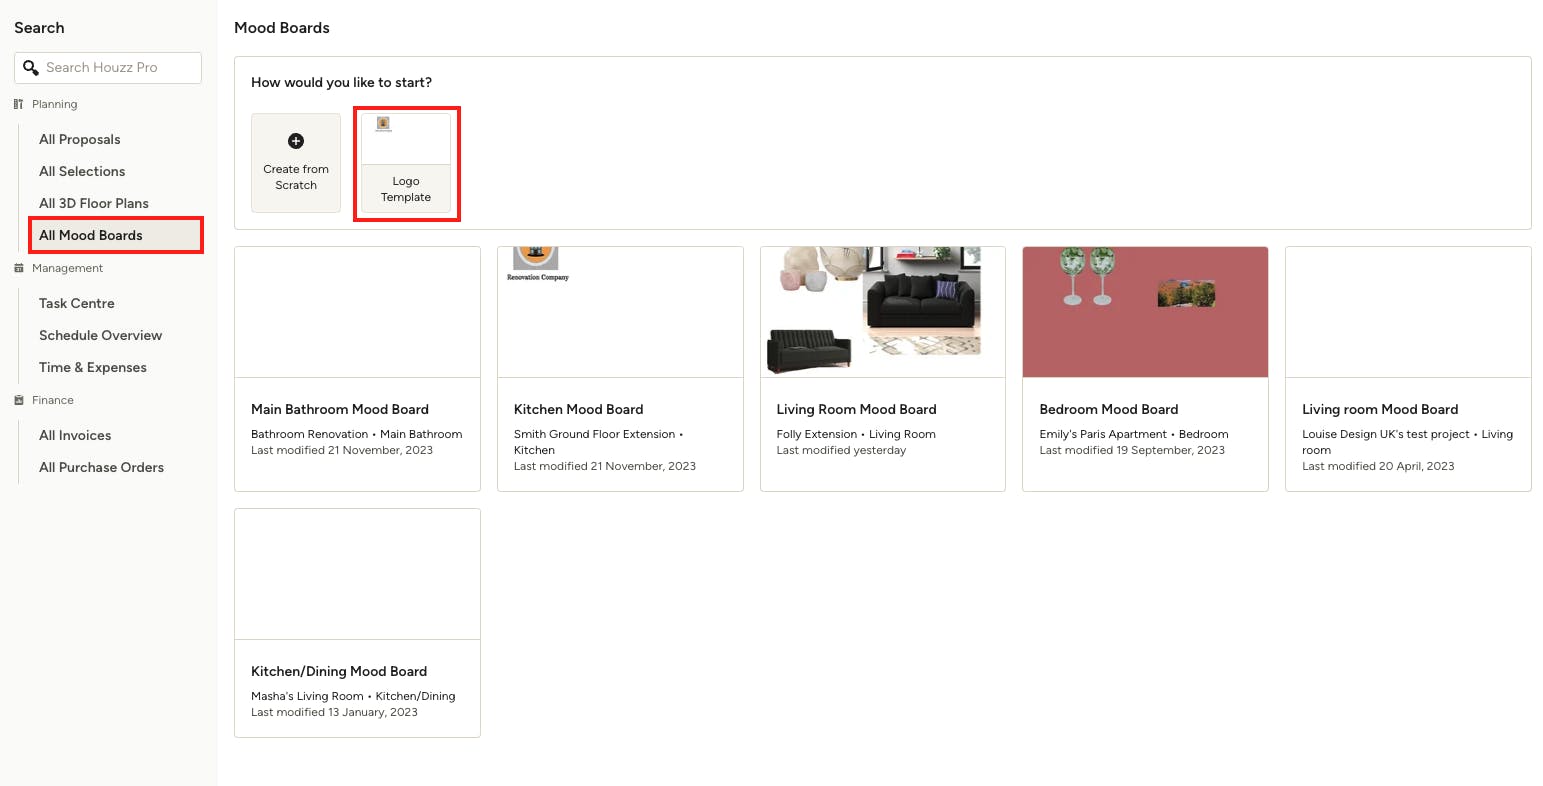
There are a few ways to create a new Mood Board. One is to click on All Mood Boards under the Planning section in Search menu in the left navigation. From there you can choose Create From Scratch, assign it to the correct project and start designing!
You can also access this page by clicking on the Mood Board icon in the Create New section of your Houzz Pro homepage.
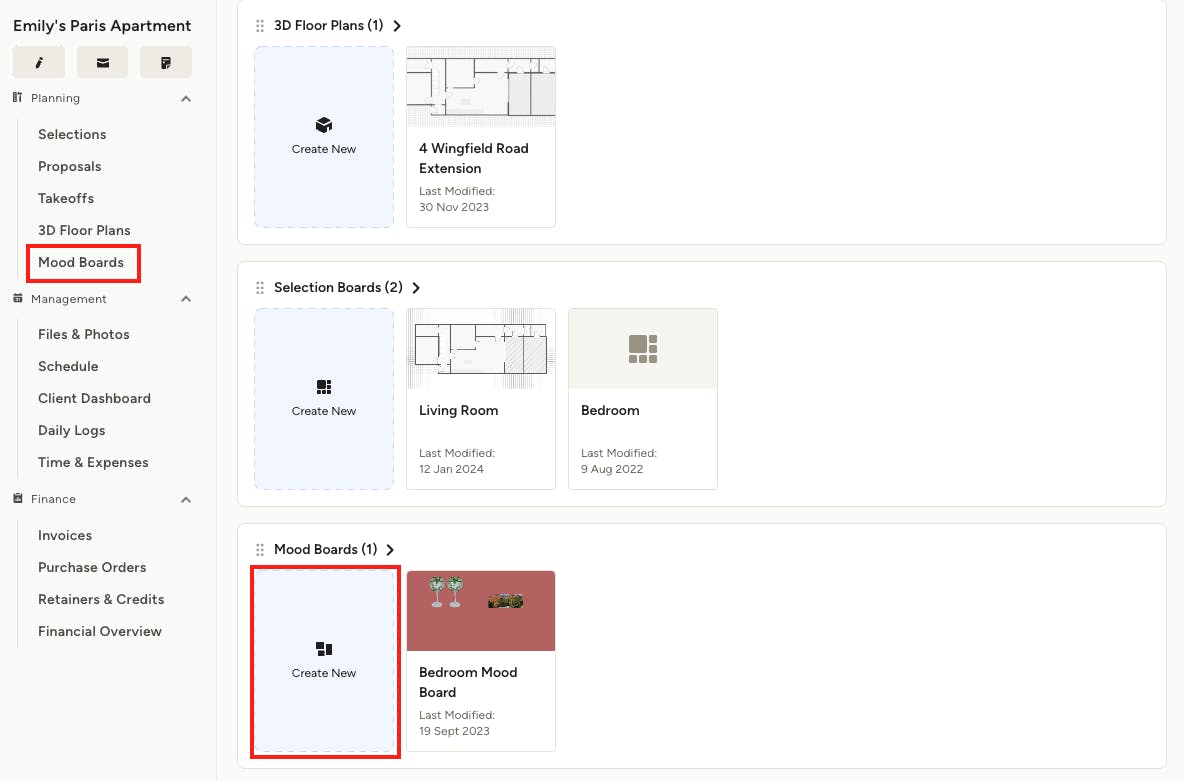
To create a new Mood Board directly from any project overview page, either select Mood Boards under the Planning section on the left, or click Create New from the Mood Boards tile on your project page.
Creating Mood Boards from a Template
Once you have created one or more templates, you can use them as a starting point for creating a new Mood Board. All your templates are accessible in your All Mood Boards section.
Next to the + Create from Scratch tile you will see all your templates listed. Just pick the one you want to use and everything saved in the template will be loaded. From there you can make any desired edits and proceed with your design.
For more information about creating and using templates, see Creating, Editing and Using Templates in Your Houzz Pro Mood Boards.

Adding Items to a Mood Board
Once you've created your new Mood Board, adding items is a breeze. You have two methods for adding items to your Mood Board:
- Click: Click on an item in the side panel for it to be added to the centre of your Mood Board.
- Click, drag, and drop: Take control by clicking and dragging an item from the side panel to a specific position on your Mood Board. Drop it where you want it to be for precise placement.
You can add items from your project items (saved with the Clipper tool or saved manually), your library, source them from Houzz's library and add any images, 3D Floor Plans, background colour or paint swatches from our partnerships with Dulux TRADE or Benjamin Moore, drawings, lines, measurements, text, and more. Here's a breakdown of all the possibilities you'll find in right side panel:
Project Items: This section is automatically organised for you. Whenever you use the Houzz Pro Clipper and assign a clipped product to a specific project, it will appear here. The same applies to products that you manually upload in your Houzz Pro library. Once you assign them to a project, they will be displayed in the Project Items section of your Mood Board. From there, you can easily drag and drop the items onto your Board.
Library: Here, you can access all the products and services saved within your Houzz Pro Library. With the help of the search bar, you can quickly find anything you're looking for.
Source: Make use of the Houzz catalogue to easily find the right products for your clients. You have a wide selection of furniture, lighting, and much more at your disposal.
Ideabooks: Your Ideabooks are your vision, thoughts, reflection and inspiring home designs that you saved in order to share with your clients. Add any image that you have saved to your Houzz Ideabooks to your Mood Board through the Ideabooks tab.
Images: Easily upload image files from your computer onto your Mood Board, simply by clicking Images > Add New and selecting the file(s) you want to add. You can save time by selecting multiple images to upload at once.
Paint Colours: Color swatches are a great addition to any Mood Board to visualise how different colours in a space will fit together. Simply pick a colour swatch from our partnerships with Dulux TRADE or Benjamin Moore from the Paint Colours tab.
3D Floor Plans: Find all the floor plans you have created for your clients and add them to your Mood Board.

Using Your Mood Boards Toolbar
Once you've mastered adding items to your mood board, it's time to really make things professional by utilising the toolbar at the top to customise the board. Here is a deep dive into everything you can do with the toolbar:
Adding and editing text, changing text colour and size
When pressing the text icon, you’ll be able to add/edit text as well as choose your desired font size and colour.

Moving things on your Mood Board
To easily move around the different elements on your Mood Board you’ll need to use the Selector tool.

Using the Pan tool
By selecting the hand icon, you can pan to specific areas of your Mood Board without selecting or moving any elements. This is particularly handy when you are viewing the Mood Board zoomed in.
Pan shortcuts (Mac and Windows):
Pan Mode: Space (keep pushed)
Pan vertically: Scroll
Pan horizontally: Shift-scroll

Zooming in and out
Want to take a closer look at a certain element? Use the magnifying glass icons to zoom in or out as needed. When you want to reset to the default view, simply click the Zoom to Centre icon.
Zooming shortcuts (Mac):
Zoom in / out: Control-Command-scroll
Zoom in: Command-+
Zoom out: Command--
Zoom to fit: Command-0
Zooming shortcuts (Windows):
Zoom in / out: Ctrl-Alt-scroll
Zoom in: Ctrl-+
Zoom out: Ctrl--
Zoom to fit: Ctrl-0

Drawing on the Mood Board
If you want to draw on your Mood Board all you have to do is press the Pencil Icon. Once you do, you’ll be able to draw anything you want. You’ll also be able to change the colour and size of your drawing.
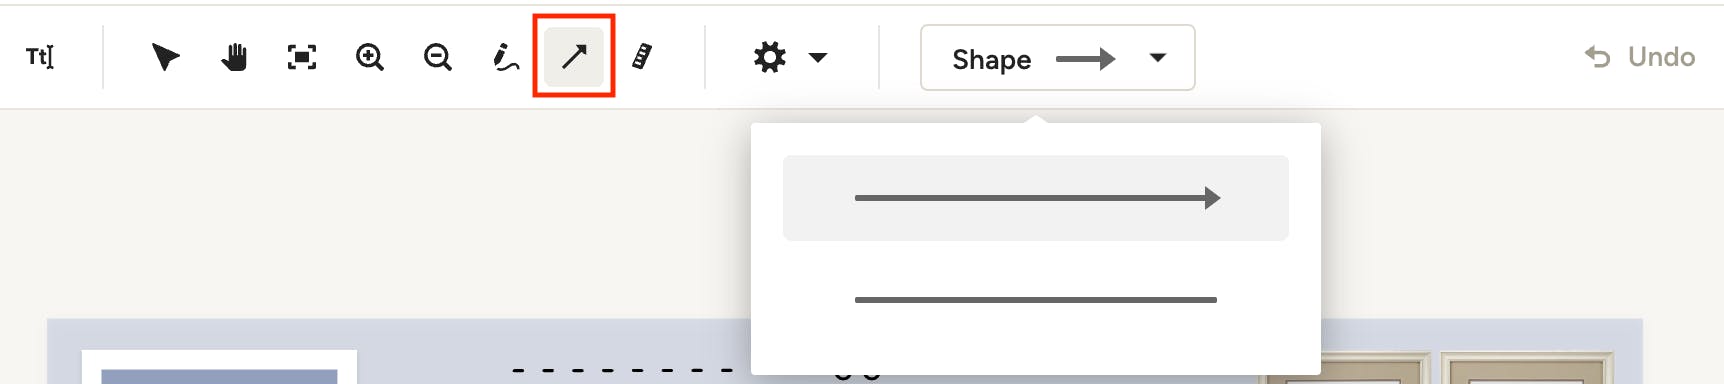
Adding lines and shapes
If you want to add any lines and shapes to your Mood Board click in the arrow icon. You’ll be able to easily draw straight lines and arrows. Simply click and drag to create your line, and once you're done you'll see colour options up in the toolbar to adjust accordingly.

Adding product measurements
You can show measurements on an item or space by clicking on the ruler icon. Once you click and drag to add the measurement, you'll be able to add the exact dimensions in the screen that pops up. You’ll then be able to customise the colour in the top toolbar.

Background removal settings
By default, any image added to your mood board will automatically have the background removed. You can chose to turn off the automatic background removal default by deselecting the checkbox next to Automatically Remove Background Image, found under the Settings icon.

Set background colour and board size
Control the look and size of your mood board with the Background and Size settings. You can set custom colours, use a colour picker to match an item in the board, and adjust transparency. Set the size to match your preferences for digital or print presentations.
Pro Tip: Use these keyboard shortcuts to quickly activate certain tools in the toolbar!
Editing Images in a Mood Board
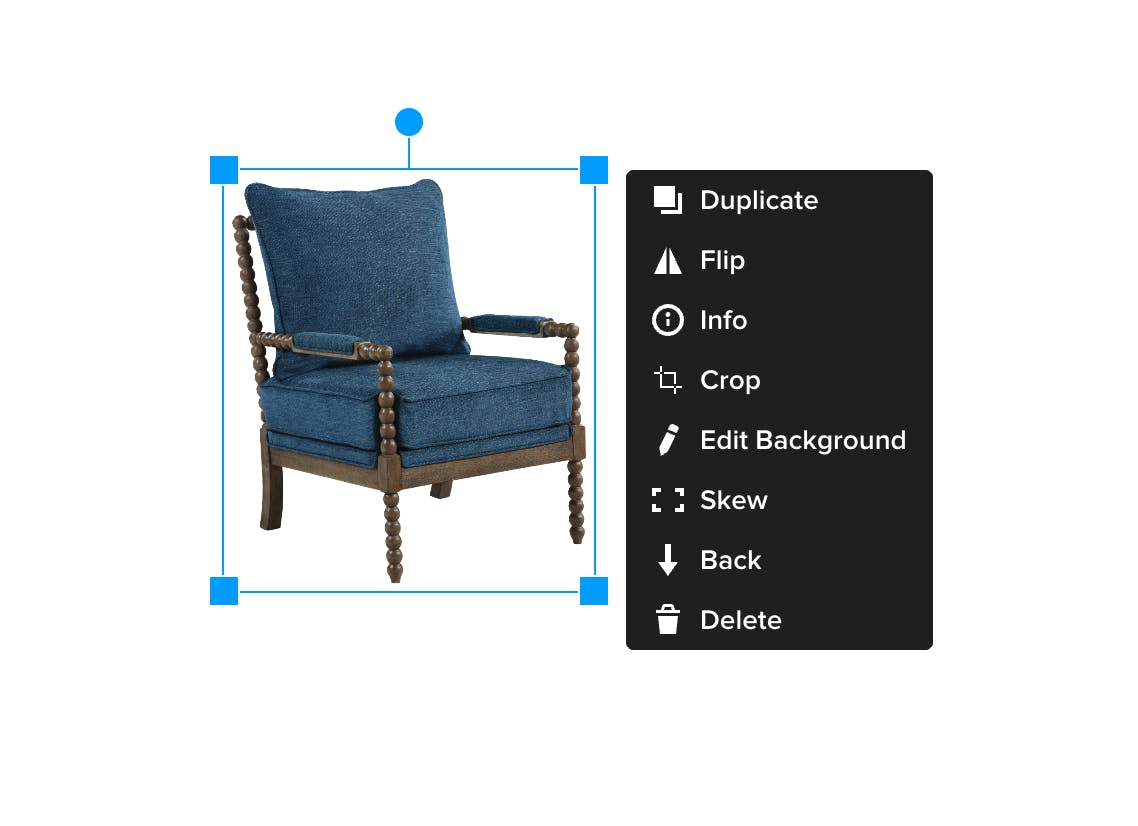
When you click on an item in the Mood Board, you’ll see options to duplicate, flip, crop, edit the background, skew, move it to the back or front of other items, and delete it. Check out the breakdown below to learn about all the different tools you can use to perfect your Mood Board images.
When you add a product image to your Mood Board you will notice a black menu appear next to your image. This menu provides you with multiple options for editing various elements of your image.

Duplicating an image
The first option you have is to duplicate the image. Let’s say you want to showcase 2 matching chairs, you can simply click Duplicate to add the exact same image to your Mood Board.
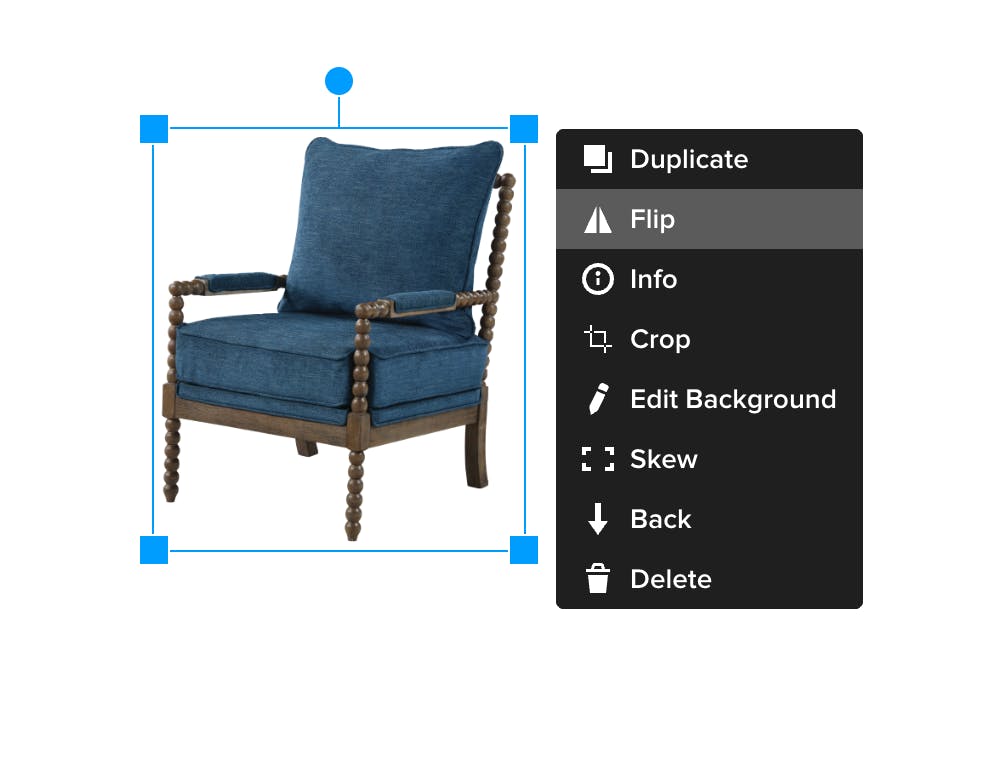
Flipping an image
Click on the Flip option to flip the product if you need to position it so that it's facing the opposite direction.
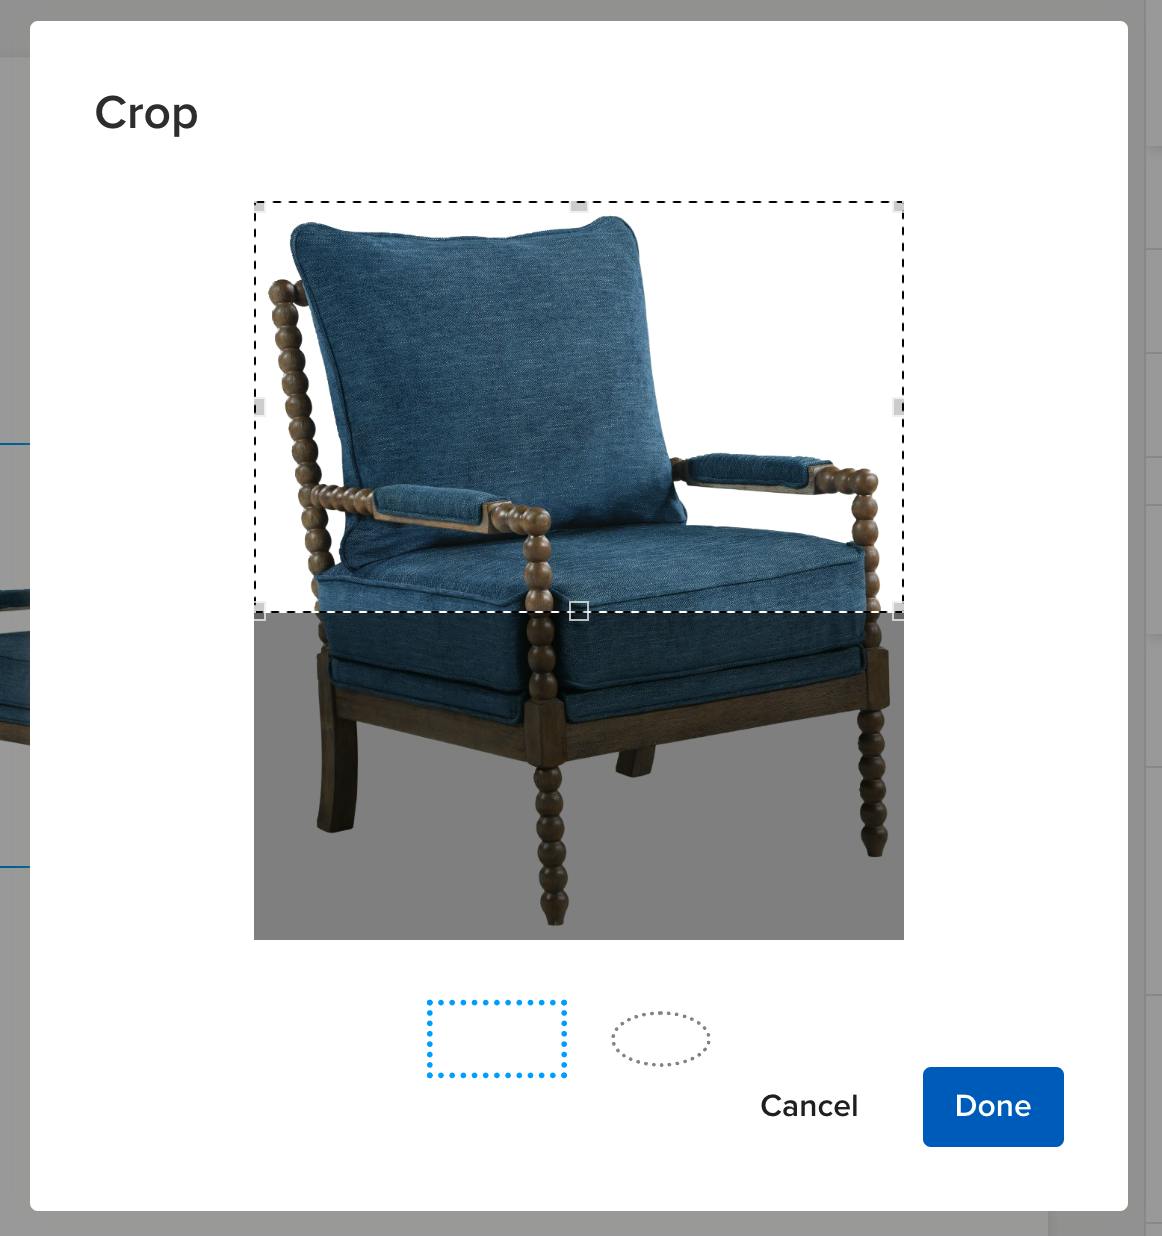
Cropping an image
Select the image you want to crop and click on the Crop icon. A pop-up will open with two different cropping options — circular or square. Once you achieve your desired crop, press Done to see the result. Want to adjust the crop? Click Crop again to make changes; the original product is still available in this view.
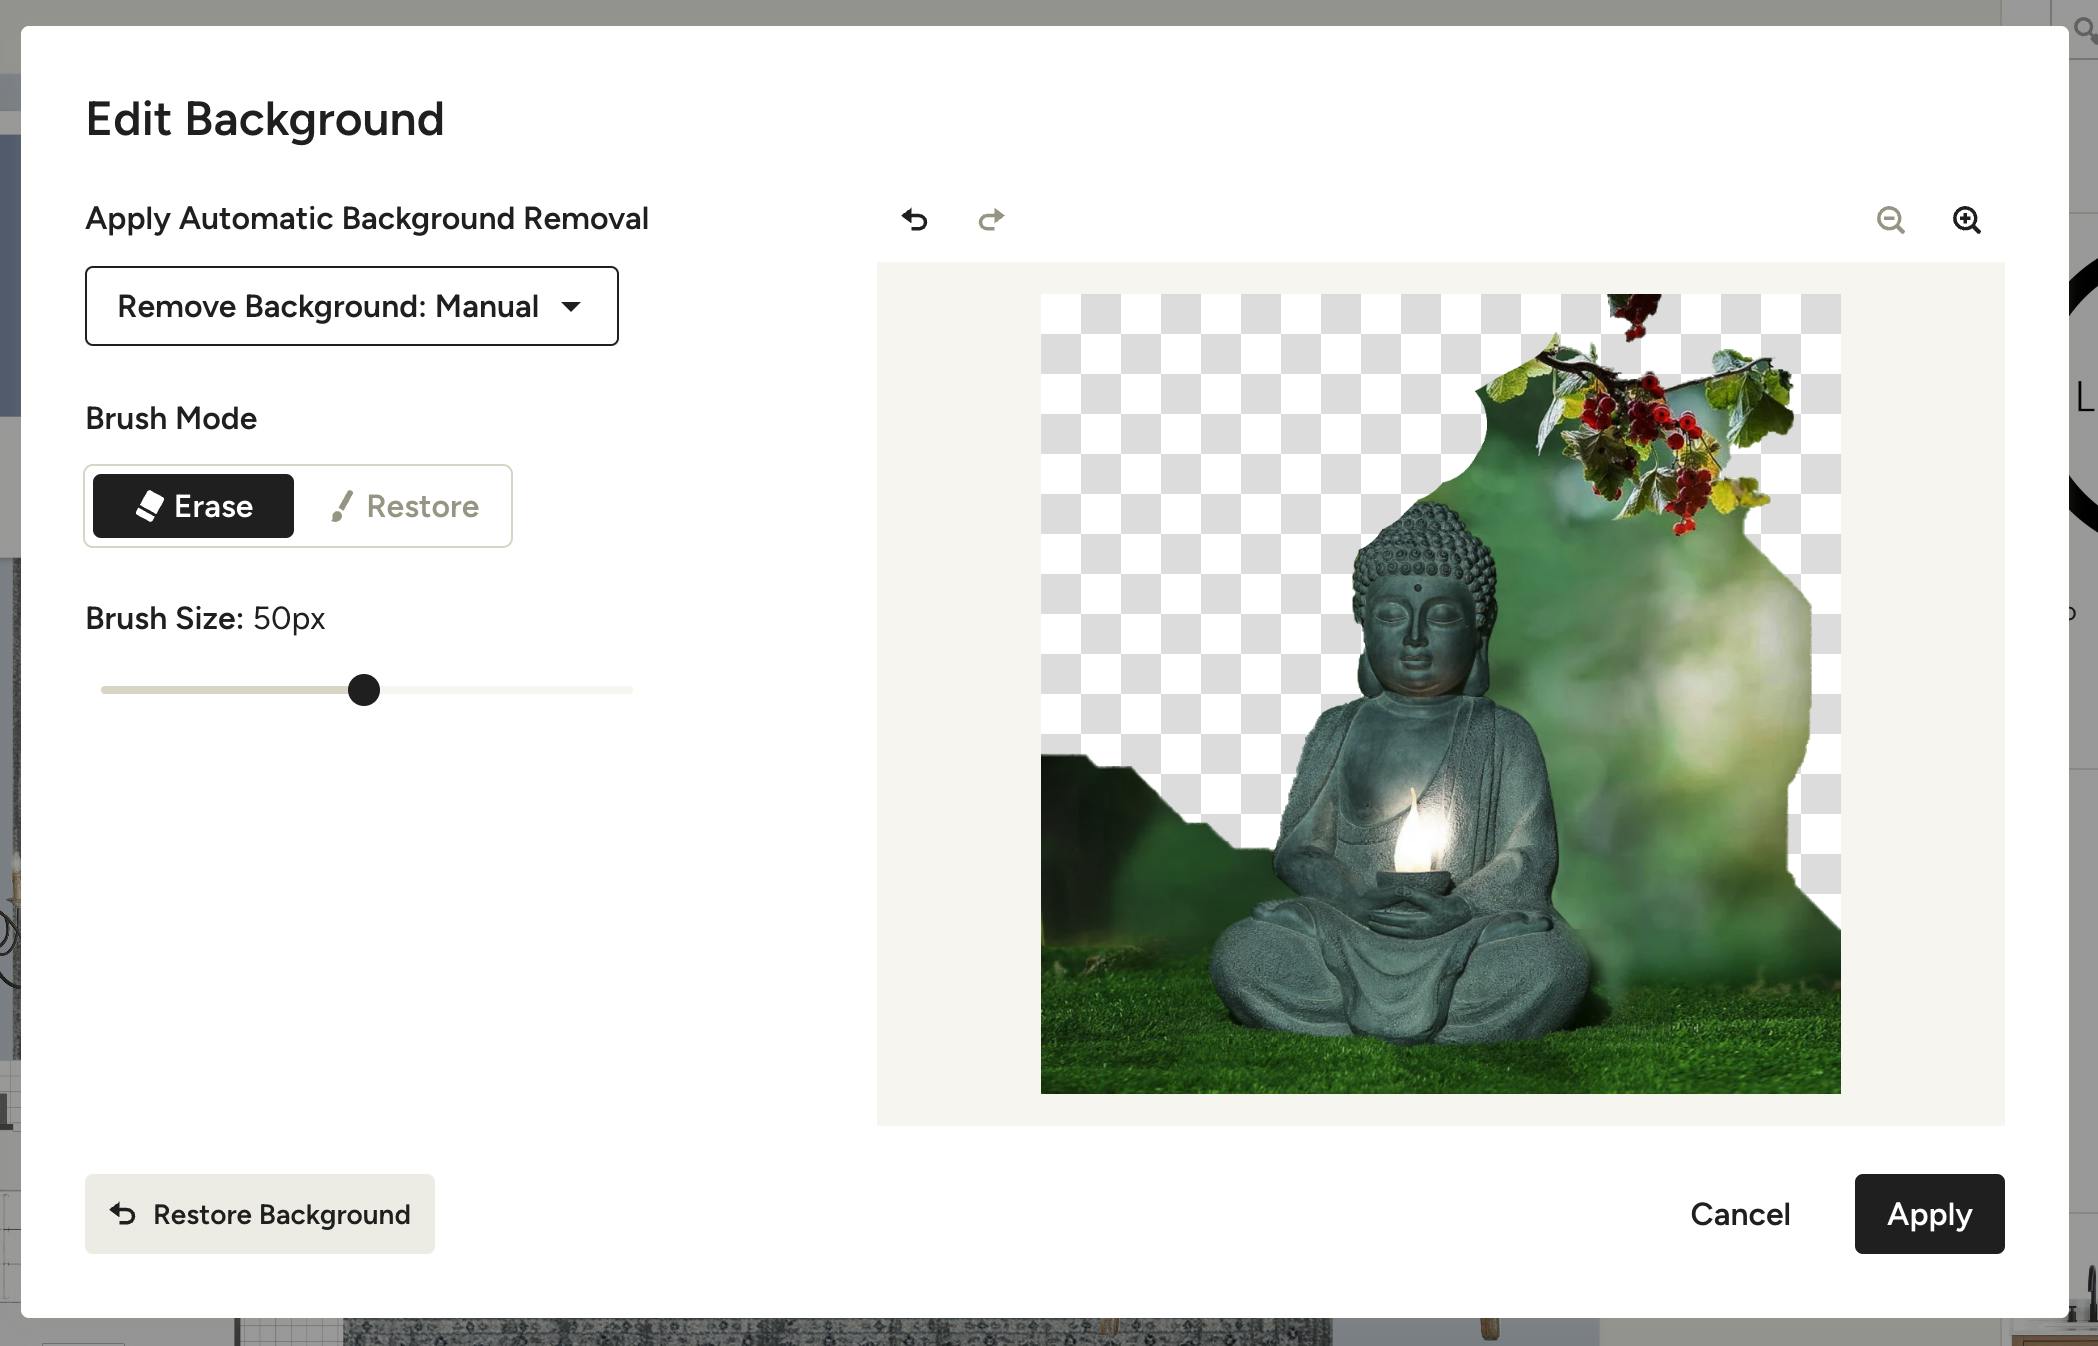
Editing the background
When adding an image that has a background, you have the option to remove that background. To do so, simply click on Edit Background. You can choose from three different background removal methods, including AI Powered, Basic and Manual. For more details on this tool, see How to Remove the Background on Mood Board Items.

Skewing an image
Want to show some perspective in your Mood Board or fix a distorted image? Use the Skew option to adjust the composition of any item. Once you select Skew, you can adjust the product but clicking and dragging the blue dots until you achieve your desired result. Click OK to save the result or Cancel to restore the original.
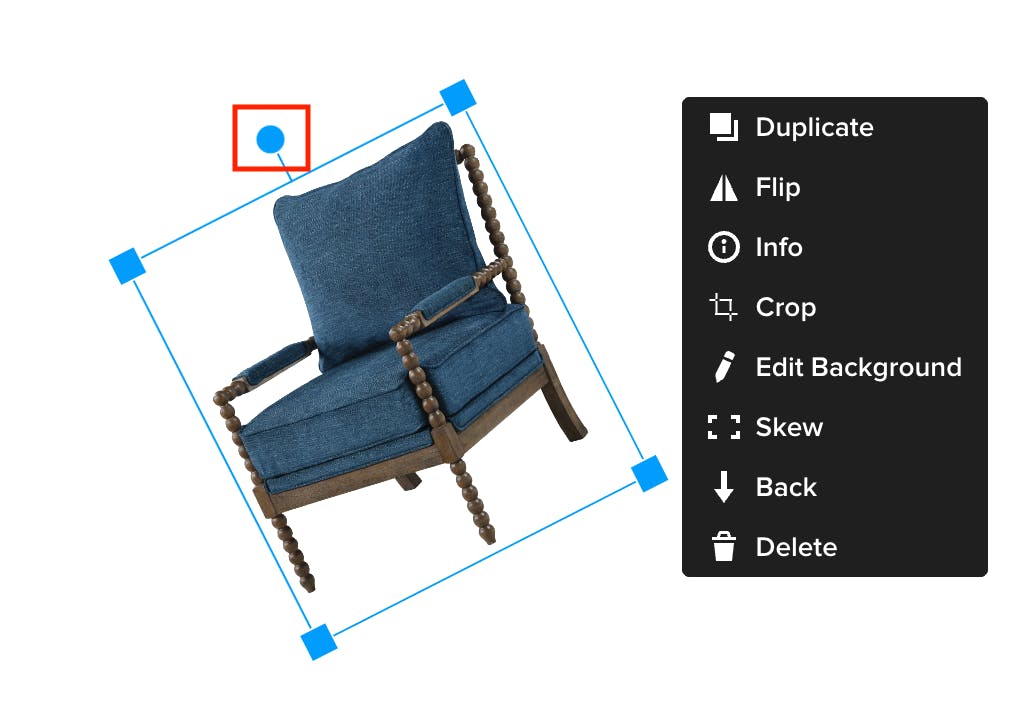
Positioning your images
You can position/layer your product images in front of or behind one another. If you want your product to be brought to the front press “Front”; if you want it to be moved behind other items, press “Back”.
You can also rotate your images so that they are positioned to your liking. You do this by clicking on the blue dot at the top of the image and moving the image until you’ve reached your desired position for that image.

Sharing a Mood Board with Clients
When you’re done, share your mood board online with your client or print it for a physical copy.
Print or Download as PDF
To print a physical copy of your mood board, click the Print/PDF button in the top right of the page and follow the prompts on your computer's print dialogue.
To save as a PDF, follow the same steps but select Save as PDF as the destination. Once your PDF is saved you can easily send it as an attachment to your client via email, or print directly from the PDF.
Share Link from Houzz Pro
To share a view-only link to your mood board, click Share in the top right of the page. Fill in the client's email address(es) and customise the message you want to send with it. Press Send and your recipient will receive your message along with a link to view the mood board (they will not be able to make any edits).