17 Designer Tips for a First-Class Kitchen
Get ideas for camouflaging your outlets, adding task lighting and avoiding common kitchen annoyances
Barbra Bright
19 August 2018
Houzz Contributor. San Francisco-based designer.
http://www.barbrabrightdesign.com/
Houzz Contributor. San Francisco-based designer.
... More
Great design is all about the details – especially those that, when done right, you don’t notice at all. As a kitchen designer, I have a number of special techniques to create gorgeous kitchens that function beautifully. Here are 17 of my best kitchen design secrets.
All about outlets
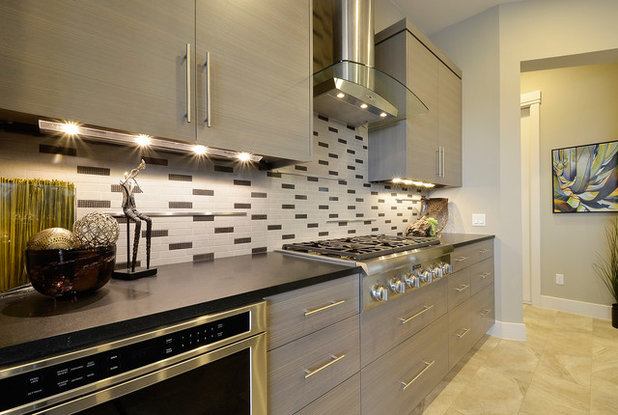
1. Colour-coordinate the outlets
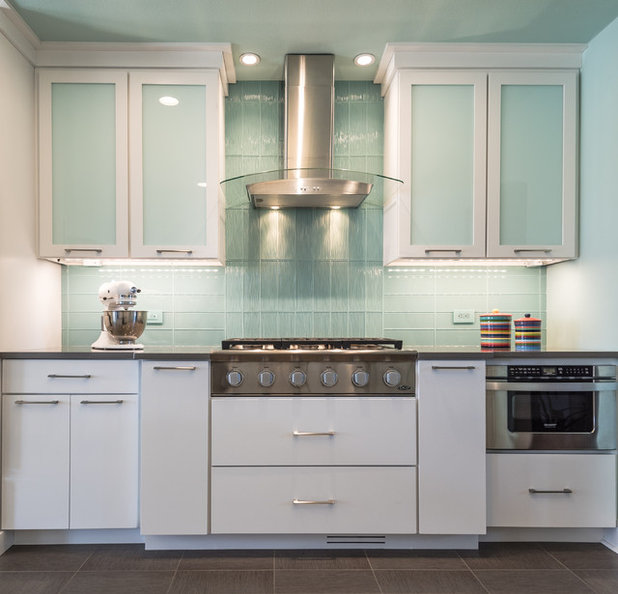
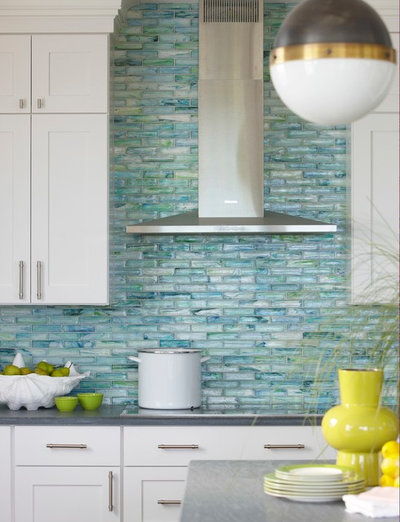
Local building codes often state that there must be an electrical outlet every 4 feet in the kitchen. White outlets are seemingly the colour of choice for electricians – and therein lies the bane of my design existence. With their glaring contrast, white outlets in a nonwhite backsplash detract from the beauty of the tile. Fortunately, you can avoid this dilemma by coordinating your outlets and wall plates with the colour of your backsplash tile, as shown in this photo. Coloured outlets and wall plates are available from your local lighting and big-box stores.
1. Colour-coordinate the outlets
Local building codes often state that there must be an electrical outlet every 4 feet in the kitchen. White outlets are seemingly the colour of choice for electricians – and therein lies the bane of my design existence. With their glaring contrast, white outlets in a nonwhite backsplash detract from the beauty of the tile. Fortunately, you can avoid this dilemma by coordinating your outlets and wall plates with the colour of your backsplash tile, as shown in this photo. Coloured outlets and wall plates are available from your local lighting and big-box stores.
2. Install under-cabinet plug moulding
One option for a clutter-free backsplash is to install plug moulding beneath the wall cabinets.
3. Mix outlet styles
I always ask clients if a toaster or a coffee maker will live on their counter. If so, I add a wall outlet behind that appliance since it will always be plugged in. Otherwise, the electrical cord will be visible as it dangles from the plug moulding above. Remember to combine a mixture of outlets and plug moulding into your design.
Find a kitchen designer near you to design your dream kitchen
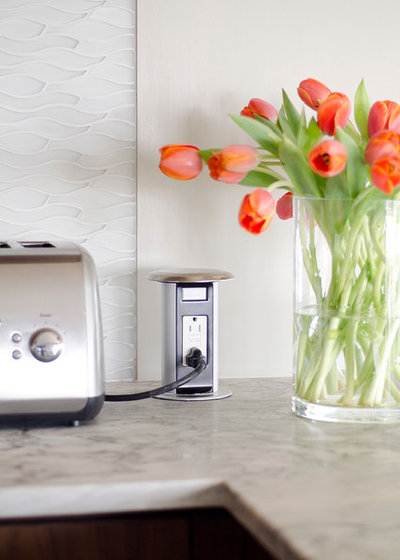
4. Go for pop-up outlets
Another option for an outlet-free backsplash is a pop-up outlet that disappears into the countertop. These are especially useful in places where there are no wall cabinets to hide a plug moulding strip.
Another option for an outlet-free backsplash is a pop-up outlet that disappears into the countertop. These are especially useful in places where there are no wall cabinets to hide a plug moulding strip.
5. Turn the outlet sideways
If wall outlets are your desired solution, install them sideways and closer to the counter for a less obtrusive profile than the common vertical orientation.
Read more about hiding switches and outlets
If wall outlets are your desired solution, install them sideways and closer to the counter for a less obtrusive profile than the common vertical orientation.
Read more about hiding switches and outlets

6. Create a charging station
A plethora of devices need charging these days. Create a docking drawer with a hidden charge station so that you can keep your smartphones and iPads out of sight.
A plethora of devices need charging these days. Create a docking drawer with a hidden charge station so that you can keep your smartphones and iPads out of sight.
Lighting secrets for style and function
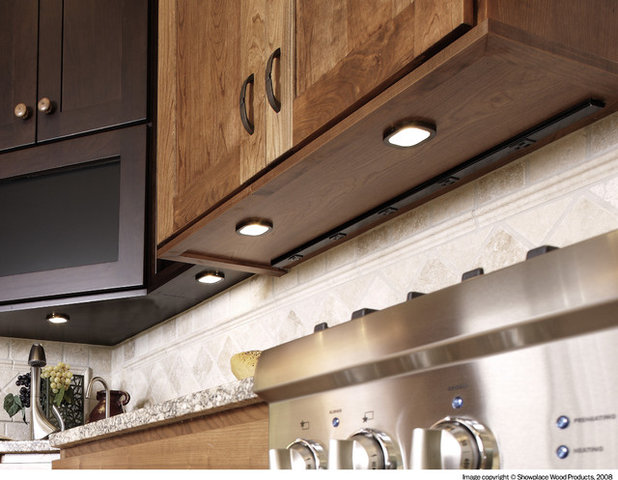
7. Provide task lighting
The primary purpose of under-cabinet lighting is to illuminate the countertop, which in turn makes food preparation easier on the eyes. That’s why it’s known as task lighting. Always install the task light toward the front of the cabinet, not toward the back. If the light is stationed closer to the back wall, it primarily highlights the backsplash tile and not the counter, defeating the purpose of the light.
Take a look at kitchen designs from across the world
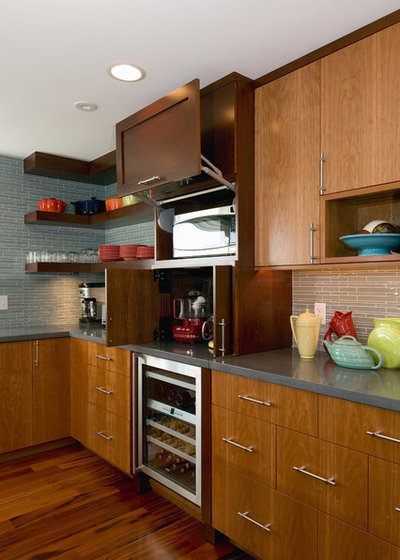
8. Make cabinets glow
In the past, lighting the interior of a wall cabinet meant that each shelf had to be glass. The light source came from the top of the cabinet and needed to penetrate the shelves to illuminate those below. The farther away from the light source, the dimmer the shelf.
But times and lighting have changed, and these days, I prefer to install an LED lighting strip on both sides of the cabinet. That way, each shelf can glow, as shown in this photo. Hide the LED strip behind the cabinet’s face frame. If it’s a frameless cabinet, embed the strip in a prepared groove in the cabinet’s side wall.
Appliance tricks
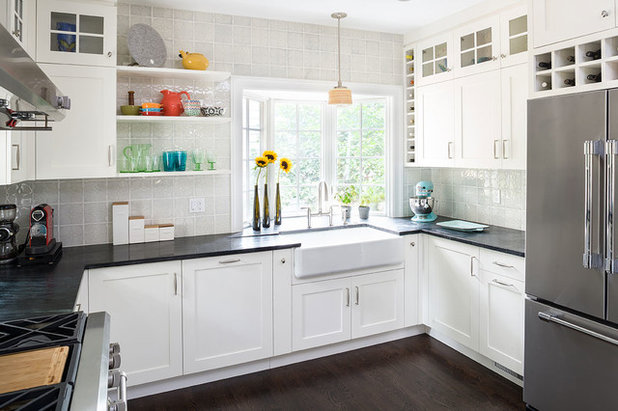
9. Hide the dishwasher with paneling
Whether or not you are paneling the refrigerator, consider paneling the dishwasher for a clean, harmonious look, uninterrupted by a stainless steel appliance next to the sink. In this photo, the dishwasher lies to the left of the sink.
9. Hide the dishwasher with paneling
Whether or not you are paneling the refrigerator, consider paneling the dishwasher for a clean, harmonious look, uninterrupted by a stainless steel appliance next to the sink. In this photo, the dishwasher lies to the left of the sink.
10. Conceal the microwave
Microwaves are still an integral part of most kitchens for reheating beverages and leftovers. Most clients prefer them out of sight rather than occupying valuable counter space. One option is to keep them hidden in a wall cabinet with a lift-up door, as shown in this photo.
Microwaves are still an integral part of most kitchens for reheating beverages and leftovers. Most clients prefer them out of sight rather than occupying valuable counter space. One option is to keep them hidden in a wall cabinet with a lift-up door, as shown in this photo.
Hood smarts
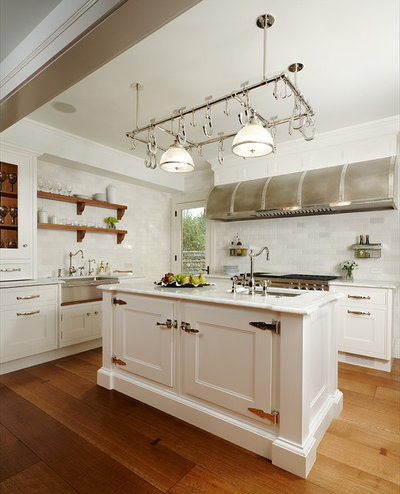
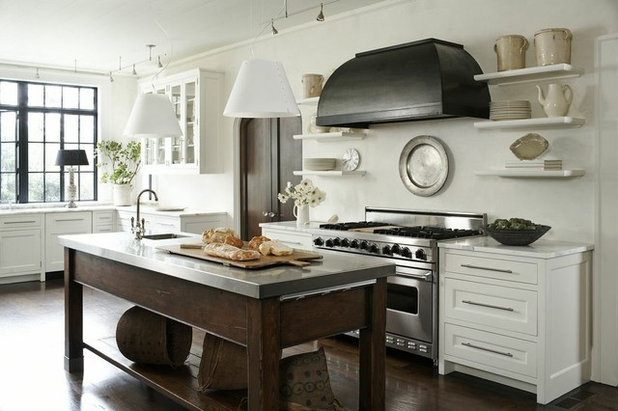
11. Don’t crowd the hood
When using a chimney hood, always leave at least 2 to 3 inches between the hood and the wall cabinets to the left and right. Visually, the hood will not look cramped, and the sides of the cabinets will stay cleaner longer.
Browse range hoods and vents
11. Don’t crowd the hood
When using a chimney hood, always leave at least 2 to 3 inches between the hood and the wall cabinets to the left and right. Visually, the hood will not look cramped, and the sides of the cabinets will stay cleaner longer.
Browse range hoods and vents
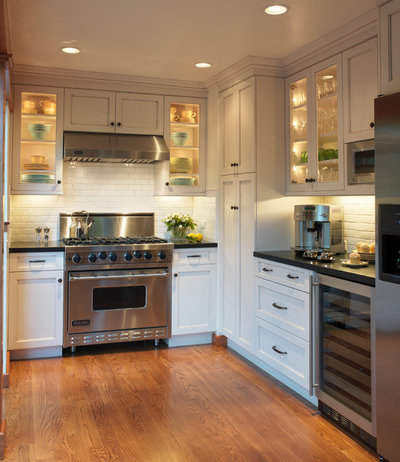
12. Rethink glass cabinetry next to a hood
Glass cabinets create a lovely focal point when placed next to a hood, but are they practical? Unless you’re prepared to constantly clean the glass of the grease and grime emanating from cooking, it’s best to install them elsewhere.
Glass cabinets create a lovely focal point when placed next to a hood, but are they practical? Unless you’re prepared to constantly clean the glass of the grease and grime emanating from cooking, it’s best to install them elsewhere.
Avoiding annoyances
13. Define the zones
Think in terms of prepping and cleanup zones when planning your kitchen. Do you really want your cleanup sink to be in the island filled with dirty dishes? Put the prep sink on the island and tuck the cleanup sink out of the way.
13. Define the zones
Think in terms of prepping and cleanup zones when planning your kitchen. Do you really want your cleanup sink to be in the island filled with dirty dishes? Put the prep sink on the island and tuck the cleanup sink out of the way.
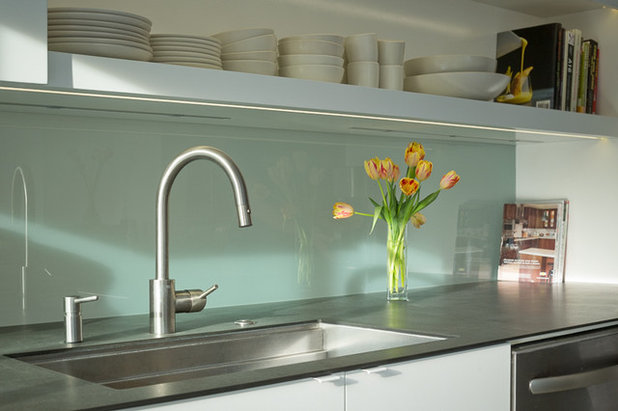
14. Maximise prep space on an island
I love symmetry, and for years, I would centre the sink in the island. But unless the island was 9 feet long, the prep area on both sides of the sink was limited. These days, I hold the sink to one side of the island to allow for maximum prep space.
Another consideration when placing a sink in an island is the height of the faucet. The taller the faucet, the more of a focal point it becomes.
Are These Best Kitchen Island Storage Ideas You’ve Ever Seen?
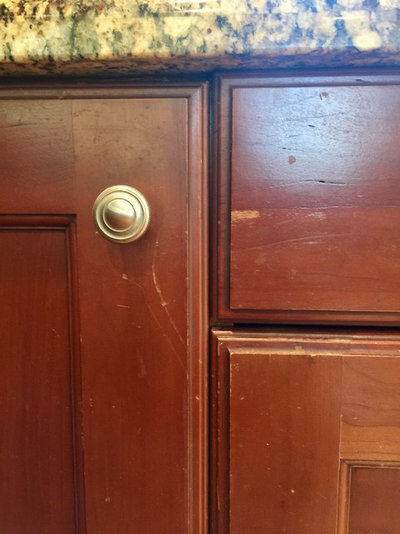
15. Countersink the screw
The cabinet next to a Lazy Susan cabinet with a bifold door often shows scratches over time. That’s because the head of the screw holding the Lazy Susan’s cabinet hardware in place protrudes and scrapes across the adjacent cabinet when the door is being closed.
The cabinet next to a Lazy Susan cabinet with a bifold door often shows scratches over time. That’s because the head of the screw holding the Lazy Susan’s cabinet hardware in place protrudes and scrapes across the adjacent cabinet when the door is being closed.
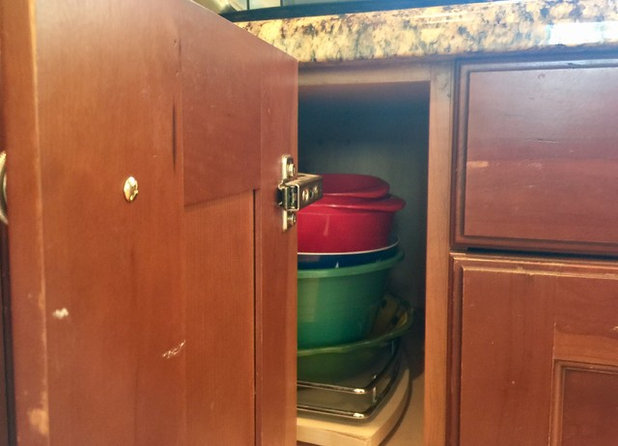
Here’s an easy fix: Just have your contractor countersink the screw so that the head of the screw is flush with the wood and no longer protrudes.
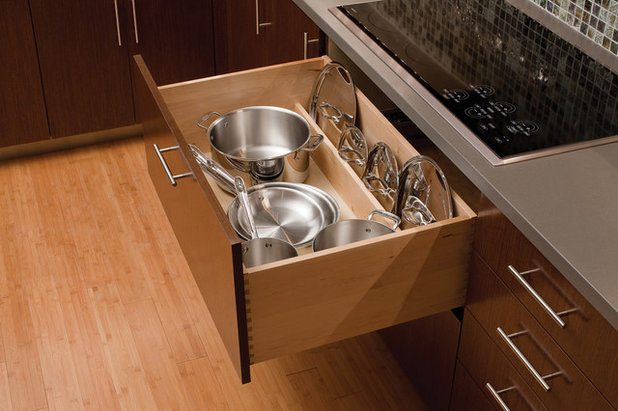
16. Account for lid storage
Having to store pot lids can be a nightmare. There are many ways to solve this problem, but my favourite is to create a divider in a pullout drawer, as shown in this photo.
Having to store pot lids can be a nightmare. There are many ways to solve this problem, but my favourite is to create a divider in a pullout drawer, as shown in this photo.
17. Clear the decks
Don’t forget to add accessories like a soap dispenser and an air switch to keep clutter off the counters and backsplash.
Read more:
How to Convert a Conventional Kitchen Into a Semi-Modular Kitchen
Fresh Design Ideas From 20 Urban Indian Kitchens
Tell us:
Have more ideas to share? Write in comments below.

Related Stories
Houzz Tours
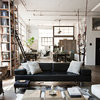
Houzz Tour: A Midcentury Home With a Strong Indoor-outdoor Link
By Becky Harris
A nature-inspired renovation has given this ranch house a relaxed mood and a connection to the outdoors from most rooms
Full Story
Kitchens
10 Smart Storage Tips for Your Kitchen Bins
Keep kitchen rubbish stylishly tucked away with these clever solutions
Full Story
More Rooms
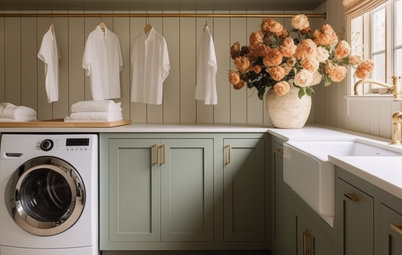
The 5 Most Popular Laundry Rooms on Houzz Right Now
Get decorating ideas for your laundry or utility room from these most-saved photos on Houzz
Full Story
Gardens
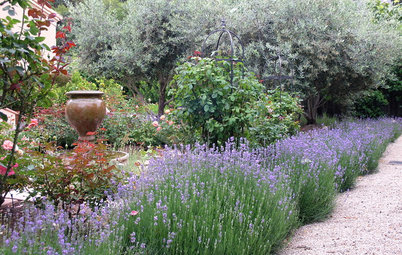
How Do I Create a Drought-tolerant Garden?
By Kate Burt
As summers heat up, plants that need less water are increasingly desirable. Luckily, there are lots of beautiful options
Full Story
Houzz Tours
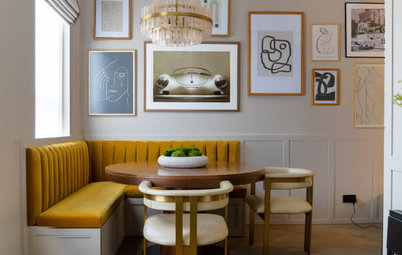
Houzz Tour: Warm Tones and Luxurious Surfaces in a City Townhouse
An earthy colour palette, hidden storage and well-placed texture add character and practicality to this London home
Full Story
Gardens
5 Inspiring Before and After Garden Transformations
Check out what a difference designers have made to these once dull plots, visually expanding spaces and creating privacy
Full Story
Houzz Tours
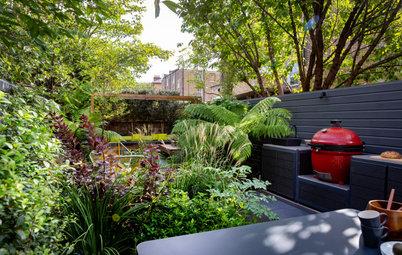
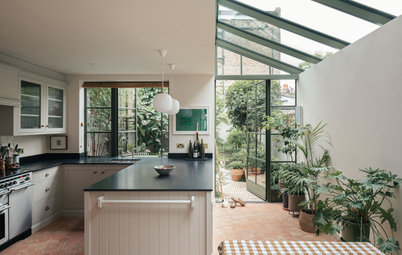
Kitchen Tour: A Gorgeous Extension With a Leafy Glasshouse Feel
By Kate Burt
When the owners of this terraced house extended, they were keen to retain its period feel and highlight the garden
Full Story

Gardens
How to Disguise Rubbish and Recycling Bins Outside Your Home
Need to hide unsightly bins in your garden or driveway? Take a look at these clever ideas for inspiration
Full Story

Renovating
21 Ways Designers Are Incorporating Arches Into Homes
By Kate Burt
Everywhere we look on Houzz right now, a cheeky arch pops up. How would you add this timeless architectural feature?
Full Story

Lifestyle
How to Improve the Air Quality in Your Home
Want to ensure your home environment is clean and healthy? Start by assessing the quality of your air
Full Story
Thank you, I picked up some great tips for the kitchen I’m about to build.
Any ideas on how the washing up brush, detergent, bench cloth etc can be hidden in an island placed sink so they are easily accessible without opening a cupboard? I’m thinking along the lines of a recessed space like in a shower
Love the soap dispenser idea.